Amanda's Creative Corner Crochet · Kitchen
Free Crochet Patterns Handmade with Love

Blue Rose Filet Mesh Bed Cover Crochet Pattern
Jump to Pattern
Blue Rose Filet Mesh Bed Cover Crochet Pattern
150-200 Hours 0 made this
Intermediate Level

You need basic dc and ch skills plus a little patience with small layered petals.

150 to 200 Hours

Every square is portable, so you can work a little each evening.

Roses On Lace

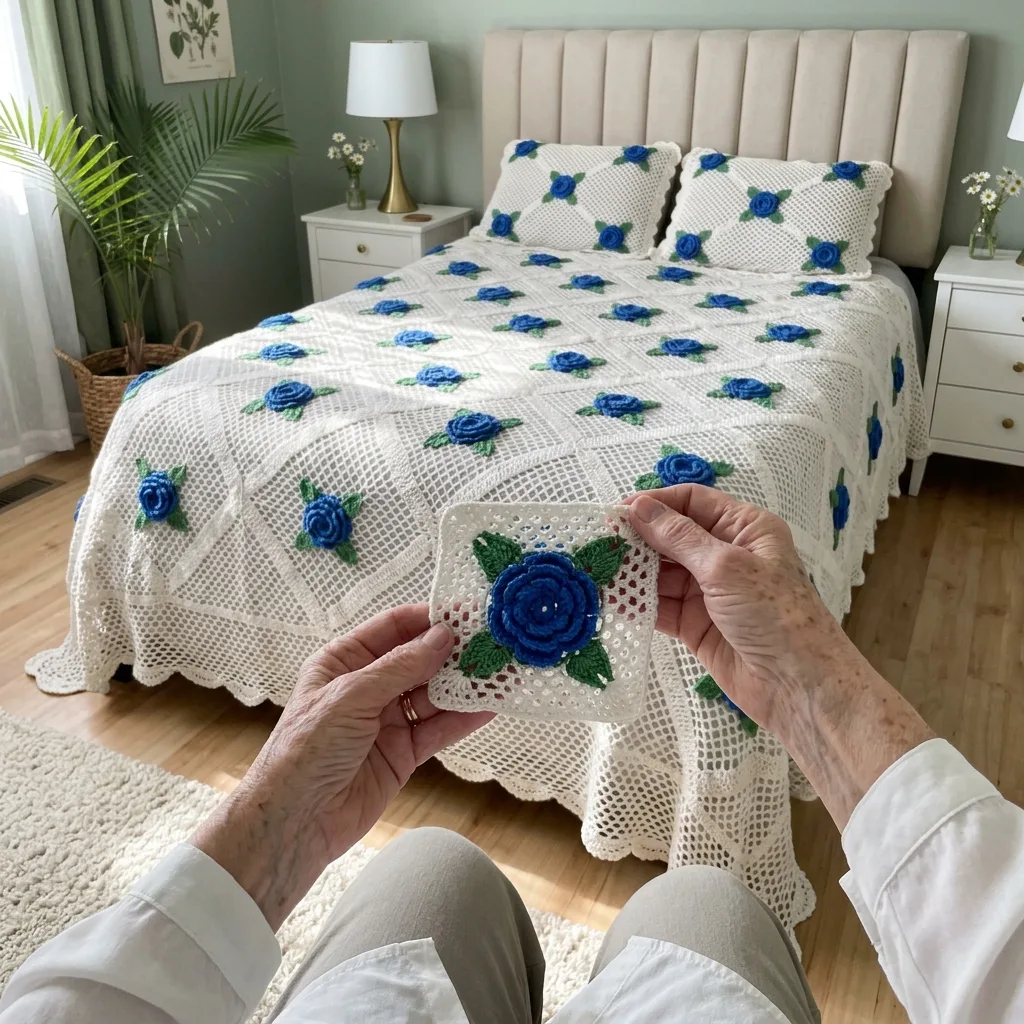
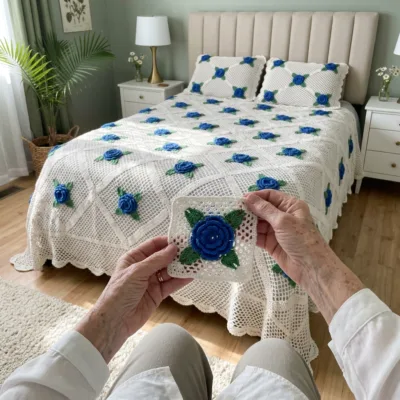
Royal blue roses and green leaves sit on airy white filet mesh for a romantic bedroom.

About This Blue Rose Filet Mesh Bed Cover Crochet Pattern Pattern

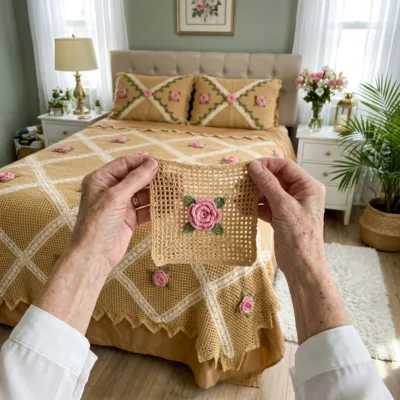
This bed cover is made from 20 squares of open white filet mesh, crossed with thick diagonal bands that form a large diamond lattice. A royal blue layered rose with a star of green leaves sits on the bands, and a white scalloped shell edge finishes the whole piece.

The finished size is about 80 by 100 inches, and two matching shams are included. You will use dc, ch, sc, hdc and sl st only, so it suits crocheters who have made a few blankets and want a showpiece.
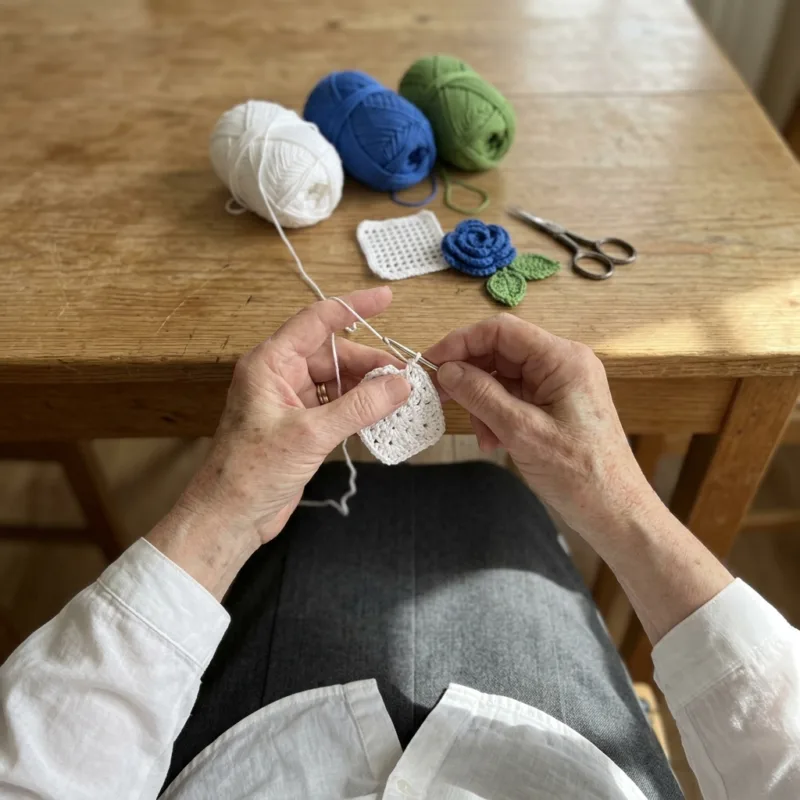
Blue Rose Filet Mesh Bed Cover Crochet Pattern step detail

Why You'll Love This Blue Rose Filet Mesh Bed Cover Crochet Pattern Pattern

I love that you never face the whole bed at once. Each mesh square is light and portable, so I can work on it on the sofa, in the garden or on a trip.

The roses are my reward after a few squares. Making one is quick, and it makes the white mesh come alive. It also makes a lovely gift for a wedding or a new home.

Switch Things Up

Try soft pink roses with sage leaves for a spring bedroom, or deep red roses with dark green leaves for winter. Make only 6 squares and 4 band strips for a throw, or 2 squares for a table runner. You can also skip the shams and make one matching cushion cover, or swap the shell edge for a simple picot edge.


Materials Needed

— Main Fabric

01 White worsted weight mercerized or soft cotton yarn, about 5,500 to 6,500 yards (approx. 3,000 g) for the squares, band strips, shams and edge
02 Royal blue worsted weight cotton yarn, about 750 yards (approx. 400 g) for 24 roses
03 Leaf green worsted weight cotton yarn, about 800 yards (approx. 430 g) for 232 leaves and 4 vine strips
04 Four 20 by 26 inch pillow forms for the shams (optional)

— Tools Required

05 4.0 mm (G-6) crochet hook
06 Yarn needle
07 Stitch markers
08 Scissors
09 Blocking mats and rustproof pins
10 Measuring tape

The Free Pattern

Intermediate 150-200 Hours

0% complete

— Mesh Square (Make 20, white) :

Each ch-2 sp counts as one mesh space. A finished square has 40 spaces across and 40 rows, about 20 inches square after blocking.
Row 1: Ch 123. Dc in 6th ch from hook, *ch 2, skip next 2 ch, dc in next ch; repeat from * 39 more times. (41 dc counting the turning ch as a dc, 40 ch-2 sps)
Rows 2 to 40: Ch 3 (counts as dc), turn. *Ch 2, skip next ch-2 sp, dc in next dc; repeat from * 40 times, working the last dc in the top of the turning ch of the previous row. (41 dc, 40 ch-2 sps)
Fasten off and weave in ends. Block each square to the same size before joining.

— Diagonal Band Strip (Make 16, white) :

Row 1: Ch 302. Sc in 2nd ch from hook and in each ch across. (301 sc)
Row 2: Ch 3 (counts as dc), turn. Dc in each sc across. (301 dc)
Row 3: Ch 1, turn. Sc in each dc across, working the last sc in the top of the turning ch. (301 sc)
Row 4: Ch 3 (counts as dc), turn. Dc in each sc across. (301 dc)
Row 5: Ch 1, turn. Sc in each dc across, working the last sc in the top of the turning ch. (301 sc)
Each strip is about 2 inches wide and 55 inches long. Fasten off, leave the tail for sewing and block flat.

— Rose (Make 24, royal blue) :

Make 22 roses for the cover and 2 for the shams.
Round 1: Make a magic ring, ch 1, work 10 sc in the ring. Sl st to the first sc. (10 sc)
Round 2: Ch 1, *sc in next sc, ch 2, skip next sc; repeat from * 4 more times. Sl st to the first sc. (5 sc, 5 ch-2 sps)
Round 3: In each ch-2 sp work (sc, hdc, 3 dc, hdc, sc), then sl st in the next sc to move to the next sp. (5 petals, 35 sts in petals)
Round 4: Fold the petals forward. Working behind them, *sc around the post of the next Round 2 sc, ch 3; repeat from * 4 more times. Sl st to the first sc. (5 sc, 5 ch-3 sps)
Round 5: In each ch-3 sp work (sc, hdc, 4 dc, hdc, sc), then sl st in the next sc to move on. (5 petals, 40 sts in petals)
Round 6: Fold the petals forward. Working behind them, *sc around the post of the next Round 4 sc, ch 4; repeat from * 4 more times. Sl st to the first sc. (5 sc, 5 ch-4 sps)
Round 7: In each ch-4 sp work (sc, hdc, 5 dc, hdc, sc). Fasten off, leaving a long tail for sewing. (5 petals, 45 sts in petals)

— Leaf (Make 232, leaf green) :

Make 192 leaves for the rose stars (8 per rose) and 40 leaves for the sham vines (10 per vine strip).
Leaf: Ch 8. Sl st in 2nd ch from hook, sc in next ch, hdc in next ch, dc in next ch, hdc in next ch, sc in next ch, sl st in last ch. Fasten off, leaving a 6 inch tail. (7 sts)

— Sham Panel (Make 4, white) :

Each sham uses two panels, a front and a back. A panel is 40 spaces wide and 50 rows long, about 20 by 25 inches.
Row 1: Ch 123. Dc in 6th ch from hook, *ch 2, skip next 2 ch, dc in next ch; repeat from * 39 more times. (41 dc counting the turning ch as a dc, 40 ch-2 sps)
Rows 2 to 50: Ch 3 (counts as dc), turn. *Ch 2, skip next ch-2 sp, dc in next dc; repeat from * 40 times, working the last dc in the top of the turning ch. (41 dc, 40 ch-2 sps)

— Sham Vine (Make 4, leaf green) :

Row 1: Ch 133. Sc in 2nd ch from hook and in each ch across. (132 sc)
Rows 2 to 3: Ch 1, turn. Sc in each sc across. (132 sc)
Each vine is about 3 inches wide and 30 inches long. Sew 10 leaves along each vine, alternating sides.

— Layout :

Lay the 20 white mesh squares in a grid of 4 squares across and 5 squares down, giving about 80 by 100 inches.
Lay the 16 band strips diagonally across the grid at 45 degrees, in both directions, so they cross to form large diamonds. Join two strips end to end where a diagonal needs more length.
Place the 22 cover roses on the bands at the crossings and along the bands, about 12 to 15 inches apart. Sew 8 leaves around each rose in a star.
On each sham front, sew two vines in an X across the panel and place 1 rose at the crossing with 8 leaves.

— Cover Edge (white) :

Round 1: Join white yarn in any corner. Work 1 sc in each dc and 2 sc in each ch-2 sp along the top and bottom (121 sc per square edge, 484 sc per side), and 2 sc in each row end along the left and right sides (400 sc per side). Work 3 sc in each corner stitch, counting the corner stitch within the side totals so each corner adds 2 extra sc. Sl st to the first sc. (1776 sc)
Round 2: Ch 1. *Skip next 2 sc, 5 dc in next sc, skip next 2 sc, sl st in next sc; repeat from * 296 times. Sl st to the first st. (296 shells, 1776 sts)
Round 3: Ch 1. *Sc in each of the first 2 dc of the shell, work (sc, ch 3, sl st in the sc just made) in the 3rd dc, sc in each of the next 2 dc, sc in the sl st; repeat from * 296 times. Sl st to the first sc and fasten off. (1776 sc, 296 picots)

— Sham Edge (Make 4 panels, white) :

Round 1: Join white yarn in any corner. Work 1 sc in each dc and 2 sc in each ch-2 sp along the top and bottom (121 sc per edge), and 2 sc in each row end along the sides (100 sc per side). Work 3 sc in each corner stitch, counting the corner stitch within the side totals. Sl st to the first sc. (450 sc)
Round 2: Ch 1. *Skip next 2 sc, 5 dc in next sc, skip next 2 sc, sl st in next sc; repeat from * 75 times. Sl st to the first st. (75 shells, 450 sts)
Round 3: Ch 1. *Sc in each of the first 2 dc of the shell, work (sc, ch 3, sl st in the sc just made) in the 3rd dc, sc in each of the next 2 dc, sc in the sl st; repeat from * 75 times. Sl st to the first sc and fasten off. (450 sc, 75 picots)

Assembly Instructions

  1. Block all 20 Mesh Squares and all 4 Sham Panels to the same size, pinning them flat until dry.
  2. Lay the Mesh Squares in 4 columns by 5 rows and whip stitch them together with white yarn along the edges, matching rows and spaces.
  3. Block the Diagonal Band Strips flat, lay them across the joined grid at 45 degrees in both directions, and sew them down with small stitches along both long edges.
  4. Sew each Rose onto the bands with its tail, then sew 8 Leaves around each Rose in a star, with the leaf tips pointing outward.
  5. Work the Cover Edge around the whole cover, then repeat the Sham Edge on each of the 4 Sham Panels.
  6. For each sham, sew 2 Sham Vines in an X across the front panel, sew a Rose and 8 Leaves at the crossing, and sew 10 Leaves along each vine.
  7. Place each front panel on its back panel with wrong sides together, whip stitch three sides, insert the pillow form, and close the fourth side.

Common Mistakes & How to Fix Them

Losing count of ch-2 spaces in the mesh makes the square lopsided, so place a stitch marker every 10 spaces in Row 1 and check the count after each row.

Joining squares with tight stitches makes the lattice pucker, so keep your whip stitches loose and block before you sew.

Sewing the band strips on while they are twisted makes the lattice look wavy, so pin each strip flat and check the diagonal with a ruler before stitching.

Pulling the post stitches tight in the rose rounds hides the ch loops and flattens the petals, so keep them loose and fold the earlier petals forward.


Denise

Denise designs crochet home decor patterns with clear instructions and a warm, encouraging voice.


Important Notes

Gauge: 10 mesh spaces measure about 5 inches wide with a 4.0 mm hook, so make a small swatch of 10 spaces by 10 rows and adjust the hook size to match.

Yarn amounts and finished size are estimates, so check them against your swatch before you buy all the yarn.

Wash gently by hand or on a delicate cycle, and use a color catcher because the blue and green yarns may bleed on the white. Lay flat to dry.


I hope you enjoy making this one. Take your time, enjoy the roses, and send me a photo of your first finished square.

Crochet Abbreviations

01 ch — chain
02 sl st — slip stitch
03 sc — single crochet
04 hdc — half double crochet
05 dc — double crochet
06 sp — space
07 st — stitch (sts = stitches)

You Ask, We Answer

What size is the finished bed cover?

About 80 by 100 inches with 20 squares in a 4 by 5 grid. Add or remove a row or column of squares to fit your own bed.

Can I use a different yarn weight?

Yes. A thinner cotton with a smaller hook gives a finer lace, but you will need more squares or more spaces per square to reach the same size, and you will need to recompute the edge counts so the 6-stitch repeat still divides evenly.

How do I wash and care for it?

Hand wash in cool water with a gentle soap, add a color catcher, press out the water without wringing, and lay flat to dry, reshaping the lattice and roses while damp.