Amanda's Creative Corner Crochet · Kitchen
Free Crochet Patterns Handmade with Love

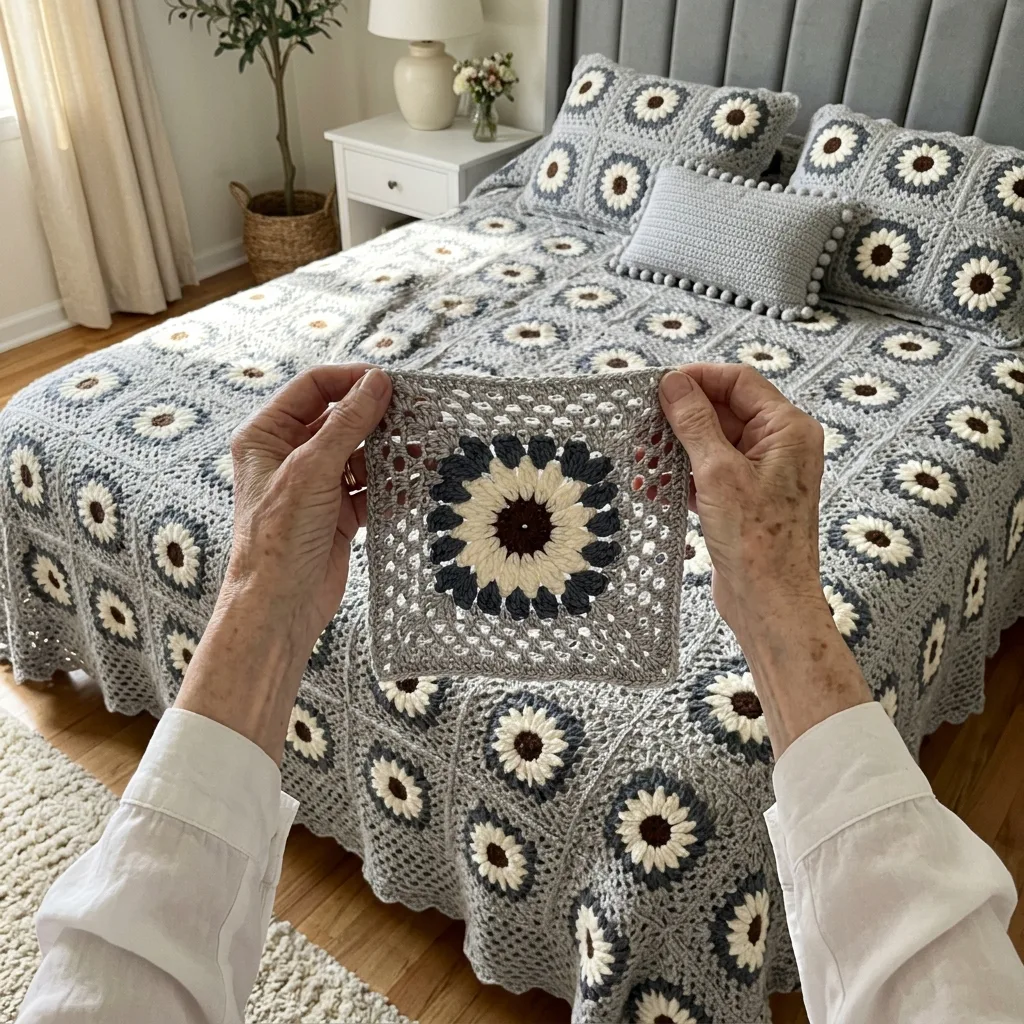
Gray Daisy Square Bed Cover Crochet Pattern
Jump to Pattern
Gray Daisy Square Bed Cover Crochet Pattern
120-150 Hours 4 made this
Intermediate Level

Filet squares, simple petals and a shell border.

120-150 Hours

Make one portable square at a time.

Daisy Checkerboard

White and slate daisies sit on a soft gray checkerboard.

About This Gray Daisy Square Bed Cover Crochet Pattern Pattern

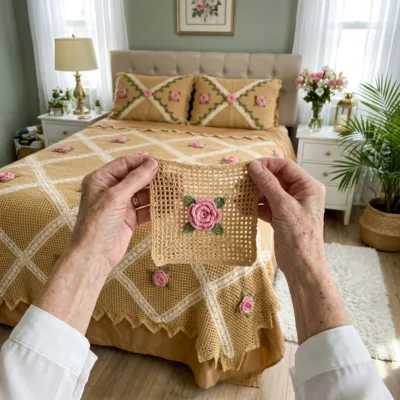
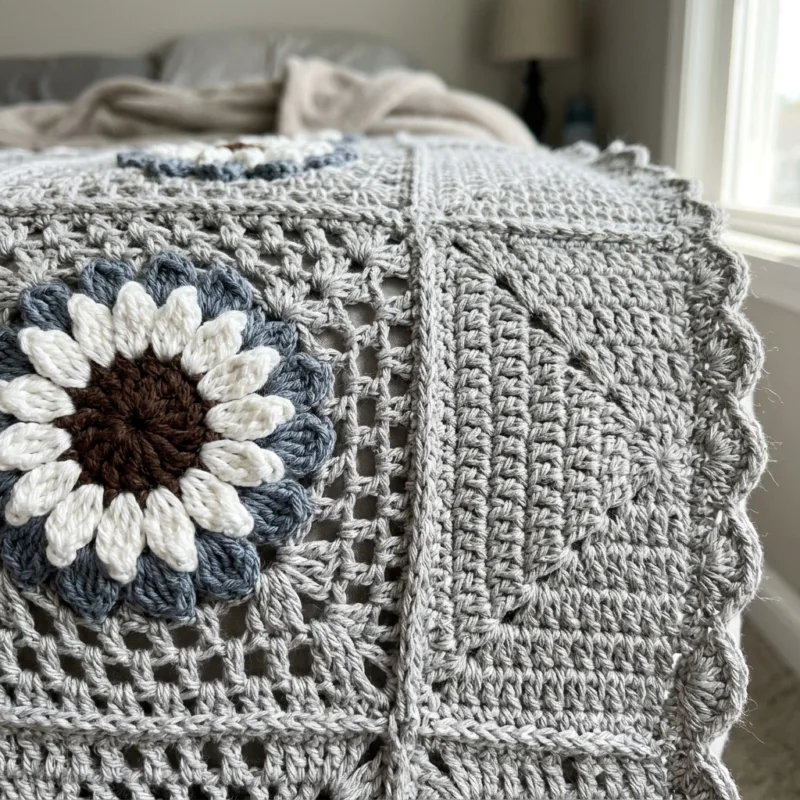
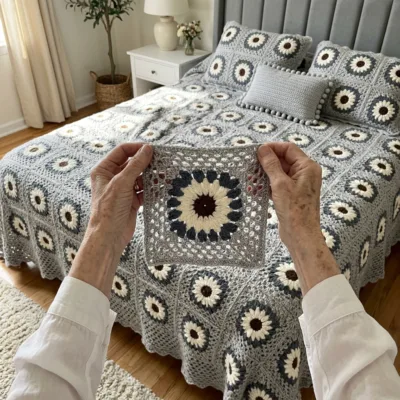
This bed cover is a checkerboard of 56 silver-gray squares. Half are open filet squares topped with a big crochet daisy, white or slate-gray with a dark brown center. The other half are solid squares with small square windows. A scalloped shell border finishes the edge.

It measures about 80 by 89 inches and uses only ch, sl st, sc, hdc and dc. It suits intermediate makers who like filet crochet and want a calm, pretty project for the bedroom.
Gray Daisy Square Bed Cover Crochet Pattern step detail

Why You'll Love This Gray Daisy Square Bed Cover Crochet Pattern Pattern

I love the soft gray with the bright white daisies. It looks fancy, but every square is the same easy filet pattern, so it becomes relaxing after the first few rows.

The daisies are my favorite part. They are worked in rounds and need no sewing of single petals. This also makes a lovely gift for a new home.

Switch Things Up

Try a warm palette with cream squares and mustard daisies, or navy squares with white daisies. Make 12 squares in 3 across and 4 down for a cozy throw. Join 4 daisy squares for a matching pillow cover. Or make every daisy white for a calmer look.


Materials Needed

— Main Fabric

01 Worsted weight cotton yarn, silver-gray: about 7,100 yd (6,500 m), roughly 3,250 g, for the squares, the daisy back layers and the border
02 Worsted weight cotton yarn, white: about 300 yd (275 m), roughly 140 g, for 14 daisy front layers
03 Worsted weight cotton yarn, slate-gray: about 560 yd (510 m), roughly 260 g, for 14 slate daisies
04 Worsted weight cotton yarn, dark brown: about 100 yd (90 m), roughly 45 g, for the daisy centers

— Tools Required

05 4.5 mm (7) crochet hook
06 Yarn needle
07 Stitch markers
08 Scissors
09 Blocking mats and rust-proof pins
10 Measuring tape

The Free Pattern

Intermediate 120-150 Hours

0% complete

— Daisy Square (Make 28, silver-gray) :

Worked flat in rows, turning at the end of each row. A finished square is about 10.5 in. Stitch key: B (block) = dc in each of next 2 sts. O (open space) = ch 1, skip 1 st, dc in next st. Every row after Row 1 begins with ch 3 (counts as dc) and skips the first st.
Row 1: Ch 45. Dc in 4th ch from hook and in each ch across, turn. (43 dc, counting the first 3 ch as a dc)
Row 2: Ch 3, skip first st, dc in each st across, ending with a dc in the top of the turning ch, turn. (43 dc)
Row 3: Ch 3, skip first st, B 2 times, O 17 times, B 2 times, turn. (26 dc, 17 ch-1 sps)
Rows 4-19: Repeat Row 3 sixteen more times, for 17 mesh rows in total. (26 dc, 17 ch-1 sps in every row)
Row 20: Ch 3, skip first st, dc in each dc and in each ch-1 sp across, ending with a dc in the top of the turning ch, turn. (43 dc)
Row 21: Ch 3, skip first st, dc in each st across, ending with a dc in the top of the turning ch. Fasten off and weave in ends. (43 dc)

— Window Square (Make 28, silver-gray) :

Worked flat in rows, turning at the end of each row. A finished square is about 10.5 in and matches the Daisy Square. Use the same B and O stitch key as the Daisy Square. Solid rows are dc in every st and every ch-1 sp.
Row 1: Ch 45. Dc in 4th ch from hook and in each ch across, turn. (43 dc, counting the first 3 ch as a dc)
Rows 2-3: Ch 3, skip first st, dc in each st across, ending with a dc in the top of the turning ch, turn. (43 dc in each row)
Row 4 (windows): Ch 3, skip first st, B 3 times, O, B 6 times, O, B 6 times, O, B 3 times, turn. (40 dc, 3 ch-1 sps)
Rows 5-10: Ch 3, skip first st, dc in each dc and in each ch-1 sp across, ending with a dc in the top of the turning ch, turn. (43 dc in each row)
Row 11 (windows): Work as Row 4. (40 dc, 3 ch-1 sps)
Rows 12-17: Work as Rows 5-10. (43 dc in each row)
Row 18 (windows): Work as Row 4. (40 dc, 3 ch-1 sps)
Rows 19-21: Work as Rows 5-10 for 3 rows. Fasten off and weave in ends. (43 dc in each row)

— Daisy (Make 28: 14 white and 14 slate-gray, dark brown center) :

White daisy: silver-gray back petals and white front petals. Slate daisy: slate-gray for both back and front petals. A finished daisy is about 6.5 in across.
Round 1: With dark brown, ch 4, join with sl st to form a ring. Ch 1, 12 sc in ring, join with sl st to first sc. (12 sc)
Round 2: Ch 1, 2 sc in each sc around, join with sl st to first sc. Fasten off. (24 sc)
Round 3: Join the back petal color (silver-gray or slate-gray) in any back loop of Round 2. Working in back loops only: *ch 9, sl st in each of next 2 back loops; repeat from * 11 more times, the last sl st landing in the join. (12 ch-9 loops)
Round 4: Work (sc, hdc, 6 dc, hdc, sc) in each ch-9 loop around, join with sl st to first sc. Fasten off. (12 petals, 10 sts each)
Round 5: With the right side facing, join the front petal color (white or slate-gray) in a front loop of Round 2 that sits between two back petal bases. Working in front loops only: *ch 9, sl st in each of next 2 front loops; repeat from * 11 more times. (12 ch-9 loops)
Round 6: Work (sc, hdc, 6 dc, hdc, sc) in each ch-9 loop around, join with sl st to first sc. Fasten off and leave a long tail for sewing. (12 petals, 10 sts each)

— Layout :

Arrange the 56 squares in 8 rows of 7 squares, in a checkerboard. Put a Daisy Square wherever the row number plus the column number is even, and a Window Square in every other spot. This gives 28 Daisy Squares and 28 Window Squares.
Daisy colors, left to right across the Daisy Squares in each row. Rows 1, 3, 5 and 7: white, slate, white, slate. Rows 2 and 6: slate, white, slate. Rows 4 and 8: white, slate, white. This uses 14 white and 14 slate daisies.
Keep the foundation edge of every square at the bottom.

— Border (silver-gray) :

Round 1: Join silver-gray in any outer corner st. Ch 1, 5 sc in the same st, then sc evenly around: 1 sc in each st along the top and bottom edges (43 per square) and 2 sc in each row end along the sides, working 5 sc in each outer corner st. Join with sl st to first sc. (1290 sc: 301 on each top and bottom edge, 336 on each side, plus 16 for the corner increases)
Round 2: Do not turn. *Skip 2 sc, 5 dc in next sc, skip 2 sc, sl st in next sc; repeat from * around, ending with a sl st in the last sc. Fasten off and weave in ends. (215 shells, 1075 dc)
Shells may not land exactly on the corners. That is fine, as long as the total stays at 215 shells.

Assembly Instructions

  1. Weave in all ends and wet block each square to about 10.5 in, then let them dry flat.
  2. Sew one daisy to the center of each Daisy Square, stitching around the dark brown center and at the base of a few petals, and leave the petal tips loose.
  3. Lay out the 56 squares in 8 rows of 7 following the Layout section, and check that the foundation edges all face the bottom.
  4. Join the squares in each row from left to right with a whipstitch seam in silver-gray, through both loops.
  5. Join the 8 rows together the same way, matching the seam crossings so the corners meet neatly.
  6. Press the seams lightly from the wrong side so they lie flat.
  7. Work the Border all the way around the outer edge, then block the finished cover gently and weave in the last ends.

Common Mistakes & How to Fix Them

The squares end up different sizes when the foundation chain is tight. Chain loosely, or use a hook one size larger for the foundation only.

If the mesh looks twisted, you probably worked a dc into a ch-1 sp. In O, skip the ch-1 sp of the row below and put the dc in the dc.

Sewing the daisies on after joining makes alignment hard. Sew them on each Daisy Square before you join.

Pulling the seams tight puckers the checkerboard. Keep the joining stitches loose and even.


Denise

Denise designs cozy blankets and home decor crochet patterns for makers of every level.


Important Notes

Gauge: 16 dc measure about 4 in, and 8 rows measure about 4 in. If yours is smaller, go up a hook size.

Yarn amounts are approximate and depend on your tension, so buy an extra ball of silver-gray and white.

Cotton is heavy, so block the squares first and lay the finished cover flat to dry.

Wash gently in cool water and dry flat to keep the mesh neat. Use a color catcher the first time, because the dark brown can bleed.


I hope this bed cover brings a calm, pretty feel to your bedroom. Take it one square at a time. Happy stitching, Denise.

Crochet Abbreviations

01 ch — chain
02 sl st — slip stitch
03 sc — single crochet
04 hdc — half double crochet
05 dc — double crochet
06 sp — space
07 st(s) — stitch(es)
08 B — block: dc in each of next 2 sts
09 O — open space: ch 1, skip 1 st, dc in next st

You Ask, We Answer

What is the finished size?

About 80 by 89 inches with 56 squares in 7 columns and 8 rows, plus the border. Make fewer squares for a throw.

Can I use a different yarn weight?

Yes. DK cotton gives smaller squares, so you will need more squares to reach the same size. Check your square size before you start the rest.

How do I wash it?

Machine wash gently in cool water or hand wash, reshape, and dry flat. Skip high heat, which can shrink cotton and flatten the daisies.