
Cobalt Blue and White Granny Diamond Bed Cover Crochet Pattern
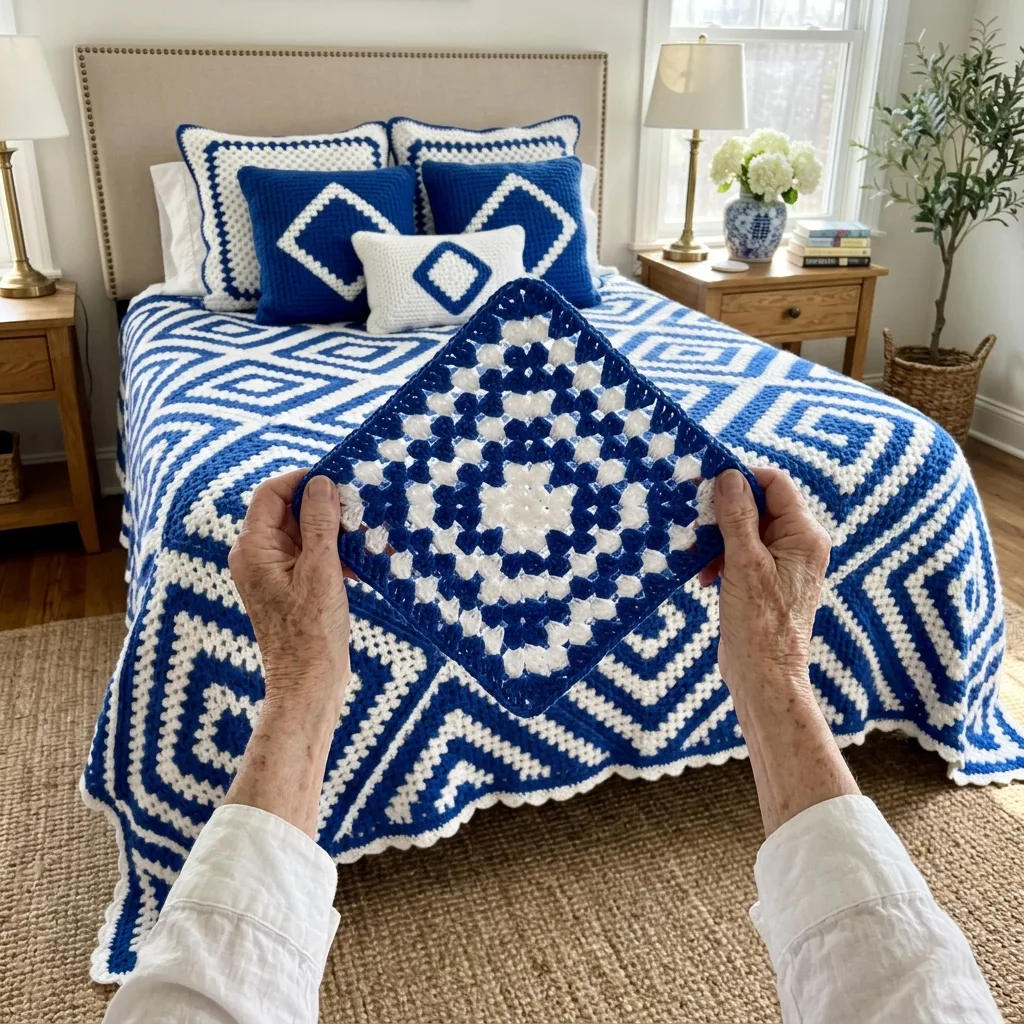
The classic granny stitch all the way through, plus simple granny triangles to straighten the edges.
Only 32 big squares, 14 half squares and 4 corners, so the pieces pile up faster than you expect.
Set the striped granny squares on point and the rounds become bold nested diamonds across the bed.
About This Cobalt Blue and White Granny Diamond Bed Cover Crochet Pattern Pattern
This bed cover takes the humble granny square and turns it into something bold and graphic. Each block is a large granny square worked in cobalt blue and white, with the colors changing round by round to make rings inside rings. When you turn the squares on point and join them, every ring becomes a diamond. The finished cover shows big nested diamonds with thick blue outlines, and along the edges the half diamonds form a row of sharp blue zigzags, like a blue and white tile floor or a piece of classic china.
Every piece is made with the granny stitch, the friendly cluster of three double crochet with a chain between groups. That means there is really only one stitch to learn, and once your hands know it, the whole project flows. The squares are worked in the round from the center, fourteen rounds each. The color plan is simple: two white rounds, one blue, three white, two blue, three white, one blue, one white and a final blue round. Because every square ends with blue, the joins between squares show as a thick blue lattice that frames each diamond.
To make a straight-edged cover out of squares turned on point, you need two kinds of triangles. The setting triangles are half squares, worked in rows from the middle of the long edge outward, and they fill the gaps along the four sides of the bed. The corner triangles are quarter squares, worked in rows from the corner, and they finish the four corners. Both use the same granny stitch and the same color plan as the squares, so the diamonds continue right to the edge of the cover without a break.
Each square measures about 14 inches on each side, which is about 20 inches from point to point when it is turned into a diamond. The queen size is four diamonds across and five diamonds long. It uses 32 squares, 14 setting triangles and 4 corner triangles. The finished cover measures about 79 by 99 inches before the border and about 80 by 100 inches after it, which drapes nicely over the sides and foot of a queen bed.
The pieces are joined with a cobalt blue whipstitch through the back loops, so the seams lie flat and blend into the blue outer rounds. The border is a round of white single crochet and a round of small white shells. I worked out the counts so the shells fall evenly along every side, and the same math works for any number of diamonds, so you can make the cover larger or smaller without changing the border at all.
The pattern uses only chain, slip stitch, single crochet and double crochet. What makes it intermediate is the size of each square, the color changes, which leave quite a few ends to weave in, and the layout on point, which needs a little care when you join. If you have made a granny square before, you already know almost everything you need. The rest is patience and a good place to lay the pieces out.
The finished cover is cozy and substantial, with the slightly bumpy texture that makes granny stitch so comforting. Cobalt blue and white is a timeless pairing that looks crisp and fresh in a cottage bedroom, a coastal guest room or any space with blue and white pottery and natural wood. It feels traditional and modern at the same time, and it makes a striking centerpiece for a room.
Why You'll Love This Cobalt Blue and White Granny Diamond Bed Cover Crochet Pattern Pattern
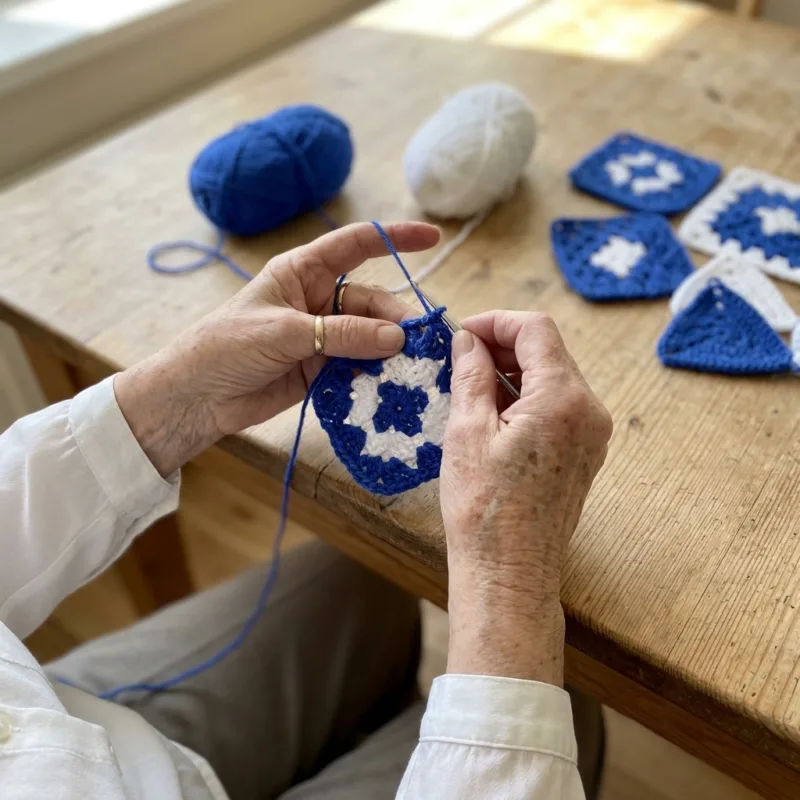
I love that this whole bed cover is built from the very first stitch most of us learned. The granny square is like an old friend. Three double crochet, a chain, three more, around and around. I can make granny rounds with my eyes half closed, chatting with my sister on the phone or watching a quiz show in the evening. Yet with nothing more than that friendly stitch and two colors, this cover looks bold and modern, as if it came from a design shop.
The moment I turned my first two squares on point and held them side by side, I was hooked. A granny square with blue stripes is pretty, but a little ordinary. Turn it on its corner and suddenly it is a diamond with rings inside rings, and when you lay four together, the blue rounds cross like a star in the middle. It is such a simple trick, and it changes everything. Every time I lay out a new row, I step back and smile.
I also love how quickly the cover comes together for its size. Because the squares are big, there are only 32 of them, plus the triangles. I made about one square every two or three evenings, and after a few weeks I had a stack that already looked like most of a bed. Compared with a cover made of a hundred small motifs, there are far fewer pieces to join and far less to keep track of.
Here are the habits that kept this project easy for me:
- Weave in the ends after every color change, never at the end.
- Change colors in a different corner each time so the joins do not line up.
- Make all the squares first, then the triangles, so your tension is settled.
- Lay the pieces out on the floor before joining, on point, to check the plan.
The colors make me happy every day. Cobalt blue and white remind me of old china plates, Delft tiles and summer days by the sea. They look clean and bright, and they never go out of style. On our bed, with a blue and white ginger jar on the nightstand and a jute rug on the floor, the whole room suddenly felt pulled together, fresh and welcoming, like a guest room in a seaside house.
I love the triangles too, even though they are a little extra work. They are fun to make because they grow in rows instead of rounds, and you can watch the half diamond appear as you go. When the last corner triangle went in and the edge of the cover turned perfectly straight, it felt like fitting the last piece of a puzzle. That straight edge also makes the scalloped border look neat and finished.
Finally, I love that this pattern feels like an heirloom from the very first day. Granny stitch has been made by grandmothers for generations, and here it gets a fresh, graphic look that younger family members love. I can imagine this cover on a grandchild's bed one day, still bright and still loved. If you make it, I hope it becomes that kind of piece in your family too.
Switch Things Up
Choose a new color pair. This design shines with any strong contrast. Navy and cream feel classic and nautical, emerald green and white look fresh and bold, and terracotta with sand is warm and earthy. For a softer room, try dusty rose with ivory or sage with oatmeal. Keep the outline color the darker one, because it carries the lattice that frames each diamond, and use the lighter one for the wide inner bands.
Make it for any bed. Each square is about 14 inches, or about 20 inches from point to point, so the cover is planned in whole diamonds. For a layout of A diamonds across and B diamonds down, you need A times B plus (A minus 1) times (B minus 1) squares, 2 times (A minus 1) plus 2 times (B minus 1) setting triangles, and always 4 corner triangles. These sizes are before the border:
- Twin: 3 by 5 diamonds, 23 squares and 12 setting triangles, about 59 by 99 inches
- Full or queen: 4 by 5 diamonds, 32 squares and 14 setting triangles, about 79 by 99 inches
- King: 5 by 5 diamonds, 41 squares and 16 setting triangles, about 99 by 99 inches
The border works for every size, because each side of Border Rnd 1 always has 84 stitches per diamond plus 2.
Make a sofa throw. Two diamonds across and three down uses 8 squares, 6 setting triangles and 4 corners, and gives a throw of about 40 by 59 inches. It is a great way to try the on-point layout and the triangles before a full bed, and it uses only about a quarter of the yarn. Draped over a sofa or a reading chair, the big diamonds look striking even in this small size.
Make a baby blanket. Stop the squares and triangles after Rnd 8 or Row 8, so the squares are about 8 inches. Work Rnd 8 and Row 8 in blue so the outline stays. A layout of 3 by 3 diamonds uses 13 squares, 8 setting triangles and 4 corners, and gives a blanket of about 34 by 34 inches. Use a soft washable cotton blend, and try pale blue and white or mint and cream for a gentle nursery look.
Add matching pillows. One square makes a 14 inch pillow front, or turn it on point and add four corner triangles to make a square cushion of about 20 inches with a diamond in the middle. For a lumbar pillow, join two setting triangles to one square in a row. Back each one with a plain white or blue granny square worked in a single color, and work the shell border around the edges to close the pillow.
Play with the color plan. You can change the order of the rounds to change the look completely. Make every other round blue for thin, busy stripes, or keep only Rnd 3 and Rnd 14 blue for a calmer cover with wide white diamonds and fine outlines. You can also swap the colors on alternate squares, so blue diamonds with white outlines sit next to white diamonds with blue outlines. Sketch your plan on squared paper before you start.
Change the edge. The small white shells are neat and simple. For a bolder frame, work the border in blue, or add a blue round of single crochet between the white rounds for a striped edge. For a vintage feel, add a picot to the top of each shell. Any edge with a 4-stitch repeat will fit the counts exactly, so you can try a few ideas on one side before you commit.
Change the yarn weight. In DK cotton with a 4 mm hook, each 14 round square comes out about 11 inches, and a queen cover needs about 5 by 6 diamonds. In bulky yarn with a 6.5 mm hook, the squares grow to about 18 inches, so a queen needs only 3 by 4 diamonds, which is just 18 squares. Always make one square first, measure it, and plan the layout in whole diamonds before you buy yarn.
Materials Needed
— Main Fabric
— Tools Required
The Free Pattern
0% complete
— Granny Diamond Square (Make 32, white and cobalt blue) :
— Setting Triangle (Make 14, white and cobalt blue) :
— Corner Triangle (Make 4, white and cobalt blue) :
— Layout and Joining :
— Border :
Assembly Instructions
- Make one granny diamond square, measure it and check that it is about 14 inches on each side before you go on.
- Make all 32 squares, then the 14 setting triangles and the 4 corner triangles, weaving in the ends after every color change.
- Block every piece to size so the squares are 14 inches and the triangle sides match the square sides.
- Lay the pieces out on point: 4 diamonds across and 5 down, 12 more squares in between, setting triangles along the edges and corner triangles in the corners.
- Whipstitch the pieces into diagonal rows with blue through the back loops, then join the rows together, matching every point.
- Work the two white border rounds around the whole cover, weave in all remaining ends and give the finished bed cover a light final blocking.
Common Mistakes & How to Fix Them
Losing track of the color plan. With fourteen rounds and five color changes in every square, it is very easy to work three white rounds where there should be two, or to forget a blue round. The square still looks fine on its own, but when you lay it next to the others, its diamond rings do not line up, and the mistake jumps out across the whole bed. Write the color plan on a card and keep it in your project bag, and tick off each round as you finish it. Before you fasten off, count the blue rings from the center: there should always be five.
Changing colors in the same corner every time. If you always fasten off and join the new color in the same corner, all the joins stack up in one place. That corner becomes thick and lumpy with woven ends, and it may show a small step or gap in the stripes. On a diamond this is easy to see, because the corner becomes a point of the diamond. Join each new color in a different corner from the last change, moving around the square clockwise. The ends are then spread evenly and the square stays flat and neat.
Triangles that do not match the squares. The setting and corner triangles are worked in rows, while the squares are worked in rounds, so your tension can be slightly different. If the triangles come out too short or too long, their sides will not match the sides of the squares, and the edge of the cover will ripple or pull in. After your first setting triangle, lay it against a square: each short side should be exactly 14 groups and the same length as the side of the square. If it is not, change your hook for the triangles only by half a size.
Joining pieces in the wrong place. Laying out squares on point can be confusing, and it is easy to join a setting triangle with its long edge facing in, or to put a square where a triangle should be. Then the zigzag along the edge breaks, or the cover ends up with a jagged side. Lay all 50 pieces out on the floor or a large bed before you sew a single seam, and take a photo of the layout with your phone. Join the pieces in diagonal rows, checking each row against your photo as you go.

You Might Also Like






Important Notes
Gauge matters because the squares and triangles must match exactly. With a 5 mm hook, the first four rounds should measure about 4 inches, and the finished square about 14 inches on each side. The triangle sides must match the square sides group for group. A small difference in size is fine as long as every piece matches the others. Measure your first two squares and your first triangle, and check one in every five pieces after that.
Block all the pieces before you join them. Pin each square to 14 by 14 inches, and pin each triangle so its short sides are 14 inches and its corners are true right angles. Spray with water until damp, and let everything dry completely before unpinning. Blocking straightens the granny clusters, opens the little holes between them and makes the diamond lines crisp. Give the finished cover a light blocking after the border, too.
The yarn amounts are estimates for the queen size, including the joining and the border. Buy all of the white and all of the cobalt blue at once, from the same dye lots, and keep the labels. Strong blues in particular can vary between lots, and a slightly different shade would show as a mismatched diamond in the middle of the bed. Buy one extra skein of each color for safety and for future repairs.
Wash the finished cover on a gentle cold cycle in a large mesh bag or a zipped duvet cover, with mild detergent. Cobalt blue sits right next to white in every round, so always use a color catcher, and for the first wash you can soak the cover in cold water with a splash of vinegar to help set the dye. Never wring or twist it. Press out the water and dry it flat, reshaping the diamonds while damp.
Thank you for making this cobalt blue and white granny diamond bed cover with me. I hope you enjoy the calm rhythm of the granny stitch, the little thrill of turning your first square on point, and that wonderful moment when the last corner triangle goes in and the whole cover lies straight and bright on your bed.
So find your blue and your white, make a magic ring and start your first square today. Count your rings, turn it on point and admire your first diamond. Then make another, and before long you will have a classic blue and white bed cover that feels fresh today and will still feel special many years from now.
Crochet Abbreviations
You Ask, We Answer
How big is the finished bed cover, and how many pieces do I need?
Following the pattern exactly, each square measures about 14 inches on each side, or about 20 inches from point to point on the diagonal. The queen layout is 4 diamonds across and 5 down, which uses 32 squares, 14 setting triangles and 4 corner triangles. It measures about 79 by 99 inches before the border and about 80 by 100 inches after it. On a standard queen mattress of 60 by 80 inches, that gives a drop of about 10 inches on each side and a long drape at the foot. Because the cover is planned in whole diamonds, the size grows in steps of about 20 inches. For any layout, use the formulas in the variations section to count squares and triangles. If you need a size between the steps, change the number of rounds in every piece, for example 15 or 16 rounds instead of 14.
Can I use a different yarn, or join the squares as I go?
Yes to both. Worsted cotton gives crisp clusters and clean color lines and washes well, a cotton and acrylic blend makes a lighter, softer cover, and a smooth acrylic is easy care and a little warmer. DK yarn with a 4 mm hook gives squares of about 11 inches, and bulky with a 6.5 mm hook gives squares of about 18 inches, so plan the layout in whole diamonds after you measure one square. You can also join the pieces as you go on the last blue round or row, by replacing each ch 1 between groups with a slip stitch into the matching space of the neighbor. That saves sewing, but the on-point layout makes it a bit harder to keep track of, so I recommend laying everything out and photographing your plan first if you choose this method.
How do I care for and store the bed cover so it lasts?
Wash it only when it really needs it, on a gentle cold cycle in a large mesh bag with mild detergent, and always add a color catcher, because cobalt blue sits right next to white. Dry it flat or on a very low setting, then lay it flat to finish drying, smoothing the diamonds into shape. Avoid a hot dryer, which can shrink cotton and pull the diamonds out of line. Between washes, shake it out and air it by an open window, out of strong direct sun, which can fade the blue over time. To store it, fold it loosely and keep it in a cotton bag or a large pillowcase rather than plastic, so the yarn can breathe. Refold it along different lines every few months, and check the seams once a year, resewing any spot that has loosened.
Success!
Thanks for subscribing — check your inbox for a welcome note.
Abbreviations
- ch — chain
- sl st — slip stitch
- sc — single crochet
- dc — double crochet
- BLO — back loop only
- st(s) — stitch(es)
- sp(s) — space(s)
- rep — repeat
- Rnd — round
- RS — right side