
Red Filet Butterfly Crochet Bed Cover Pattern with Matching Shams
Filet crochet from a simple chart, using only double crochet and chains.
One square a week, with the shams, the pillows and the edge at the end.
Twenty-five filet butterflies in one deep red, with matching shams and a scalloped edge.
About This Red Filet Butterfly Crochet Bed Cover Pattern with Matching Shams Pattern
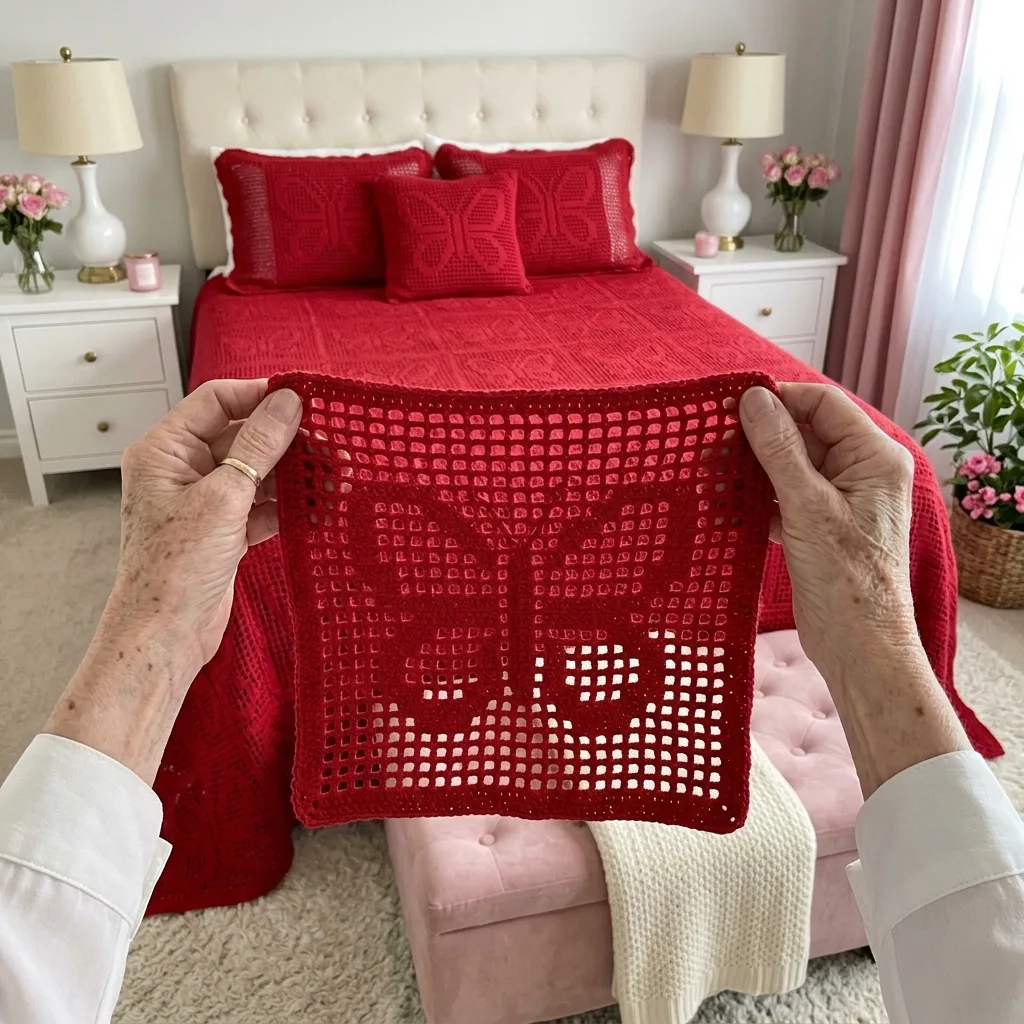
Butterflies are the first thing you see on this bed. Twenty-five big red squares, laid out in five columns and five rows, each carry one butterfly with wide open wings, and the whole cover is worked in a single deep red, so the picture is made only from light and shadow. The butterfly is solid, built from thick lines of stitches, and everything around it is open mesh. The mesh lets a little shadow through, and the butterfly floats in the middle of it like a drawing on glass.
The technique is filet crochet, one of the oldest and best loved kinds of lace. A filet square is built from just two tiny pieces: an open space, which is a chain of two and a double crochet, and a solid block, which is three double crochets in a row. Chart a picture with blocks and spaces, and the picture appears. The butterfly in each square is made of 79 blocks, set into a mesh of 21 by 21 squares. Every wing is outlined with blocks and left open in the middle, with thin veins running through it.
Every square is the same, which keeps the work calm. Each one measures about 20 inches, with a solid border of three rounds of single crochet around the mesh. I made them in worsted cotton with a 4.5 mm hook, which gives a firm, open lace that hangs well and keeps its shape. The squares are joined with a slip stitch seam worked on the wrong side, and the seam leaves a thin raised ridge on the right side between the squares, a neat frame around every butterfly.
The cover is a grid of 5 columns and 5 rows, 25 squares in all. Three columns cover the top of the bed, four rows run from the head to the foot, and the last row and the two outer columns fall over the sides and the foot. The finished cover measures about 100 by 100 inches, and it drops about 20 inches on both sides and at the foot, which takes it nearly to the floor. A scalloped edge of 170 little rounded shells runs along both sides and across the foot.
The set includes two long shams, each with one big butterfly in a mesh of 31 by 21 squares and a small scalloped trim, and two square pillows with the same butterfly, which stand behind the shams. In the photo the pillows behind are white. I made them in red as well, so that every pillow on the bed is crochet and every one belongs to the cover.
This is an intermediate pattern, mostly because of the counting. A filet chart asks you to count stitches in threes for hours at a time. The reward is that the stitches themselves are very simple, only double crochet and chain. Expect about 5 to 7 months of evenings for 27 squares, 2 shams, the pillows and the edge. A good plan is one square a week. When you have finished the first square, you have learned the whole pattern, because the other 26 are exactly the same.
Why You'll Love This Red Filet Butterfly Crochet Bed Cover Pattern with Matching Shams Pattern
I love this cover for its bold red and its quiet drawing. Red can be loud, but when the whole bed is one color it becomes calm and rich, like the curtains in an old theater. The butterflies give the eye a place to rest, and the mesh around them keeps everything light. I can picture it in a room with pink flowers, soft cream walls and morning sun, exactly as in the photo.
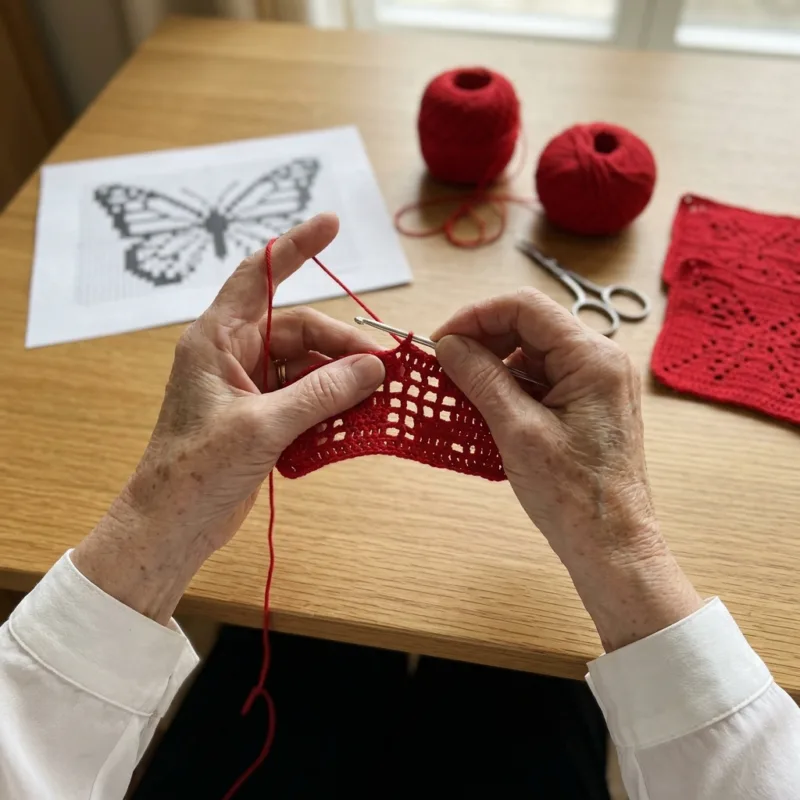
I love filet crochet because it is a picture made from counting. There is a special pleasure in following a chart and watching a butterfly appear one row at a time. For the first few rows you see only mesh. Then the first blocks of the wing tips appear, and suddenly you can tell where it is going. By the last wing rows you can see the whole butterfly, and you cannot stop.
I love that every square is the same size and the same picture. When you are tired, you do not have to think about anything new. You pick up the hook, find your row on the chart and work. When you are fresh, you can try to work faster, or read the chart without looking at it. I also love that you can lay the finished squares side by side and watch the cover grow. Here is what I enjoy most about this pattern:
- One simple chart that repeats in every square
- A single color, with no ends to sort
- Squares small enough to carry anywhere
- A scalloped edge that makes the cover look finished
Working in a single color is a gift. There are no color changes, no yarn to carry and no stripes to keep in mind. You can take a square to the park, to a waiting room or in the car. The only things you need are the hook, one ball of cotton and the chart on a small card.
I love how well filet drapes. Because most of the cover is open mesh, it is much lighter than a solid blanket of the same size. It falls over the edge of the bed in soft folds, it dries quickly after washing, and in summer it can lie over the sheet without making the bed hot. In winter you can put it over a quilt, and the red looks wonderful against a cream blanket.
This is also a cover for giving. A butterfly is a symbol of change and of new beginnings, and I can see this as a wedding gift, a gift for a new home or a gift for someone who has come through a hard year. If you make it, sew a small label in one corner with your name and the date, because covers like this are kept for a very long time.
Finally, I love the way it looks from across the room. The butterflies seem to fly up the bed toward the pillows. The first time I saw the whole cover laid out, I stood there for a while without saying anything.

Switch Things Up
Red is the dramatic choice, but filet butterflies look beautiful in any single color. For a classic bedroom, try ivory, which makes the lace look like an old tablecloth. For a deep, quiet room, choose navy or forest green. For a sunny guest room, use butter yellow or soft sage. For a fresh, young look, try dusty rose or lavender. Use a cotton with a little sheen, because it shows the stitches best, and keep the same color for the whole cover and the pillows.
You can also play with two colors in a simple way. Work the three border rounds of every square in a second color, so that a red butterfly sits in a cream frame, or an ivory butterfly sits in a navy frame. It looks like a framed picture, and it needs no carrying of yarn, because the border is a separate round. Use the second color for the scalloped edge too.
The squares are 20 inches, so every size is easy to count. These are the grids I suggest, written as columns by rows, with the last row at the foot:
- Twin: 4 columns by 5 rows, 20 squares, about 80 by 100 inches
- Full or queen: 5 columns by 5 rows, 25 squares, about 100 by 100 inches (as written)
- King: 6 columns by 5 rows, 30 squares, about 120 by 100 inches
A smaller version makes a lovely throw. Join 2 columns by 3 rows, 6 squares, for a throw of about 40 by 60 inches, and work the scalloped edge on all four sides. Join 4 squares in a row for a bed runner of about 20 by 80 inches. Both are good ways to try the pattern before you commit to the whole cover, and either one makes a fine gift.
For a baby, an open mesh is not safe, because small fingers and toes can get caught in the holes. Make a solid version instead: work every row as double crochet in each stitch, so the square has no holes, and let the butterfly show in a second soft color, using the chart as a guide. Make 2 columns by 2 rows, about 40 by 40 inches, and use it for play and for cuddles, never for sleeping.
The pillows make a project of their own. A single butterfly square sewn to a solid back makes a 20 inch cushion, and a sham front made from the wide chart makes a long lumbar pillow. Both are a good way to test the chart before you start the cover, and both use up the end of a ball.
The pattern uses worsted cotton and a 4.5 mm hook. For a finer lace, use size 5 cotton and a 2.0 mm hook. The squares will shrink to about 11 inches, so a queen needs 9 columns by 9 rows, which is 81 squares. If you prefer a plainer finish, replace the scalloped edge with a simple round of single crochet. Always make a test square first, block it, measure it and recalculate the grid.
Finally, think about the edge. A scalloped edge suits a romantic room, while a plain single crochet edge suits a modern one. If you want a quieter finish, stop after the single crochet round. If you want a richer one, work a second round of shells on top of the first. Whatever you choose, keep the same red and the same hook, so that the edge matches the squares.
Materials Needed
— Main Fabric
— Tools Required
The Free Pattern
0% complete
— Butterfly Filet Square (Make 27: 25 for the cover and 2 for the square pillows; scarlet red worsted cotton; 4.5 mm hook) :
— Sham Front (Make 2; scarlet red worsted cotton; 4.5 mm hook) :
— Solid Backs (Make 4; scarlet red worsted cotton; 4.5 mm hook) :
— Layout (Joining the Cover) :
— Scalloped Edge (scarlet red worsted cotton; 4.5 mm hook) :
— Pillows (2 shams and 2 square pillows) :
Assembly Instructions
- Make 27 Butterfly Filet Squares, with the 3 border rounds, and block each one to 20 inches.
- Lay 25 squares in a grid of 5 by 5 as shown in the Layout section, join them into 5 strips of 5, then join the 5 strips.
- Work the Scalloped Edge along both long sides and the foot: the single crochet round, the shells and the sc round on the shells.
- Make the 2 Sham Fronts and the 4 Solid Backs.
- Join each Sham Front to a Sham Back on 3 sides, insert a form in its inner cover, close the 4th side and work the Sham Trim.
- Join the 2 remaining squares to the 2 Square Pillow Backs in the same way, and work the Square Pillow Trim.
- Spread the cover over the bed, with the head end under the pillows, and arrange the 4 pillows.
Common Mistakes & How to Fix Them
Losing count in the mesh. Filet crochet depends on exact counts. If one block has 4 double crochets instead of 3, every stitch after it moves over by one, and the butterfly starts to lean. Count the stitches at the end of every row, and make sure there are 64. Mark the middle of each row with a stitch marker and tick every row on your printed chart. If you find a mistake three rows back, rip back to it, because the wings will not forgive it. A moment of counting saves a whole evening.
Pulling the chain spaces tight. A space should be as wide as a block, about 1 inch. If the chains are tight, the mesh puffs up and the square pulls into a diamond. Work each ch 2 loosely, a little longer than the double crochets beside it, and check that the spaces and blocks line up in straight columns. If a row looks narrower than the one below it, you pulled too hard, so rip it out and work it again with a looser hand. A tight space also makes the butterfly look smaller than the chart.
Joining squares that are not blocked. An unblocked filet square looks wavy, and its blocks and spaces do not line up. Pin each square out to 20 inches, with straight lines of pins along every side, spray it with water and let it dry for a day. The butterfly then stands out as clearly as the chart. Only join the squares after blocking, and check that every square has 68 sc on each side, so that the seams match exactly. A blocked square also feels softer and drapes better, so the cover will hang in gentle folds.
Joining with the wrong sides out. If you join the squares with the right sides facing, the ridge falls on the back of the cover and the clean frame around each butterfly disappears. Hold two squares with the wrong sides together, match each corner first, and work slip stitches through the back loops of both. Add one extra slip stitch where four corners meet, so that no hole opens. Look at the first seam from the right side before you do the other 39. Weave the seam ends into the ridge so that nothing shows.

You Might Also Like





Important Notes
Gauge: one finished square is the gauge. In worsted cotton and a 4.5 mm hook, the 21 by 21 mesh should measure about 18 inches before the border, and the whole square about 20 inches after it. Each mesh should be nearly square. If your mesh is too small, go up a hook size, and if it is too large, go down. Check one square before you make the other 26.
Blocking: pin each square flat on foam mats, with the corners first and then the middle of each side, spray it with water and let it dry for a full day. Pin the mesh so that the spaces become true squares. Do not starch it heavily, because the cover must fall in soft folds over the sides of the bed. Block the sham fronts in the same way, to 28 by 20 inches.
Yarn amounts: the total of about 5,300 yards is an estimate, so buy 10 percent extra. Red cotton varies a lot between dye lots, and in a one-color cover a different lot shows clearly, so buy everything at once and check the lot numbers. Wind several balls ahead of time, and keep one small ball in reserve for future repairs. Write the lot number on a card and keep it with the pattern, so you can match it later.
Washing: wash the cover by itself in cool water with a mild soap, and add two color catcher sheets, because red cotton can bleed, especially in the first washes. Test a square first. Never use bleach or hot water. Lift the wet cover in a large towel, do not wring it, and dry it flat. Never hang it wet, because the open mesh will stretch. Gently shape the squares with your hands while they dry.
This cover is a long journey, and every square along the way is a small finished picture. The first butterfly takes the longest, because you are learning the chart, but the second one goes faster, and by the fifth you will hardly need to look at it. Make one square at a time, keep your test square and take your time with the edge. When the cover is spread across the bed, the months you spent on it will look small next to the result.
I would love to see yours. Tell me which color you chose, how many squares you have finished and what you think of the chart. If a row or a count puzzles you, leave a comment and I will help you find the answer. Happy crocheting, and thank you for stitching along with me.
Crochet Abbreviations
You Ask, We Answer
How big is the finished bed cover?
The finished cover measures about 100 by 100 inches. That gives a top of about 60 by 80 inches, which fits a queen bed, and a drop of about 20 inches on both sides and at the foot, so the cover falls nearly to the floor. Each square is about 20 inches, and the cover is made of 25 squares in a grid of 5 by 5. Your size depends on your tension, so always make a test square first and measure it after blocking. The finished cover weighs about 3 kilograms, because most of it is open mesh. If you want a different size, see the grids in the switch things up section, from 20 squares for a twin to 30 for a king. To check the fit, lay a few squares on your mattress before you join them, and measure the drop at the side.
Can I use a different yarn weight or make another size?
Yes. The pattern uses worsted cotton and a 4.5 mm hook. For a finer lace, use size 5 cotton and a 2.0 mm hook, and expect each square to shrink to about 11 inches, which means 9 columns by 9 rows, or 81 squares, for a queen. For another bed, follow the grids in the switch things up section. Always make a test square in the new yarn, block it, measure it and recalculate the grid before you start the rest of the cover. Keep the same single color throughout, because the design depends on tone on tone. Write the final counts on a card, so you can repeat the cover later, and keep your printed chart with it. If you change the yarn, keep the hook size matched to the yarn, so the mesh stays open and nearly square, because the butterfly depends on square spaces and blocks.
How do I wash and care for it?
Wash the cover by itself, by hand or on the gentlest machine cycle, in cool water with a mild soap, and add two color catcher sheets, because red cotton can bleed. Do not wring or twist it, and never use bleach. Lift it out in a large towel and press the water out gently. Dry it flat on towels. Never hang the wet cover, because the weight of the cotton will stretch the mesh. Check the seams after each wash and re-sew any that feel loose. Store it loosely folded in a cotton pillowcase, and keep it out of strong sun, which can fade red dye over time. If a seam comes loose, sew it again with a tapestry needle and matching cotton, and weave in the ends. A little care after each wash will keep the red bright and the mesh crisp for many years of use, and it will make the cover easier to pass on.
Success!
Thanks for subscribing — check your inbox for a welcome note.
Abbreviations
- ch — chain
- sl st — slip stitch
- sc — single crochet
- dc — double crochet
- S — space on the chart: ch 2, skip 2 sts, dc in the next st
- B — block on the chart: dc in each of the next 3 sts
- st — stitch
- sts — stitches
- rnd — round
- mm — millimeter
- yd — yard