
Mint and Plum Ginkgo Leaf Hanging Curtain Crochet Pattern
Simple fan rows and shell edging, plus a little color change and careful strand planning.
Leaves and beads are small enough to finish in short sittings, a handful at a time.
Cascading mint leaves turn any window into a soft green view, even on a gray day.
About This Mint and Plum Ginkgo Leaf Hanging Curtain Crochet Pattern Pattern
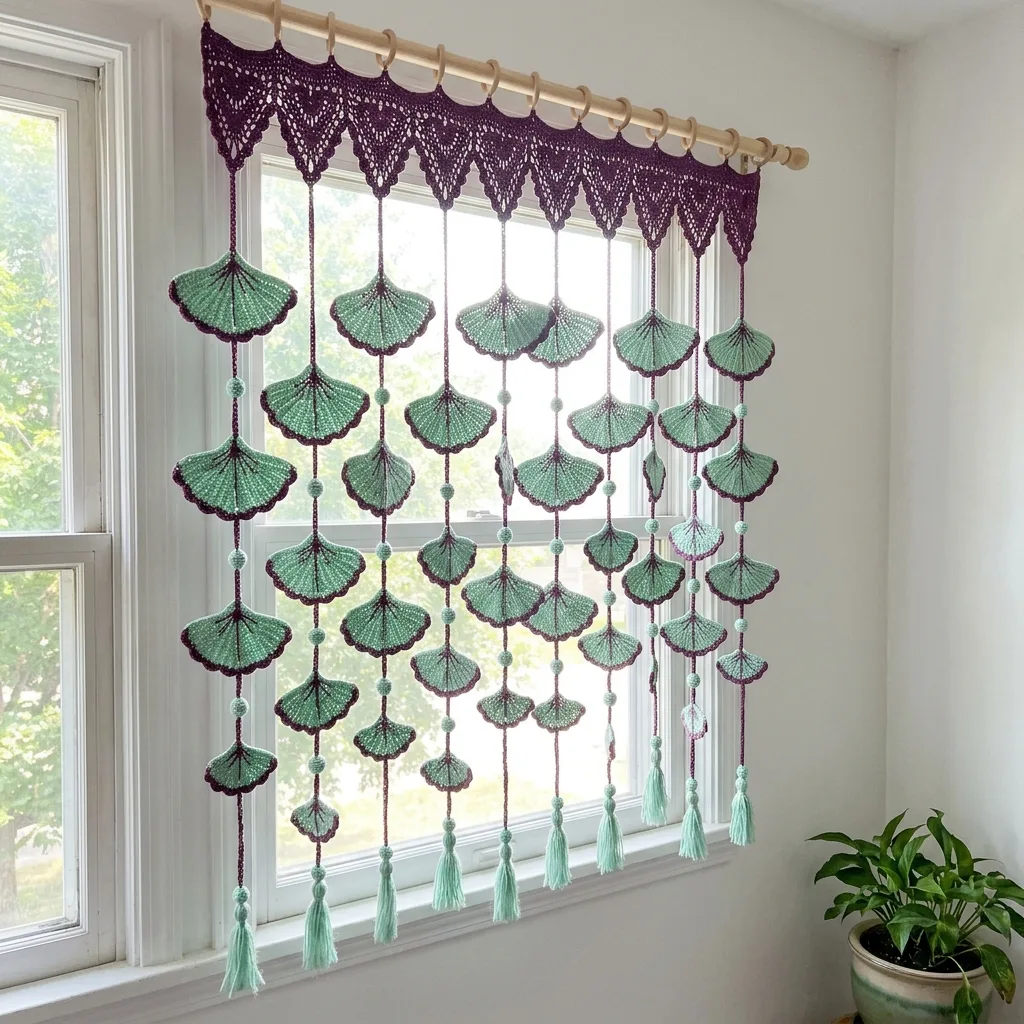
This curtain is a cascade of mint green ginkgo leaves hanging on fine plum chain strands. Each leaf is a little fan with ribbed stitches, a scalloped plum edge and a few plum vein lines running down from the stem. Round mint beads sit between the leaves like tiny buds, and the strands hang slightly staggered, so the leaves overlap and seem to tumble down the window. When the light comes in from behind, the mint glows and the plum outlines stand out crisp and dark. It looks like a branch of leaves frozen in the middle of a breeze.
At the top sits a plum lace valance made of twelve small lacy triangles. Each triangle is a little granny triangle worked from the point up, finished with a shell edge along its two sloped sides. The triangles are joined across their tops with two rows of single crochet, and a third row wraps the band around twelve wooden curtain rings, one above each triangle. The rings slide easily along the rod, so you can open and close the curtain or straighten it in seconds.
Below the valance hang twelve strands, one from the point of each triangle. Every strand holds eight leaves, four large ones near the top and four small ones lower down, which gives the curtain that natural look of bigger leaves up high and smaller ones toward the tips. A mint bead sits above the first leaf, between every pair of leaves and at the very end, so each strand carries nine beads. The odd strands start a little higher than the even ones, which makes the leaves fall into a gentle zigzag instead of lining up in rows. A short mint tassel finishes every strand.
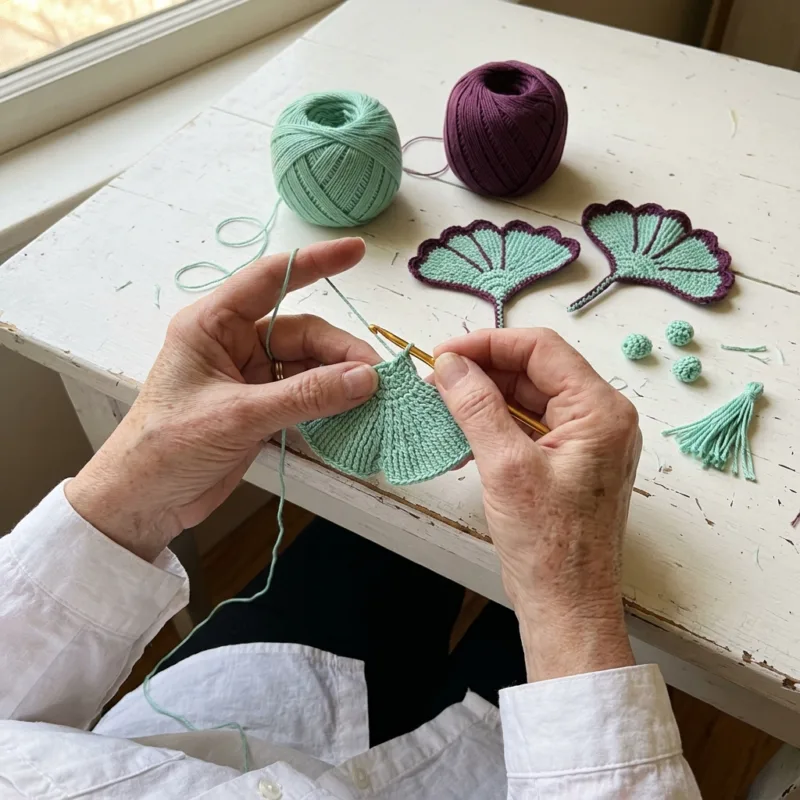
The leaves are worked in rows from a magic ring at the stem, so the fan opens outward with every row. Large leaves have three rows of double crochet and one row of treble crochet, and small leaves stop after the double crochet rows. Then you switch to plum for a scalloped shell edge along the bottom curve and sew a few straight stitches from the stem for the veins. The beads are tiny stuffed balls worked in single crochet, and the chains, triangles and band use only basic stitches.
The finished curtain measures about 120 cm wide and 150 cm long (47 by 59 inches) from the top of the rings to the tips of the tassels. That fits a standard window, a wide single window or a cozy reading nook. The strands are built by chaining down from the valance, adding a bead, joining a leaf at its stem, carrying the chain behind the leaf and chaining on to the next bead. Nothing is sewn between the strands, so each one hangs and moves on its own.
I love how alive it feels when it hangs. The cotton gives the strands enough weight to fall straight, but the leaves still turn a little when the window is open. In the morning the light shines through the gaps and the leaf shapes throw soft shadows on the floor. In the evening the mint looks almost silver. It gives a window privacy without hiding the trees outside, so it feels like the garden comes right into the room.
I rate this pattern Intermediate. The stitches are simple, but you will make ninety-six leaves and over a hundred beads, change colors on every leaf and keep track of which strand starts higher. If you have made a few small motifs and you can follow a row with a stitch count, you can make this. Plan on about fifty-five to sixty-five hours. It suits a patient maker who enjoys small, cheerful pieces and loves watching a big project come to life one leaf at a time.
Why You'll Love This Mint and Plum Ginkgo Leaf Hanging Curtain Crochet Pattern Pattern
I fell in love with ginkgo leaves on a walk in the park one autumn, when a whole tree dropped its little fans onto the path at once. I took a few home, pressed them in a book and kept thinking about how to make them in yarn. When I hung my first test strand of mint leaves in the window, it looked just like those branches I had seen. The plum edge was my favorite surprise. It frames each leaf like a drawing and makes the mint look even fresher.
The thing I love most is how portable this project is. A leaf takes a short sitting, a bead takes only a few minutes, and you can carry everything in a small bag with two balls of yarn, a hook, scissors and a needle. I made dozens of beads while waiting at appointments and stitched leaves on the porch in the evenings. By the time I was ready to build the strands, I had a whole bowl of leaves and beads waiting, and it felt like gathering a little harvest.
Making ninety-six leaves taught me a lot about consistency. My first few leaves came out slightly different sizes, because my treble crochet was looser on some days than others. I learned to lay every new leaf on top of my first one before adding the plum edge. I also learned to stuff the beads firmly and evenly, since a soft bead looks flat on the strand and a hard one looks lumpy.
Here is what keeps me coming back to this design:
- Small leaves and beads that fit in any project bag
- Two colors that make each leaf look hand drawn
- Strands that move and catch the light on their own
- A curtain that looks like a living plant in the window
It is also one of my favorite gifts to make. I made a shorter cafe version for a friend who loves gardening, and she hung it over her kitchen sink where she can see her herbs through it. A handmade curtain is something a person sees every single day, so it really feels like a piece of you lives in their home. It suits a cottage kitchen, a sunroom or a calm bedroom equally well.
This curtain also uses up yarn beautifully. The beads take only a few meters each, so all those small leftover balls of mint can go straight into them, and the scraps make perfect stuffing. The plum leftovers become tassel wraps and vein stitches. When I finished, I had only a few short ends left, and nothing felt wasted.
Most of all, I love what it does to a room. A plain window suddenly feels like the edge of a garden. The leaves soften the light, the plum lines add a little drama, and the whole curtain looks different as the sun moves across the sky. Every time I walk past it, I feel the same quiet joy I felt on that autumn path, and that is why I keep making them.
Switch Things Up
The easiest change is the color. Mint and plum is fresh and a little dramatic, but ginkgo leaves look lovely in many pairs. Golden yellow leaves with a brown edge look just like autumn. Green leaves with a cream edge feel calm and natural, and white leaves with a soft golden edge look elegant in a bedroom. Pink leaves with a white edge are sweet for a nursery, and red leaves with a white edge bring a cheerful touch to a farmhouse kitchen.
You can change the width to fit your window. Each valance triangle adds about 10 cm (4 inches) of width and one more strand. For a narrow window, make 6 triangles and 6 strands, about 60 cm wide, with 24 large leaves, 24 small leaves and 54 beads. For a wide window, keep adding triangles and strands in the same way. The number of strands always matches the number of triangles and rings.
Length is just as easy to change. Each extra leaf, with its bead and links, adds about 12 cm (5 inches). For a door about 200 cm tall, keep 12 strands and work 12 leaves per strand, 5 large and 7 small, which is 144 leaves and 156 beads in all. For a room divider about 160 cm wide and 230 cm tall, make 16 triangles and 16 strands with 14 leaves each, 6 large and 8 small, for 224 leaves and 256 beads.
- Narrow window: 6 strands of 8 leaves, about 60 by 150 cm
- Standard window: 12 strands of 8 leaves, about 120 by 150 cm
- Door: 12 strands of 12 leaves, about 120 by 200 cm
- Room divider: 16 strands of 14 leaves, about 160 by 230 cm
A short cafe curtain is a lovely first version. Keep the 12 triangles and 12 strands, but work only 4 leaves per strand, 2 large and 2 small, which is 48 leaves and 60 beads. It hangs about 75 cm (30 inches) long and covers the lower half of a kitchen window, so you get privacy at the sink and plenty of light at the top. It is also a quick way to test your tension and colors before a full curtain.
For a doorway curtain that people walk through, leave off the valance and work each strand straight from its own wooden ring. Hang the strands closer together, about 6 cm apart, so the opening looks full, and use the small leaves only, since they swing less and tangle less. Skip the tassels and end each strand with a bead. The strands part easily as someone passes and fall right back into place.
The tassels are easy to change too. For a neat finish, wrap the yarn around a 5 cm piece of cardboard. For a more flowing look, use a 10 cm piece. You can also make plum tassels for more contrast, or leave the tassels off and end each strand with a small leaf instead, so the curtain finishes with leaves at the tips like a real branch.
Finally, you can change the yarn weight. A sport or DK cotton with a 3.5 mm (E-4) hook gives leaves about 9 cm wide, and the curtain shrinks to about 85 by 110 cm with the same counts, perfect for a small window or a cabinet door. A bulky cotton with a 6 mm (J-10) hook makes big leaves that cover a large window with fewer strands. Whatever you choose, make one large leaf and one bead first and measure them before you plan the rest.
Materials Needed
— Main Fabric
— Tools Required
The Free Pattern
0% complete
— Large Ginkgo Leaf (Make 48, mint with plum edge) :
— Small Ginkgo Leaf (Make 48, mint with plum edge) :
— Bead (Make 108, mint) :
— Valance Triangle (Make 12, plum) :
— Valance Band (Make 1, plum) :
— Layout :
— Chain Links and Joining (Strands, Make 12, plum) :
— Tassels (Make 12, mint) :
— Top Loops and Hanging (plum) :
Assembly Instructions
- Make all 48 large leaves and 48 small leaves with their plum edges and veins, and make the 108 beads.
- Make the 12 valance triangles and join them across their tops with Rows 1 and 2 of the Valance Band.
- Follow the Layout to sort the leaves into 12 groups of 4 large and 4 small, and mark which strands get the short and long leads.
- Work the 12 strands from the triangle points, adding beads and joining leaves as described in Chain Links and Joining.
- Make the 12 tassels and tie one to the end of every strand, then trim them to the same length.
- Work the ring row from Top Loops and Hanging, attaching a wooden ring above each triangle.
- Block the leaves and valance, let the curtain hang to straighten the strands and slide the rings onto the rod.
Common Mistakes & How to Fix Them
Leaves that change size are the most common problem. The treble crochet row on the large leaves is easy to work looser on a relaxed evening and tighter on a busy one, and a few centimeters of difference shows right away when the leaves overlap. To avoid it, keep your first large leaf and first small leaf as samples and lay each new one on top before you add the plum edge. If a leaf is clearly bigger or smaller, rip back the last row and work it again. Small differences disappear after blocking, but big ones never do.
A wavy or ruffled leaf edge is another easy slip. It happens when the plum shell edge has too many stitches for the leaf, usually because you missed a skip, or when the fan rows have too few increases and the leaf cups. Count your stitches at the end of every row, and make sure Row 4 has 29 tr and Row 3 has 21 dc before the edge. The edge should lie flat with gentle scallops. If it ripples, pull it out and check that every shell sits on its own stitch.
Beads that slide or sit crooked spoil the clean line of a strand. If you only slide the bead loosely onto the chain, gravity pulls it down, and soon two beads sit together while a link above is bare. Sew each bead around the chain with a few firm stitches through the chain itself, right where it belongs, then knot the tail inside the bead. Stuff every bead the same way so they all look alike. A bead that is too soft looks flat, and one that is overstuffed looks lumpy and stretches the stitches.
Mixing up the short and long leads ruins the cascade. If two neighboring strands start at the same height, their leaves line up side by side in rows and the big leaves bump into each other instead of overlapping in a zigzag. It happens when you work the strands in a different order than you planned. Place a stitch marker in every even triangle point before you start, and count the lead chain carefully. If a strand is wrong, you only need to undo it back to the top and chain the lead again.

You Might Also Like






Important Notes
Gauge matters because the leaves overlap and any size difference is easy to see. With worsted cotton and a 5.0 mm hook, a large leaf should measure about 13 cm wide and a small leaf about 10 cm wide after blocking. Make one of each before buying all your yarn. If yours are bigger, go down a hook size, and if they are smaller, go up one. Beads should be about 2 cm across so they fit neatly between the leaves.
Blocking helps the leaves look crisp and flat. Wet each finished leaf, roll it in a towel and pin it on a blocking mat, spreading the fan evenly and opening each plum shell with your fingers. Pin the valance triangles so their points are sharp. Let everything dry completely before you build the strands. Do not block the beads, since the stuffing would stay damp. After assembly, let the curtain hang for a day so the chains settle.
Buy all your yarn at once and check that every ball of each color comes from the same dye lot. Mint shades can vary a lot, and a different lot shows clearly when light shines through the leaves. The amounts in the materials list include a little extra. If you change the size, plan about 4 m of mint and 2.5 m of plum per large leaf, about 2.2 m of mint and 2 m of plum per small leaf and about 1 m of mint per bead.
The finished curtain weighs roughly 500 grams, which a normal wooden rod holds easily, but use sturdy brackets for a long rod so it does not bow. To wash it, hand wash in cool water with mild soap and add a color catcher, because the plum can bleed into the mint. Never wring the strands. Press out the water, roll it in a towel, reshape the leaves and hang it to finish drying.
I hope this curtain brings a little garden into your home the way it did into mine. It looks like a big project when it is hanging in the window, but it is really just one small leaf and one little bead, made again and again on quiet evenings. Every leaf you finish is a small win, and before you know it you will have a whole bowl of them ready to hang.
So grab your mint yarn and your hook and make just one leaf today. Add its plum edge, hold it up to the window and watch the light shine through it. I have a feeling you will want to make the next one right away. Happy crocheting, friend.
Crochet Abbreviations
You Ask, We Answer
How big is the finished curtain?
As written, the curtain measures about 120 cm wide and 150 cm long, which is roughly 47 by 59 inches, measured from the top of the wooden rings to the tips of the tassels. The width comes from the 12 valance triangles, each about 10 cm across. The length comes from 8 leaves, 9 beads and the links on each strand, plus the valance and rings at the top. The even strands hang about 9 cm lower than the odd ones because of their longer lead, which creates the staggered cascade. That size fits a standard window or a wide single window. If your window is different, measure it first, then add or remove triangles and strands for the width and leaves for the length, using the size list in the section on switching things up. I like to let the curtain hang for a day before trimming the tassels, so the final length is just right.
Can I use a different yarn weight or make it a different size?
Yes, the design works in many yarn weights. A sport or DK cotton with a 3.5 mm hook gives large leaves about 9 cm wide and makes a dainty curtain of about 85 by 110 cm with the same counts. A bulky cotton with a 6 mm hook makes big, bold leaves, so you can cover a large window with fewer strands. I suggest cotton or a cotton blend for any version, because it holds its shape, keeps the plum edges crisp and helps the strands hang straight. Acrylic is lighter and springier, so the strands may twist and the leaves may curl. Whatever you choose, make one large leaf, one small leaf and one bead first, block them and measure them. Then work out how many triangles fit your width and how many leaves fit your length. Remember that thinner yarn makes shorter chains, so you may need more chains in the leads and links.
How do I wash and care for the curtain?
Treat it gently and it will stay pretty for years. When it needs a wash, slide the rings off the rod and hand wash the curtain in cool water with a mild soap, swishing it slowly instead of rubbing. Add a color catcher sheet to the water, because dark plum can bleed into light mint, especially in the first wash. Do not wring or twist the strands, as that tangles them and can pull the leaves out of shape. Instead, lift the curtain out in your arms, press out the water and roll it in a large towel. Lay it flat, smooth each leaf and open the plum shells with your fingers, then hang it back on the rod to finish drying, so the chains straighten as they dry. Squeeze the beads gently to reshape them. Between washes, a light shake keeps dust away. Keep it out of harsh direct sun for long periods, since cotton can fade over time.
Success!
Thanks for subscribing — check your inbox for a welcome note.
Abbreviations
- ch — chain
- sl st — slip stitch
- sc — single crochet
- sc2tog — single crochet 2 stitches together
- dc — double crochet
- tr — treble crochet
- sk — skip
- st — stitch
- sts — stitches
- sp — space
- sps — spaces
- ch-sp — chain space (for example ch-2 sp is the space under 2 chains)
- tch — turning chain