
Pink Daisy Granny Square Bed Cover Crochet Pattern
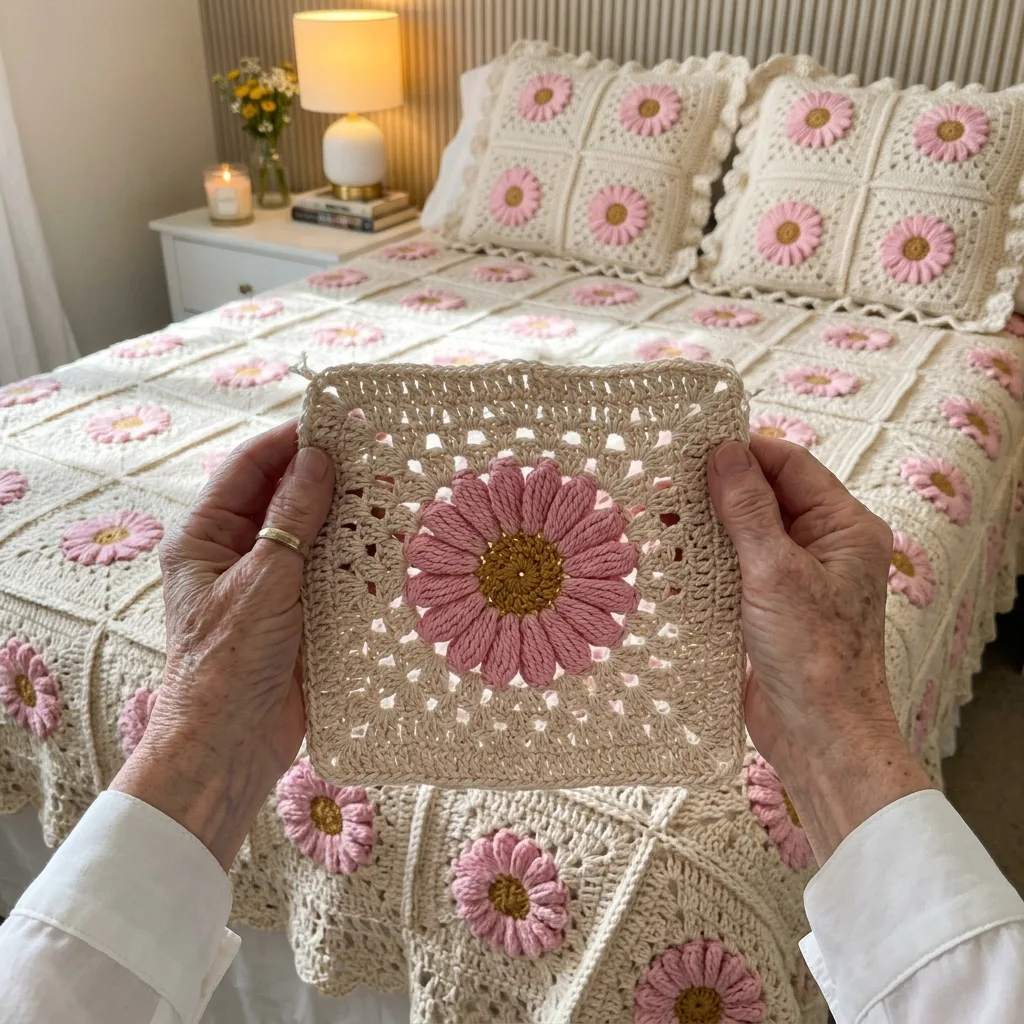
You need granny rounds, post-free petals made of simple stitches and a raised seam, nothing more.
Seventy small squares mean you can finish one daisy in an evening.
Two layers of plump pink petals sit in the middle of every cream lacy square.
About This Pink Daisy Granny Square Bed Cover Crochet Pattern Pattern
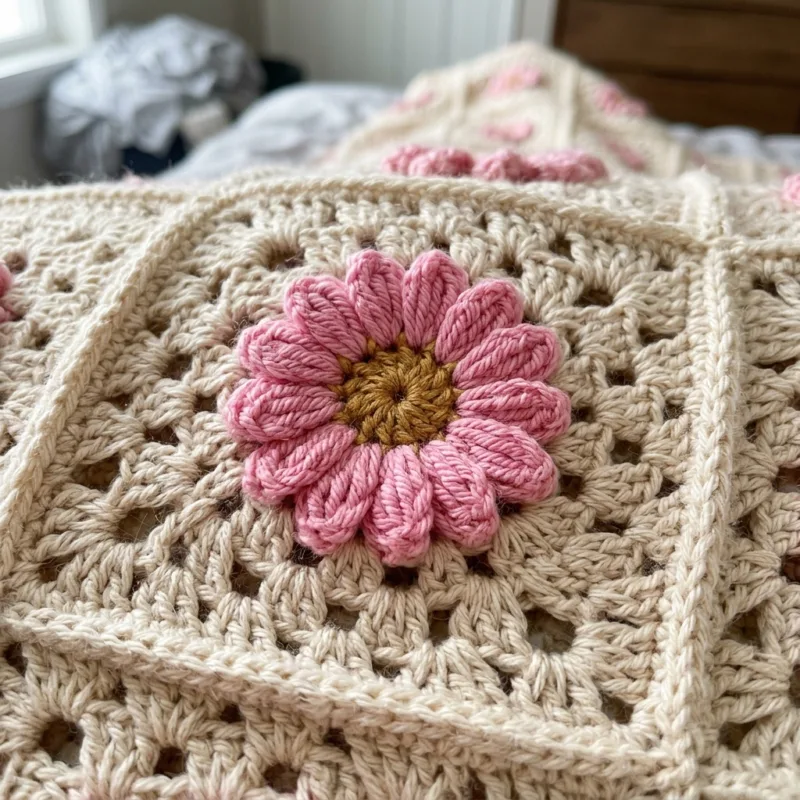
This bed cover is made of 70 granny squares joined in 7 columns and 10 rows. Every square has a plump pink daisy with a golden-brown center, framed by soft cream rounds full of little round holes. The squares are joined with a raised ridge on the right side, and a petal scallop edge finishes the whole cover.
It measures about 70 by 100 inches, which covers a queen bed with a generous drop. You work granny rounds, simple petals made of chains and basic stitches, and a single crochet seam. It suits someone who has made a few granny square blankets and wants a showpiece.
Why You'll Love This Pink Daisy Granny Square Bed Cover Crochet Pattern Pattern
I love that every square is its own tiny project. A daisy takes a short evening, so I always have a small goal and a lot of pink yarn to look at.
The cream frames let the flowers glow, and the raised seams give the whole cover a soft, quilted look. It is a bed cover I would be proud to gift, and a lovely way to use up cotton yarn.
Switch Things Up
Try the daisies in soft yellow, lilac or coral, or use a grey or sage frame instead of cream. For a baby blanket, join 4 by 5 squares for about 40 by 50 inches. For matching pillow covers, join 2 by 2 squares for the front and add a simple back. You can also swap the petal scallop edge for a plain single crochet border if you want a faster finish.
Materials Needed
— Main Fabric
— Tools Required
The Free Pattern
0% complete
— Daisy Center and Petals (Make 70, golden-brown and pink) :
— Square Frame Rounds (Make 70, cream) :
— Joining the Squares (cream) :
— Layout :
— Petal Scallop Edge (cream) :
Assembly Instructions
- Weave in the ends of all 70 squares and block each square to 10 by 10 inches. Pin the corners and steam the daisies lightly, shaping the petals by hand instead of pressing them flat.
- Lay the squares out in 7 columns and 10 rows, with every daisy upright, and check that all squares have 43 sc on each side.
- Join the squares into 10 strips of 7 using the seam between squares in a strip (45 sc), with wrong sides together and the ridge on the right side.
- Join the strips with the seam between strips (321 sc each), working 1 sc through all four corner center sts at every junction.
- Work the Petal Scallop Edge, Rounds 1 to 4, all the way around the cover, following the stitch counts so that a shell lands on every cover corner.
- Weave in the last ends, then block the whole cover gently and spread the petals of each daisy with your fingers.
Common Mistakes & How to Fix Them
Working the Layer 2 petals on the same stitches as Layer 1. Layer 2 starts one stitch over, in the back loops, so the long petals sit between the short ones.
Working the ch-6 loops in Round 1 of the frame too tightly. They should be loose enough for the petal tips to lie flat, or the daisy will cup.
Skipping the stitch check. Every square must have 43 sc between the corners in Round 8, or the long seams will not match.
Changing the edge counts. The shells only land on the corners when Round 1 totals 1,572 sc, so count each side before you start Round 2.

You Might Also Like






Important Notes
One square is about 10 inches wide, with 43 sc along each side and about 4 stitches to the inch. The daisy is about 6 inches across. Make a swatch of one full square first, because sizes and yarn amounts are estimated.
Buy extra cream yarn from the same dye lot, because the cover uses a lot of it and small color differences show in the frames.
Block each square before joining so the edges line up. The daisies are textured, so steam them lightly and never press them flat.
Wash the cover on a cold, gentle cycle with a color catcher sheet for the first wash because the pink and cream yarns are used together. Dry it flat.
I hope you enjoy every daisy as much as I do. Send me a photo when your cover is finished, I would love to see your colors.
Crochet Abbreviations
You Ask, We Answer
What is the finished size of this bed cover?
About 70 inches wide and 100 inches long, which covers a queen bed with a generous drop. Add or remove squares to change the size, because each square is about 10 inches.
Can I use a different yarn weight?
Yes. A DK cotton works with a 3.5 mm hook and gives a smaller square, so make more rounds or more squares. Always swatch one full square first and check the stitch counts in the edge, because they depend on the square size.
How do I wash and care for the finished cover?
Wash it on a cold, gentle cycle with a color catcher sheet, then lay it flat to dry. Avoid hanging it while wet, because the weight of the cotton can stretch it.
Success!
Thanks for subscribing — check your inbox for a welcome note.
Abbreviations
- ch — chain
- sl st — slip stitch
- sc — single crochet
- sc2tog — single crochet 2 stitches together
- hdc — half double crochet
- dc — double crochet
- tr — treble crochet
- st(s) — stitch(es)