
Blue Butterfly and Flower Hanging Curtain Crochet Pattern
The stitches are simple, but you need steady tension to keep eighty-four little motifs the same size.
Small butterflies and flowers you can finish in short sittings add up to a full window curtain.
Open strands let daylight pour between the butterflies and flowers from morning until evening.
About This Blue Butterfly and Flower Hanging Curtain Crochet Pattern Pattern
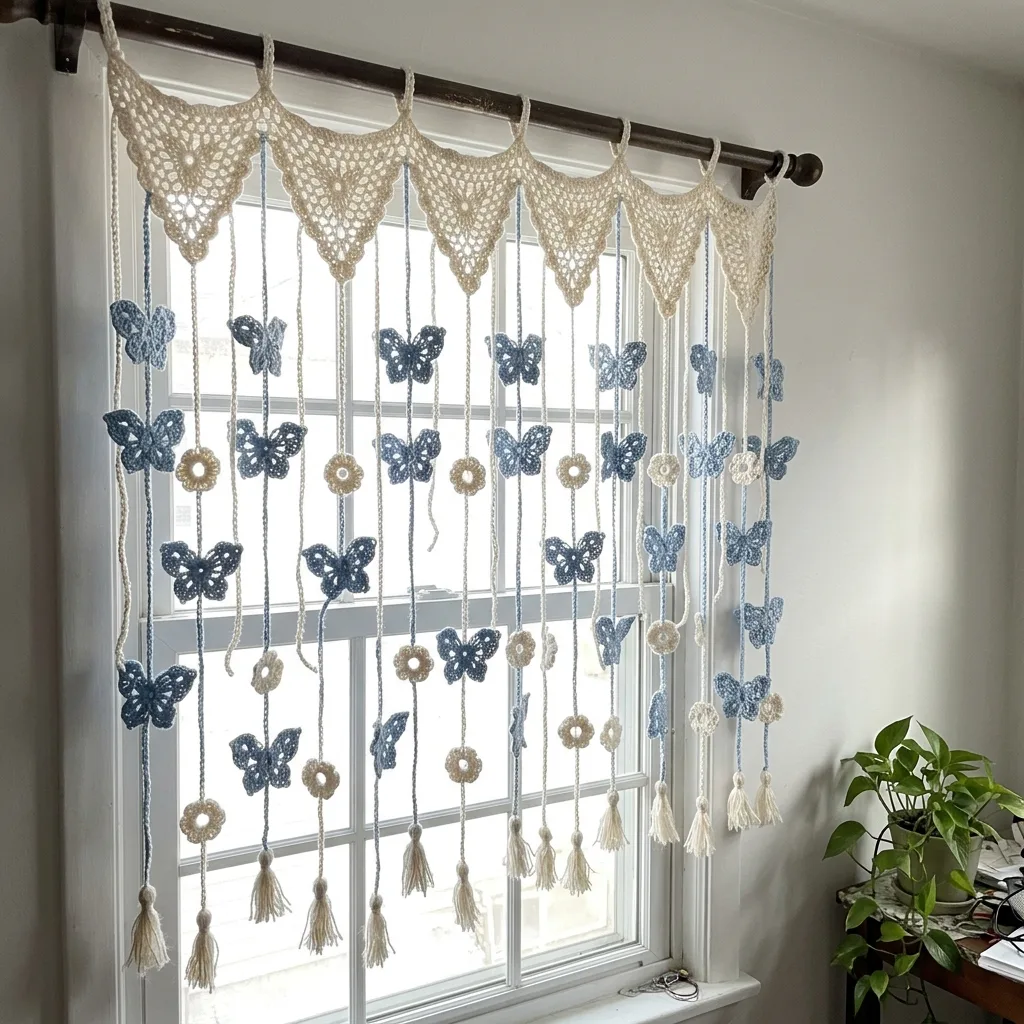
This curtain is a hanging panel of soft blue butterflies and little cream flowers, strung on fine chain strands below a lacy valance. Nothing is sewn into one solid piece. Every motif hangs on its own strand, so light and air pass through the open spaces and the whole curtain seems to float in the window. When the sun comes in, the cream yarn glows and the blue butterflies stand out as if they had just landed there. It is one of those projects that people stop and touch when they walk past it.
At the top sits a valance of six lacy triangles. Each one is worked as a small granny triangle from the point upward, then finished with a row of little shells along the two sloped sides. The six triangles are joined with two rows of single crochet across their tops, and that band carries seven yarn loops that slide over the curtain rod. The points of the triangles hang down in a row of soft scallops, which frames the strands below and gives the top of the curtain a finished cottage look. I like how it hides the rod and the starts of all the strands.
Below the valance there are thirteen strands in all. Seven of them are motif columns, and each column holds twelve motifs, six butterflies and six flowers, taking turns down the strand. The columns are offset, so the first, third, fifth and seventh columns start with a butterfly and the others start with a flower. That small trick turns the whole curtain into a gentle checkerboard of blue and cream. The other six strands are plain cream chains that drop from the points of the triangles and fill the gaps, so the curtain looks full without getting heavy. Every strand ends in a short cream tassel.
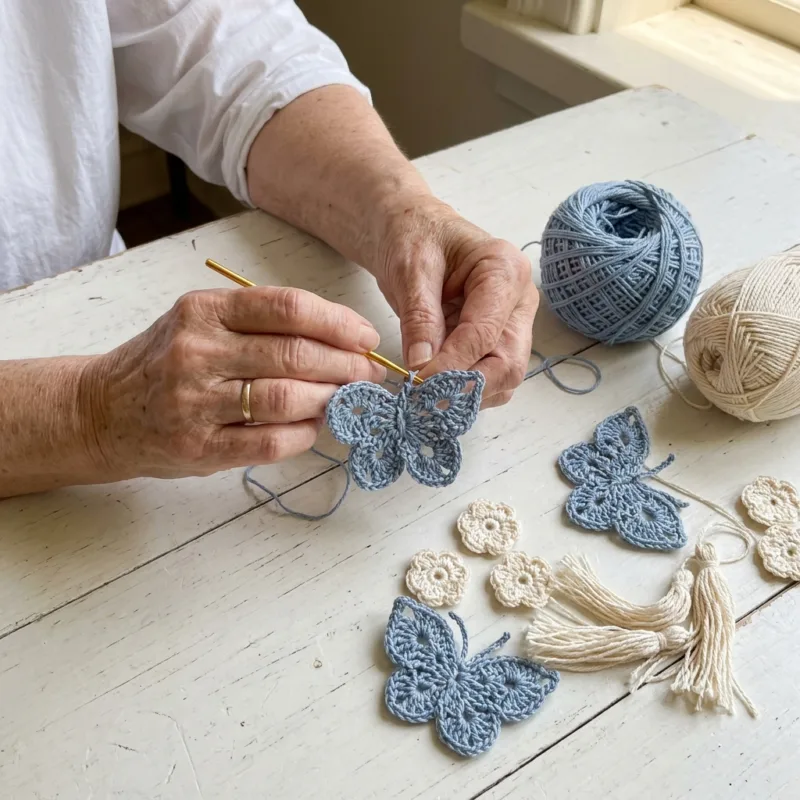
The butterflies are worked in the round from a magic ring. A ring of single crochet makes the center, long chain loops form the four wings, and the wings are filled with a mix of sc, hdc and dc before a lacy round of chain spaces gives them that open, airy edge. A small strip of hdc is sewn down the middle for the body, so each butterfly has a raised center that catches the light. The flowers are quicker, just three short rounds of single crochet, chain spaces and petals. Once you know them, you can make one in about ten minutes.
The finished curtain measures about 90 cm wide and 180 cm long (35 by 71 inches) from the top of the loops to the tips of the tassels. That fits a standard single window or a narrow door. The motifs are joined as you build each strand. You chain from the valance down, slip stitch into the top of a motif, carry the chain behind it, slip stitch out at the bottom and chain on to the next one. There is no sewing of motifs to each other, only weaving in ends, and that makes the assembly feel calm and steady.
The feel of the finished curtain is what surprised me most. Cotton gives the strands a little weight, so they hang straight instead of tangling, and the motifs stay flat and crisp after blocking. In the morning the light comes through the open wings of the butterflies and throws tiny lace shadows on the floor. In the evening, with a lamp on behind it, the cream flowers look almost like small lanterns. It changes with the hour, and I never get tired of looking at it.
I rate this pattern Intermediate. You only need basic stitches: ch, sl st, sc, hdc and dc. The challenge is making eighty-four motifs and keeping them all the same size, and you need a little patience to measure each strand so the bottoms line up. If you have made a few granny squares or small flowers and you can follow a round with a stitch count, you can make this. Plan on about forty to fifty hours. It suits someone who likes small, portable pieces and enjoys watching a big project come together slowly, one butterfly at a time.
Why You'll Love This Blue Butterfly and Flower Hanging Curtain Crochet Pattern Pattern
I fell for this curtain the first time I hung a single test strand in my kitchen window. Even one column of butterflies changed the light in that room. The blue looked soft and a little dreamy against the glass, and the cream flowers between them kept it from feeling busy. I had made plenty of blankets before, but I had never made something that moved with the air the way this does. When the window is open, the strands sway just a little and the butterflies seem to flutter.
The thing I love most is how portable it is. Every butterfly and every flower is a small piece you can finish in one sitting. I kept a little zip bag with a ball of blue, a ball of cream, my hook and a few stitch markers, and I made motifs in waiting rooms, in the car while someone else drove, and on the porch in the evening. By the time I sat down to build the strands, I had a whole basket of them waiting, and it felt like opening a box of treats.
Making the same motif over and over also taught me more about my own tension than any swatch ever did. By the twentieth butterfly my wings were even and my lace spaces were the same size every time. I learned to count my chain links out loud, which sounds silly, but it saved me from a lot of ripping back. I also learned to stop for the day when my hands got tired, because tired hands crochet tighter, and a tight butterfly stands out in a row of relaxed ones.
Here is what keeps me coming back to this design:
- Small motifs that fit in a pocket-size project bag
- Only two colors, so planning is easy
- No seaming of motifs, just chains and slip stitches
- A window that looks different every hour as the light moves
It is also one of my favorite things to give. I made a shorter version for a friend who had just moved, and she told me it was the first thing that made her new place feel like home. A handmade curtain says you thought about the room someone lives in every day. It is personal without being fussy, and it fits almost any style, from a farmhouse kitchen to a plain modern bedroom.
This curtain is kind to your yarn stash too. The flowers, the chain strands and the tassels all use cream, so any half balls of cream cotton you have left from other projects can go straight into it. If you have a few small leftovers of blue in slightly different shades, you can even mix them across the butterflies for a softer, more natural look. Nothing goes to waste, and the little scraps at the end make perfect tassel ties.
Most of all, I love the slow satisfaction of it. There is a moment near the end, when you slide the last loop over the rod and step back, when the whole room seems to soften. All those evenings of small motifs suddenly become one big, light, happy thing in the window. It reminds me why I crochet in the first place, and I hope it does the same for you.
Switch Things Up
The easiest change is the color palette. Blue and cream is calm and fresh, but the design works with almost any pair. Try pink butterflies with white flowers for a nursery or a little girl's room, or sunny yellow butterflies with white flowers for a kitchen. Mint green butterflies with cream flowers feel like spring all year, and red butterflies with white flowers look cheerful in a farmhouse window. For something elegant, make white butterflies and white flowers and work the last round of each flower center in a soft golden yarn.
You can also change the width to fit your window. Each valance triangle adds about 15 cm (6 inches) of width, plus one more motif column and one more plain strand. For a narrow window, make 4 triangles, 5 motif columns and 4 plain strands, about 60 cm (24 inches) wide, with 30 butterflies and 30 flowers. For a wider window, keep adding triangles in the same way. Remember that the motif columns always number one more than the triangles, and the plain strands always match the triangles.
Length is just as simple to change. Each pair of motifs, one butterfly and one flower with their links, adds about 25 cm (10 inches). For a door about 210 cm (83 inches) tall, keep 6 triangles and work 14 motifs per column, which gives 98 motifs in all, 49 butterflies and 49 flowers. Add about 62 chains to each plain strand for every extra pair so the bottoms still line up. Always measure your window or door first and decide on the length before you make all the motifs.
- Narrow window: 4 triangles, 5 columns of 12 motifs, about 60 by 180 cm
- Standard window: 6 triangles, 7 columns of 12 motifs, about 90 by 180 cm
- Door: 6 triangles, 7 columns of 14 motifs, about 90 by 205 cm
- Room divider: 9 triangles, 10 columns of 16 motifs, about 135 by 230 cm
A room divider is a lovely way to split a big space without blocking the light. Make 9 triangles, 10 motif columns and 9 plain strands, with 16 motifs in each column, so you need 80 butterflies and 80 flowers. Hang it from a ceiling rod or a tension rod in a wide opening. Because people will walk past it often, I suggest working the links a little tighter so the strands do not stretch over time.
A short cafe curtain is a great first version if you want to try the design before committing to a full one. Keep the 6 triangles and 7 columns, but work only 6 motifs per column, which is 21 butterflies and 21 flowers. Shorten the plain strands by about 186 chains so they match. It hangs about 105 cm (41 inches) long and is perfect for the lower half of a kitchen window or a bathroom window where you want some privacy and lots of light.
For a doorway curtain that people walk through, skip the valance and work each strand straight from a yarn loop on the rod. Make 10 to 12 motif strands close together with no plain strands between them, so the opening looks full. Leave off the tassels or make them very small, because long tassels tangle quickly when people pass through. Choose a sturdy cotton and give each strand a good tug before you hang it, so it has already stretched as much as it will.
The tassels themselves are easy to play with. Wrap the yarn around a 6 cm piece of cardboard for small, neat tassels, or around a 15 cm piece for long, flowing ones that suit a tall window. You can also skip the tassels entirely and finish each strand with one more little cream flower. Blue tassels on the motif columns and cream tassels on the plain strands add a pretty touch of color along the bottom edge.
Finally, you can change the yarn weight. In a sport or DK cotton with a 3.5 mm (E-4) hook, the butterflies come out about 7 cm wide and the whole curtain shrinks to about 70 by 140 cm with the same counts. That is great for a small window or a little cabinet door. In a bulky cotton with a 6 mm (J-10) hook, everything grows, and you can cover a big window with fewer motifs. Whatever you choose, make one butterfly and one flower first and measure them before you plan the rest.
Materials Needed
— Main Fabric
— Tools Required
The Free Pattern
0% complete
— Small Flower (Make 42, cream) :
— Butterfly (Make 42, dusty powder blue) :
— Valance Triangle (Make 6, cream) :
— Valance Band (Make 1, cream) :
— Layout :
— Chain Links and Joining (Motif Columns, Make 7, cream) :
— Plain Strands (Make 6, cream) :
— Tassels (Make 13, cream) :
— Top Loops and Hanging (cream) :
Assembly Instructions
- Make all 42 small flowers and all 42 butterflies, sew the body onto each butterfly and lightly block every motif to the same size.
- Make the 6 valance triangles, join them across their tops with Rows 1 and 2 of the Valance Band, and mark the 7 corners where the motif columns attach.
- Lay the motifs out on the floor following the Layout, so columns 1, 3, 5 and 7 start with a butterfly and columns 2, 4 and 6 start with a flower.
- Work the 7 motif columns from the marked corners, joining each motif with the chain links as described in Chain Links and Joining.
- Work the 6 plain strands from the triangle points and check that every strand ends at the same level as the motif columns.
- Make the 13 tassels and tie one to the end of every strand, then trim all tassels to the same length.
- Work Row 3 of the Top Loops and Hanging section across the band, block the whole curtain flat, let it dry completely and slide it onto the rod.
Common Mistakes & How to Fix Them
The most common problem is motifs that slowly change size. You make ten butterflies on a relaxed evening and ten more on a busy afternoon, and suddenly some wings are clearly smaller. It happens because tension changes with mood, tiredness and even the chair you sit in. To avoid it, keep your first finished butterfly and first flower as samples and hold every new motif against them before you weave in the ends. If a motif is more than about half a centimeter off, make it again, or save the small ones for the bottom of a column where they show less.
Twisted strands are another easy mistake. A long chain likes to spiral, and if you carry it behind a motif with a twist, the next butterfly turns sideways and stays that way. This usually happens when you rotate the work while joining or when the chain gets wound around your hook hand. Before each sl st into a motif, let the strand hang straight from the valance so it untwists on its own. Check that the motif faces right side forward. If a motif keeps turning after blocking, pull out back to that join and redo it.
Uneven bottoms come from losing count on the long chains. The plain strands need about 395 chains, and it is very easy to drift ten or twenty chains off without noticing. When the curtain hangs, those extra centimeters show right away along the tassel line. Place a stitch marker after every 25 chains so you can recount in small groups, and always hold each plain strand next to a finished motif column before you fasten off. Measure the strands while the curtain hangs, since cotton stretches a little under its own weight and a strand that matched on the table can hang lower.
Breaking the checkerboard is a small slip that changes the whole look. If two neighboring columns both start with a butterfly, the blue lines up across the curtain in stripes instead of taking turns with the cream flowers. A similar mistake is joining a butterfly upside down, with the smaller lower wings at the top. Both happen when you pick motifs from the basket without a plan. Lay the whole grid out on the floor or a bed first, take a photo of it, and work each column straight from that layout, top motif first, checking the photo as you go.

You Might Also Like






Important Notes
Gauge matters here more than in a blanket, because every motif sits on its own and size differences are easy to see. With worsted cotton and a 5.0 mm hook, one flower should measure about 5.5 cm across and one butterfly about 9 cm wide and 7.5 cm tall after blocking. Make one of each before you buy all your yarn. If yours are bigger, go down a hook size, and if they are smaller, go up one, so the finished curtain still fits your window.
Blocking makes a big difference to this curtain. Soak the finished motifs in cool water, roll them in a towel to remove extra water and pin them flat on blocking mats, opening each lace space on the butterfly wings with your fingers. Pin the triangles so the points are sharp and the shell edges curve evenly. Let everything dry completely before you build the strands. After assembly, you can mist the whole curtain lightly and let it hang to straighten the chains.
Buy all your yarn at once and check that every ball of each color comes from the same dye lot. Cream shades can vary a lot between lots, and the difference shows clearly when daylight shines through the curtain. The amounts in the materials list already include a little extra for swatching and tassels. If you change the size, plan about 7 m of blue per butterfly and about 3.5 m of cream per flower, then add the chains, triangles and tassels.
The finished curtain weighs roughly 550 grams, which a normal curtain rod holds easily, but a thin tension rod may sag in the middle, so use a sturdy rod with good brackets. To wash it, hand wash in cool water with mild soap, adding a color catcher since blue and cream are washed together. Never wring the strands. Roll it in a towel, lay it flat to shape it, then hang it to finish drying.
I hope this curtain brings as much light and joy into your home as it has brought into mine. It looks like a big project when you see it finished, but it is really just one small butterfly and one small flower, made again and again on quiet evenings. Every motif you finish is a little win, and before you know it you will have a whole basket waiting to hang.
So grab your blue yarn and your hook, and make just one butterfly today. Hold it up to the window and watch the light come through its wings. I have a feeling you will want to make the next one right away. Happy crocheting, friend.
Crochet Abbreviations
You Ask, We Answer
How big is the finished curtain?
As written, the curtain measures about 90 cm wide and 180 cm long, which is roughly 35 by 71 inches, measured from the top of the hanging loops to the tips of the tassels. The six valance triangles each add about 15 cm of width, and each motif column of twelve motifs, with its lead chain and tail, hangs about 165 cm below the band. That size fits a standard single window or a narrow door. If your window is a different size, measure it first and then add or remove triangles for the width and pairs of motifs for the length, using the guide in the section on switching things up. Keep in mind that cotton stretches a little when it hangs, often one to three centimeters on a long strand. I like to hang the curtain for a day before I trim the tassels, so the final length is exactly where I want it.
Can I use a different yarn weight or make it a different size?
Yes, the design works in many yarn weights. A sport or DK cotton with a 3.5 mm hook gives smaller, daintier butterflies about 7 cm wide, and the curtain shrinks to about 70 by 140 cm with the same counts. A bulky cotton with a 6 mm hook makes everything larger, which helps cover a big window with fewer motifs. I suggest cotton or a cotton blend, because it holds its shape and hangs straight, while acrylic can be springy and the strands may curl. Whatever you choose, make one butterfly and one flower, block them, and measure them before planning. Then work out how many triangles fit your width and how many motif pairs fit your length. If you change yarn weight, also adjust the long plain strands, since a chain in thinner yarn is shorter, so you will need more chains to reach the same length.
How do I wash and care for the curtain?
Treat it gently and it will last for years. When it needs a wash, take it off the rod and hand wash it in cool water with a mild soap, swishing it slowly instead of rubbing. Add a color catcher sheet to the water, because the blue butterflies and cream flowers are washed together and you want the cream to stay clean. Do not wring or twist the strands, since that can tangle them and stretch the chains unevenly. Instead, lift the whole curtain out, press out the water, roll it in a large towel and lay it flat to shape it. Straighten each strand, smooth the butterfly wings and the triangle points, then hang it back on the rod to finish drying. Between washes, a light shake and a gentle dusting with a soft brush keep it fresh. Keep it out of strong direct sun for long periods, as cotton can fade over time.
Success!
Thanks for subscribing — check your inbox for a welcome note.
Abbreviations
- ch — chain
- sl st — slip stitch
- sc — single crochet
- hdc — half double crochet
- dc — double crochet
- sk — skip
- st — stitch
- sts — stitches
- sp — space
- sps — spaces
- ch-sp — chain space (for example ch-3 sp is the space under 3 chains)
- tch — turning chain