
Cream Lace Crochet Bed Cover Pattern with Red 3D Tulip Flowers
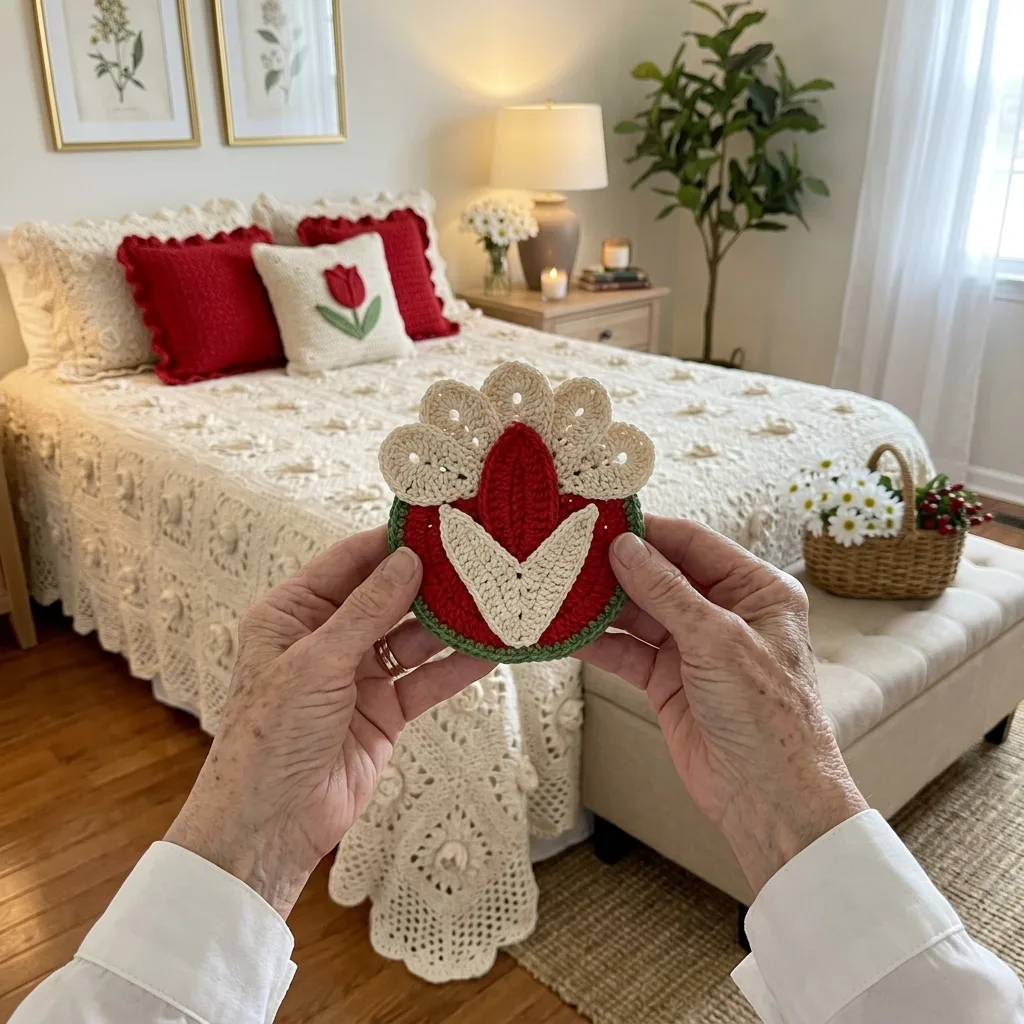
Simple lace squares, small shaped flower pieces and a little sewing, all repeated.
Lace squares and flowers are made one at a time, so you can work in short evenings.
Forty-two raised tulips in cream, red and green sit on a field of soft daisy lace.
About This Cream Lace Crochet Bed Cover Pattern with Red 3D Tulip Flowers Pattern
This cover feels like a quiet garden that has been laid across a bed. The ground is soft cream lace, made of small daisy squares joined into one big sheet, and on top of the lace sits a field of large 3D flowers. Each flower has a pointed cream petal in front, a ribbed red leaf behind it and a crown of five cream fans around the top, and all of it rests on a round red base with a green rim. From a distance the red and green look like little slices of watermelon, and up close they look like tulips opening in the sun.
The lace ground is built from 49 squares, and each square is 12 inches across. Every square starts at a little eight-petal daisy in the center, and the rounds grow outward into a square of open net with a firm single crochet edge. I chose size 5 cotton and a 2.25 mm hook for the ground, which gives a lace that is open enough to show the flowers off but strong enough to hang from the side of a bed. The squares are joined with a slip stitch seam, so the lace reads as one piece.
The flowers are made on their own, in a thicker cotton, and sewn on afterwards. That is the secret of this design. You can make a flower while a lace square dries after blocking, and you can see right away how the finished cover will look. There are 42 flowers on the cover, set in a grid of 7 columns and 6 rows. The 7 columns include the two side drops, so the flowers continue over the edge of the mattress, just as they do in the photo, and every flower points toward the foot of the bed. The last row of squares, at the foot, is plain lace.
The finished cover measures about 84 by 84 inches. The top of the bed is covered by 5 columns and 6 rows, and the side drops and the foot drop add 12 inches each. The head end is left open, because the pillows hide it. A scalloped lace edge, made of 168 little shells with a picot on top of each one, runs along both sides and across the foot. It is soft and rounded, and it moves a little when you walk past the bed.
A cover like this deserves a matching set, and the photo shows one. I replaced every fabric pillow with a crochet one. Two red pillows, textured and ruffled, echo the red centers of the flowers. Two cream lace pillows with ruffles sit behind them, and one cream lace pillow with a single tulip flower in the middle sits in front, in the place of the embroidered one. Everything on the bed is crochet, and every color comes from the cover.
This is an intermediate pattern with a lot of repeats. The lace squares use only chains, double crochets and single crochets. The flowers need some shaping, with increases, fans and a little sewing, but each piece is small and quick. Allow about 7 to 9 months of evenings for the whole cover. If you make one lace square and one flower first, you will know the whole pattern, because everything after that is the same again.
Why You'll Love This Cream Lace Crochet Bed Cover Pattern with Red 3D Tulip Flowers Pattern
I love this cover because it is both delicate and bold. The cream lace is as light as a tablecloth, and the red flowers are the kind of color you notice from across the room. Together they look calm and festive at the same time. I can see it on a bed in summer with the window open, or in December with a candle on the nightstand, and I think it would look right in both.
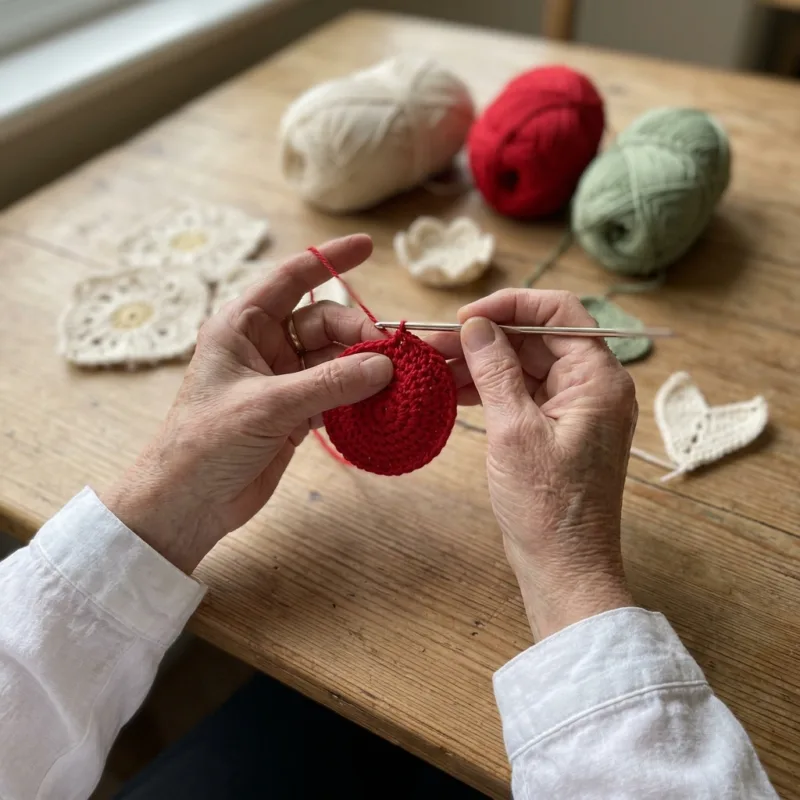
I love the two speeds of the project. The lace squares are slow and steady, a repeat you can work while you talk or watch a film. The flowers are the fun part. Each one grows from a tiny disc into a small sculpture, and when you sew the crown and the pointed petal onto the base, it suddenly looks like a real flower. I like to make one flower after every second square, as a reward.
I love how forgiving the build is. If one flower comes out a little taller than the others, nobody will notice, because each flower sits in its own square of lace. If one square is a quarter of an inch off, blocking will fix it. And because the flowers are sewn on at the end, you can lay them out on the finished lace, move them around and stand back before you take a single stitch. Here is what I enjoy most about this design:
- Lace squares that give a small win every time
- Flowers that look like real tulips
- Pieces you can make in any order
- A scalloped edge that frames the whole cover
I love the colors too. Cream, red and a thin line of green is a very classic combination, and it works in a hundred different rooms. The green rim around each red base is a small detail, but it is the thing that makes the flower look finished. It reminds me of the leaves at the base of a real tulip, and it ties the cover to the plants in the room.
This is also a cover that can be passed down. Cotton lace gets softer with every wash, and the 3D flowers are sewn on firmly, so they last. I think of a wedding gift, a housewarming gift or a cover that comes out for family visits. If you make it, stitch a small label inside one corner with your name and the year, and the next person to own it will know who made it.
Finally, I love the moment when the last flower is sewn on. You spread the cover over the bed, the lace falls into soft folds, and the flowers line up in their rows like a garden after rain. You will have spent months on it, and you will see every evening of those months in it. That is a very special feeling, and I hope you get to have it.
One more thing I love is how the cover photographs. The raised flowers throw small shadows onto the lace, so the pattern changes through the day, soft in the morning and deeper in the evening lamplight.
Switch Things Up
Cream and red is the classic version, but the design is friendly to any palette. For a cool, quiet room, try ivory lace with dusty blue flowers, a silver-gray rim and a pale gray leaf. For a warm autumn bed, use cream lace with rust flowers, a golden-yellow base and an olive rim. For a sweet nursery or a girl's room, try white lace with soft pink flowers and a sage-green rim. For a bold winter bed, use ivory lace with deep burgundy flowers and a dark pine rim. Keep the same flower colors in every flower, so the garden looks even.
The squares are 12 inches, so every size is easy to count. These are the grids I suggest, written as columns by rows, with the foot row always plain lace:
- Twin: 5 columns by 7 rows, 35 squares, 30 flowers, about 60 by 84 inches
- Full: 6 columns by 7 rows, 42 squares, 36 flowers, about 72 by 84 inches
- Queen: 7 columns by 7 rows, 49 squares, 42 flowers, about 84 by 84 inches (as written)
- King: 8 columns by 7 rows, 56 squares, 48 flowers, about 96 by 84 inches
The cover in the photo falls almost to the floor. If your bed is high, or you like a long drop, add one more column down each side and one more row at the foot. A queen then becomes 9 columns by 8 rows, which is 72 squares, with 54 flowers on the first six rows and plain lace on the last two. That cover measures about 108 by 96 inches, so plan to wash it in a bathtub, and ask a helper to lift it.
A smaller version makes a lovely throw. Join 4 columns by 5 rows, 20 squares, for a throw of about 48 by 60 inches, put a flower on every square and work the scalloped edge on all four sides. You can also join 7 squares in one row for a table runner or a bed runner of about 12 by 84 inches, with a flower on every second square. Both are good ways to try the pattern before you commit to the whole cover.
For a baby, make only the lace squares, 3 columns by 3 rows, for a blanket of about 36 by 36 inches in soft washable cotton, and leave off the 3D flowers and the picots. Raised flowers can be pulled and put into a mouth, and picots can catch small fingers. If you want a flower, make one flat, on a single square, and sew it with many small stitches. A baby must never sleep under a lace blanket, so use it for play and for cuddles.
The pillows are a project of their own. A single lace square with one flower and a ruffle makes a lovely 12 inch cushion, and it is the best way to test the pattern before you start the cover. You can also change the red pillows to match your new palette, so that the pillows always repeat the color of the flower bases.
The pattern uses size 5 cotton for the lace and worsted cotton for the flowers. For a finer lace, use size 10 thread and a 1.5 mm hook for the squares. They will shrink to about 9 inches, so a queen needs 9 columns by 9 rows. For a quicker cover, use worsted cotton and a 3.5 mm hook for the lace too, stop each square a few rounds early, and measure. If the scalloped edge is too much for you, a plain single crochet edge or a simple picot edge also looks very good. Always make a test square first.
Materials Needed
— Main Fabric
— Tools Required
The Free Pattern
0% complete
— Daisy Lace Square (Make 55: 49 for the cover and 6 for the pillows; cream size 5 cotton; 2.25 mm hook) :
— Flower Base (Make 43; red and green worsted cotton; 3.5 mm hook) :
— Flower Crown (Make 43; cream worsted cotton; 3.5 mm hook) :
— Flower V Petal (Make 43; cream worsted cotton; 3.5 mm hook) :
— Flower Leaf (Make 43; red worsted cotton; 3.5 mm hook) :
— Flower Assembly (Make 43) :
— Layout (Joining the Cover and Placing the Flowers) :
— Scalloped Edge (cream size 5 cotton; 2.25 mm hook) :
— Pillows (2 red, 2 cream lace and 1 flower pillow) :
Assembly Instructions
- Make 55 Daisy Lace Squares through Rnd 19 and block each one to 12 inches.
- Make 43 Flowers: a Base, a Crown, a V Petal and a Leaf for each, and assemble them as shown in the Flower Assembly section.
- Lay 49 squares in a grid of 7 by 7, join them into 7 strips of 7, then join the 7 strips.
- Sew 42 Flowers onto rows 1 to 6 of the grid, with every V Petal pointing toward the foot, and leave row 7 plain.
- Work the Scalloped Edge along both long sides and the foot: the single crochet round, the shells and the picots.
- Make the 2 Red Pillows, with panels, closing and ruffle.
- Make the 2 Cream Lace Pillows from 4 squares and the Flower Pillow from 2 squares and 1 Flower.
- Spread the cover over the bed, with the head end under the pillows, and arrange the 5 pillows.
Common Mistakes & How to Fix Them
Skipping the test square. A lace square that measures 13 inches instead of 12 makes a cover that is 7 inches too wide, and you will not see it until the squares are joined. Make one full square first, block it and measure it. It should be 12 inches. If it is larger, go down a hook size, and if it is smaller, go up. While you are at it, make one flower too, and lay it on the square to check that it fills about two thirds of the width.
Sewing the flowers on crooked. All 42 flowers point toward the foot, and a flower that leans to one side is easy to see in a long row. Lay out the finished lace on the floor, set every flower in place with a pin and stand back before you sew. Use a ruler to check that each V petal points straight down the square and that each flower sits in the center. Sew with matching thread and small stitches, so nothing flaps when the cover is washed. Take a photo of the layout before you sew, so you can compare it later.
Making the fans too tight. The crown only looks like soft petals if the 9 double crochets in each fan lie loose and curved. A tight fan pulls the strip flat, and the petals stand up like a stiff comb. Work the double crochets with a relaxed hand, pull each loop up a little taller than usual, and pin each fan into a round shape while it is damp. If a fan is very flat, rip it out, because blocking will not fix it. Check the first fan against the next four, and keep that same tension for every crown you make.
Joining the squares in a hurry. When two squares are joined with the wrong sides out, a ridge shows on the right side or the corners do not meet. Hold the squares with the wrong sides together, match each corner first, and then work slip stitches through the back loops of both. Add one extra slip stitch where four corners meet, so no hole opens. Check the first seam on the right side, because there are 48 seams in all. Weave the seam ends into the seam itself, so nothing shows on the right side, and keep the lace flat while you join.

You Might Also Like






Important Notes
Gauge: the test square is your gauge. In size 5 cotton and a 2.25 mm hook it should measure 12 inches square after blocking, with 64 sc on each side of Rnd 19. The flower base, in worsted cotton and a 3.5 mm hook, should measure about 5 inches across after Rnd 7. If your pieces are too big, go down a hook size, and if they are too small, go up. Check one of each before you start the other 54 squares and 42 flowers.
Blocking: pin each lace square flat on foam mats, mist it with water and let it dry for a full day. Pin the four corners first, then the middle of each side, so the square is exactly 12 inches. Block each flower separately, shaping the fans into round petals and the V into a smooth point, and let it dry before you sew. Do not starch the lace heavily, because the cover must drape over the sides of the bed.
Yarn amounts: the totals are estimates, so buy 10 percent extra of every color and take it all from one dye lot. Cream shows differences between lots more than any other color, and the red can vary too. Wind a few balls ahead of time, and keep a small ball of each color for repairs. Write the lot number on a card and keep it with the pattern, so you can match it later.
Washing: wash the cover by itself in cool water and a mild soap, and add a color catcher sheet, because the red can bleed into the cream, especially in the first wash. Test one flower first. Never use bleach or hot water. Lift the wet cover on a large towel without wringing it, and dry it flat. Gently shape the flowers while they dry, so the fans keep their round form.
This cover is a long project, and it is a happy one. The first lace square and the first flower take the longest, because you are learning the rounds, but the second ones go faster, and by the tenth you will know both by heart. Make one piece at a time, keep your test square and take your time with the sewing. When the cover is on the bed, the months you spent will look small next to the result.
I would love to see yours. Tell me which colors you chose, how many flowers you have finished and which part you enjoyed most, the lace or the tulips. If a round or a count puzzles you, leave a comment and I will help you find the answer. Happy crocheting, and thank you for stitching along with me.
Crochet Abbreviations
You Ask, We Answer
How big is the finished bed cover?
The finished cover measures about 84 by 84 inches. That gives a top of about 60 by 72 inches, which fits a queen bed with the pillows covering the head end, and a drop of about 12 inches on both sides and at the foot. Each lace square is 12 inches, and the cover is made of 49 squares in a grid of 7 by 7, with 42 flowers on top. Your size depends on your tension, so make a test square first and measure it after blocking. The cover weighs about 7 kilograms with the flowers, so ask a helper to lift it. For a longer drop, see the floor-length version in the switch things up section. If you want to check the fit, lay a few squares on your mattress before you join them, and measure the drop on the side and at the foot, so you can add a row if your bed is high.
Can I use a different yarn weight or make another size?
Yes. The pattern uses size 5 cotton for the lace and worsted cotton for the flowers. For a finer lace, use size 10 thread and a 1.5 mm hook for the squares, and expect them to shrink to about 9 inches, which means 9 columns by 9 rows for a queen. For other beds, follow the grids in the switch things up section, from 35 squares for a twin to 56 for a king. Always make a test square and a test flower in the new yarn, block them, measure them and recalculate the grid before you start the rest. Keep the same three flower colors throughout, so the garden looks even. Write down your final counts on a card so you can repeat the cover later. If you change the yarn, keep the flowers in a thicker cotton than the lace, because the contrast in weight is what gives the flowers their raised look.
How do I wash and care for it?
Wash the cover by itself, by hand or on the gentlest machine cycle, in cool water with a mild soap, and add a color catcher sheet, because the red can bleed into the cream. Do not wring or twist it, and never use bleach. Lift it out in a large towel and press the water out gently. Dry it flat on towels and shape the flowers with your fingers while they are damp. Never hang the wet cover, because the weight of the cotton will stretch the lace. Check the seams and the sewn flowers after each wash, and re-sew any that feel loose. Store it loosely folded in a cotton pillowcase, away from strong sun. If a flower comes loose, sew it back on with matching thread and small stitches, and do not pull the thread tight. A little care after each wash will keep the cover looking new for many years.
Success!
Thanks for subscribing — check your inbox for a welcome note.
Abbreviations
- ch — chain
- sl st — slip stitch
- sc — single crochet
- hdc — half double crochet
- dc — double crochet
- BLO — back loop only
- st — stitch
- sts — stitches
- sp — space
- sps — spaces
- rnd — round
- mm — millimeter
- yd — yard