
Amanda's Creative Corner Crochet · Kitchen
Free Crochet Patterns Handmade with Love

Pumpkin Granny Square Bed Cover Crochet Pattern
Jump to Pattern
Pumpkin Granny Square Bed Cover Crochet Pattern
320-380 Hours 3 made this
Beginner Friendly

If you can chain, sc and dc, you can make every square.

320-380 Hours

Each square takes about two and a half hours, so this is a cozy project for the whole season.

Portable Squares

Every pumpkin square is small enough to crochet anywhere.

About This Pumpkin Granny Square Bed Cover Crochet Pattern Pattern

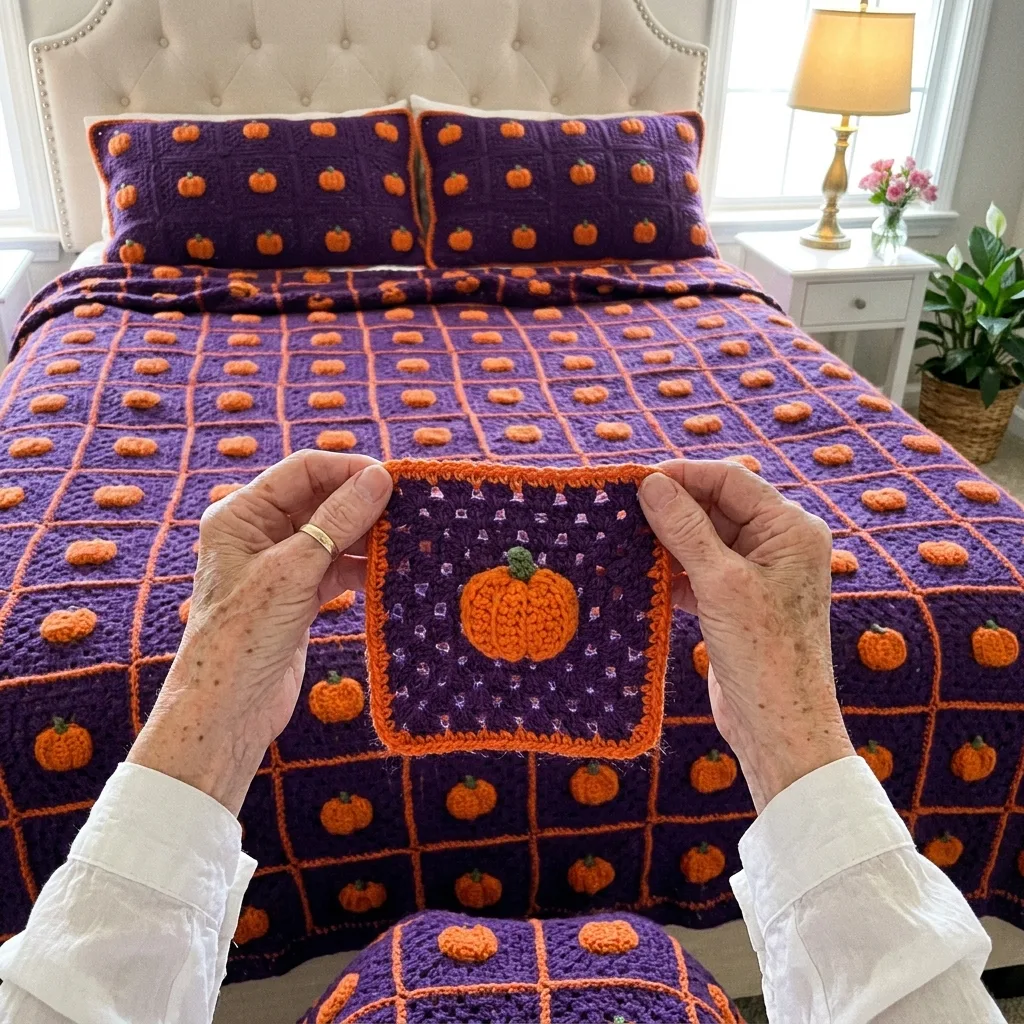
This bed cover is made from 120 deep purple granny squares. Each one has a plump orange pumpkin with a little green stem sewn to the center, and a bright orange border. The squares are joined with raised orange seams and the whole cover is finished with a scalloped orange edge.

It measures about 77 by 92 inches, which suits a queen bed with a soft drop on each side. You will use single crochet, double crochet, a magic ring and a little surface slip stitch. It is a happy first big project if you already know the basic granny square.
Pumpkin Granny Square Bed Cover Crochet Pattern step detail

Why You'll Love This Pumpkin Granny Square Bed Cover Crochet Pattern Pattern

I love that this big bed cover is really just one small square at a time. I keep a bag with purple, orange and green yarn by my chair, and a pumpkin is done before my tea gets cold.

I also love how the orange seams glow against the purple when the lamp is on. It makes the whole bedroom feel like autumn, and every finished square is a small win you can see.

Switch Things Up

Try cream pumpkins on charcoal squares with a soft grey seam, or blush pumpkins on deep teal. Make 6 by 8 squares for a lap blanket, or 5 by 6 for a baby blanket. You can also crochet one square into a pillow cover to match the bed. For a quicker finish, replace the scalloped edge with two rounds of single crochet.


Materials Needed

— Main Fabric

01 Worsted weight cotton yarn in deep purple: about 4,800 yards (about 2,400 g) for the 120 squares
02 Worsted weight cotton yarn in bright orange: about 3,200 yards (about 1,600 g) for the square borders, the pumpkins, the joining and the edge
03 Worsted weight cotton yarn in sage green: about 150 yards (about 80 g) for the stems
04 Buy a little extra of each color, since dye lots can vary

— Tools Required

05 4.0 mm (G) crochet hook, or the size that gives you a firm fabric
06 Yarn needle
07 Stitch markers (for marking the start of the pumpkin rounds)
08 Scissors
09 Blocking mats and pins
10 Measuring tape

The Free Pattern

Beginner 320-380 Hours

0% complete

— Purple Granny Square (Make 120, deep purple with an orange border) :

Rounds 1 to 6 are worked in deep purple and joined at the end of each round. Do not turn. Round 7 is the orange border.
Round 1: Make a magic ring, ch 3 (counts as dc), 2 dc in ring, ch 2, *3 dc in ring, ch 2; repeat from * 2 more times, sl st to top of beginning ch 3. (12 dc, 4 ch-2 sps)
Round 2: Sl st in next 2 dc and into the first ch-2 sp. Ch 3 (counts as dc), 2 dc, ch 2, 3 dc in same sp for the first corner. *Dc in each of next 3 dc, (3 dc, ch 2, 3 dc) in next ch-2 sp; repeat from * 2 more times, dc in each of next 3 dc, sl st to top of beginning ch 3. (36 dc, 4 corner ch-2 sps)
Round 3: Sl st in next 2 dc and into the first ch-2 sp. Ch 3 (counts as dc), 2 dc, ch 2, 3 dc in same sp. *Dc in each of next 9 dc, (3 dc, ch 2, 3 dc) in next ch-2 sp; repeat from * 2 more times, dc in each of next 9 dc, sl st to top of beginning ch 3. (60 dc, 4 corner ch-2 sps)
Round 4: Sl st in next 2 dc and into the first ch-2 sp. Ch 3 (counts as dc), 2 dc, ch 2, 3 dc in same sp. *Dc in each of next 15 dc, (3 dc, ch 2, 3 dc) in next ch-2 sp; repeat from * 2 more times, dc in each of next 15 dc, sl st to top of beginning ch 3. (84 dc, 4 corner ch-2 sps)
Round 5: Sl st in next 2 dc and into the first ch-2 sp. Ch 3 (counts as dc), 2 dc, ch 2, 3 dc in same sp. *Dc in each of next 21 dc, (3 dc, ch 2, 3 dc) in next ch-2 sp; repeat from * 2 more times, dc in each of next 21 dc, sl st to top of beginning ch 3. (108 dc, 4 corner ch-2 sps)
Round 6: Sl st in next 2 dc and into the first ch-2 sp. Ch 3 (counts as dc), 2 dc, ch 2, 3 dc in same sp. *Dc in each of next 27 dc, (3 dc, ch 2, 3 dc) in next ch-2 sp; repeat from * 2 more times, dc in each of next 27 dc, sl st to top of beginning ch 3. Fasten off. (132 dc, 4 corner ch-2 sps, 33 dc along each side between the corners)
Round 7: Join orange in any corner ch-2 sp. Ch 1, 3 sc in same sp, *sc in each of next 33 dc, 3 sc in next corner ch-2 sp; repeat from * 2 more times, sc in each of next 33 dc, sl st to first sc. Fasten off and weave in ends. (144 sc, 33 sc along each side and 3 sc in each corner)
Your square should measure about 7.5 inches across after blocking. If yours is smaller or larger, change the hook size, since the layout depends on this size.

— Pumpkin Appliqué (Make 120, bright orange) :

The pumpkin is worked in a continuous spiral without joining. Mark the first stitch of each round.
Round 1: Make a magic ring, 8 sc in ring. (8 sts)
Round 2: 2 sc in each st around. (16 sts)
Round 3: *Sc in next st, 2 sc in next st; repeat from * 7 more times. (24 sts)
Round 4: *Sc in next 2 sts, 2 sc in next st; repeat from * 7 more times. (32 sts)
Round 5: *Sc in next 3 sts, 2 sc in next st; repeat from * 7 more times. (40 sts)
Round 6: *Sc in next 4 sts, 2 sc in next st; repeat from * 7 more times. (48 sts)
Round 7: Sc in each st around, sl st in next st. Fasten off, leaving a long tail for sewing. (48 sts)
Ribs: with the right side facing, insert your hook between stitches at the top edge, then work a line of surface slip stitch in orange yarn in a gentle curve down toward the center, about 7 sl sts long. Make 4 curved lines, 2 on each side of the middle, so the pumpkin looks ribbed. Pull the yarn snug so the disc puffs slightly. Fasten off and weave in the ends.
Your pumpkin should measure about 3 inches across. Sew it to the center of a purple square after blocking the square.

— Stem (Make 120, sage green) :

Row 1: Ch 5, sl st in 2nd ch from hook, sc in next 3 chs. Fasten off, leaving a long tail for sewing. (4 sts)
Sew the stem to the top of the pumpkin, leaning it slightly to one side so it looks natural.

— Layout :

Arrange the squares in a grid of 10 columns by 12 rows (120 squares). Every square has its pumpkin sewn on with the stem pointing up toward the headboard.
Finished size before the edge: about 75 by 90 inches. The edge adds about 1 inch on every side, so the finished cover is about 77 by 92 inches.

— Edge (bright orange) :

Round 1: Join orange at any outer corner. Sc in each of the 33 side sc along every outer square edge, work 1 sc in each seam where two squares meet, and work 3 sc in the center corner sc of each of the 4 outer corners. Top and bottom edges: 10 x 33 + 9 seams = 339 sc each. Left and right edges: 12 x 33 + 11 seams = 407 sc each. Corners: 4 x 3 = 12 sc. Sl st to first sc. (339 + 339 + 407 + 407 + 12 = 1,504 sc)
Round 2: Ch 1, *sc in next st, skip 3 sts, 5 dc in next st, skip 3 sts; repeat from * around, 188 times in all, sl st to first sc. Fasten off and weave in ends. (188 shells of 5 dc, 188 sc, 8 sts per repeat, 1,504 sts used)
Check your Round 1 total before starting Round 2. The count must divide by 8. If you are off by a few stitches, adjust by working or skipping a stitch along a flat stretch, never at a corner.

Assembly Instructions

  1. Block every purple square to about 7.5 inches across and let it dry fully before sewing or joining.
  2. Sew each orange pumpkin to the center of a purple square with the long tail and a yarn needle, using small whip stitches around the edge, then sew a green stem to the top of each pumpkin.
  3. Lay out the 120 squares on a bed or floor in 10 columns and 12 rows, so every pumpkin faces the same way.
  4. Join the squares into strips first. Hold two squares with wrong sides together and slip stitch through both loops of both orange borders with orange yarn, so a raised orange ridge shows on the right side.
  5. Join the 12 strips the same way, matching the corners so the orange seams cross neatly.
  6. Work the orange edge in two rounds around the whole outer edge, following the Edge section.
  7. Weave in any remaining ends and trim them close.
  8. Block the whole bed cover gently on a clean floor or bed with pins, then let it dry flat.

Common Mistakes & How to Fix Them

Sewing the pumpkins on before blocking the squares can pull the stitches out of shape, so block first and then sew.

Letting your squares come out different sizes makes the grid wavy, so measure after blocking and keep the same hook for all 120.

Pulling the ribs too tight makes the pumpkin cup instead of puff, so keep the surface slip stitches snug but relaxed.

Starting the edge without counting the stitches can make the shells uneven, so count Round 1 and divide by 8 first.


Denise

Denise designs cozy home decor crochet patterns and loves turning small motifs into big, comforting projects.


Important Notes

Gauge: one finished square should be about 7.5 inches across. Make one first and block it before you start the rest.

The stitch counts and yarn amounts are estimates, so test-swatch one square and one pumpkin before you commit to the whole bed cover.

Wash in cool water on a gentle cycle and lay flat to dry. The deep purple and bright orange are dark and light yarns together, so use a color catcher the first time you wash it.


I hope this pumpkin bed cover brings a little autumn glow to your bedroom. Take it one square at a time, and I would love to hear which color you pick for your pumpkins.

Crochet Abbreviations

01 ch — chain
02 sc — single crochet
03 dc — double crochet
04 sl st — slip stitch
05 sp — space
06 st(s) — stitch(es)

You Ask, We Answer

How big is the finished bed cover?

It measures about 77 by 92 inches with the edge, which covers a queen bed with a soft drop. Make fewer squares for a throw or baby blanket.

Can I use a different yarn weight?

Yes. Thinner yarn with a smaller hook makes smaller squares, so you will need more of them to cover the same size. Always check your square size before you change the layout.

How do I wash and care for it?

Use cool water and a gentle cycle, with a color catcher for the first wash. Lay it flat to dry and reshape the shells by hand while it is damp.





