Amanda's Creative Corner Crochet · Kitchen
Free Crochet Patterns Handmade with Love

Sitting Cow Amigurumi Pattern with Chenille Yarn
Jump to Pattern
Sitting Cow Amigurumi Pattern with Chenille Yarn
6 to 8 hours 3 made this
Intermediate level

You need to know the magic ring and how to change colours in the round.

6 to 8 hours

Most makers finish this cow over a long weekend.

Soft and huggable

Chunky chenille yarn gives her a plush, velvety feel.

About This Sitting Cow Amigurumi Pattern with Chenille Yarn Pattern

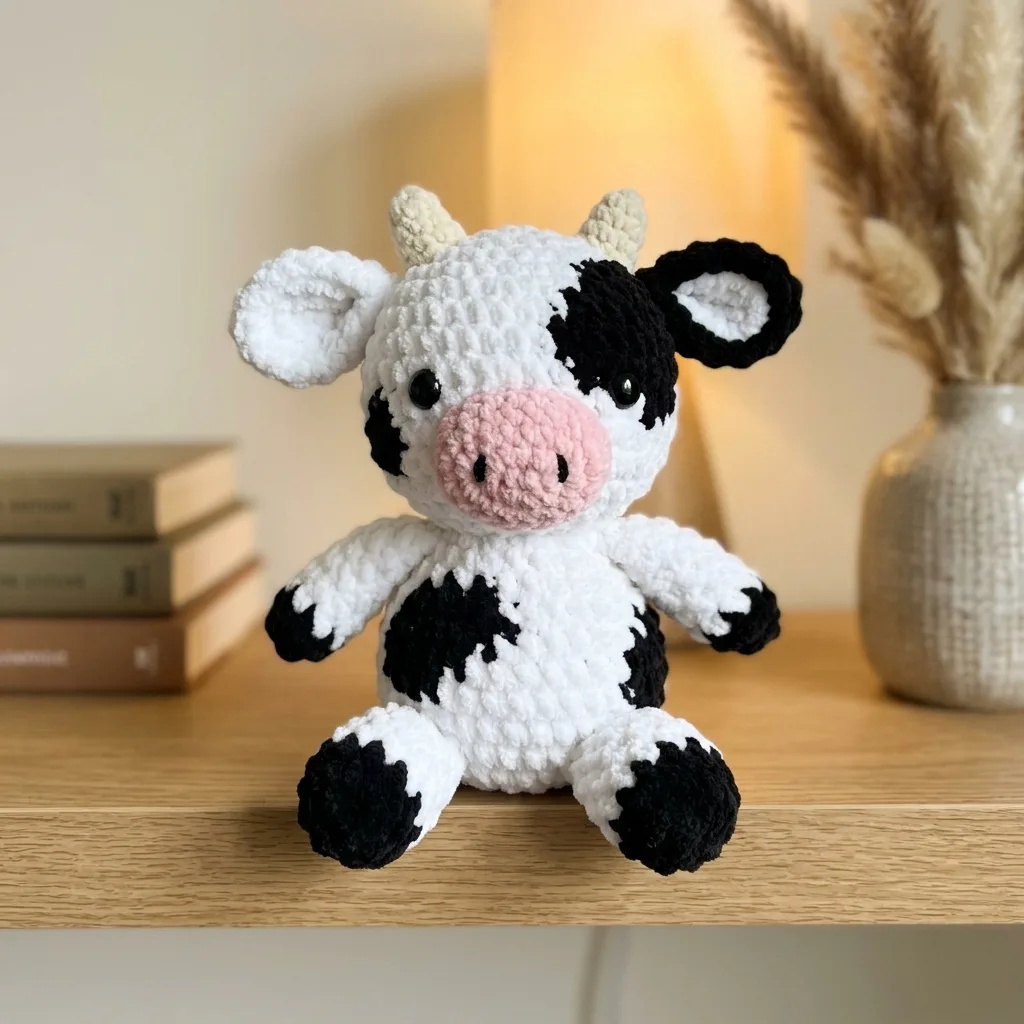
This sweet little cow sits up straight with her chin high and her legs stretched out in front. She is worked in white chenille yarn with a pink muzzle, small cream horns, black patches and black feet. She measures about 9 inches (23 cm) tall when seated.

You will use the magic ring, spiral rounds, simple colour changes and basic sewing. She suits crocheters who have finished a few amigurumi and want a cuddly project with some colour work.
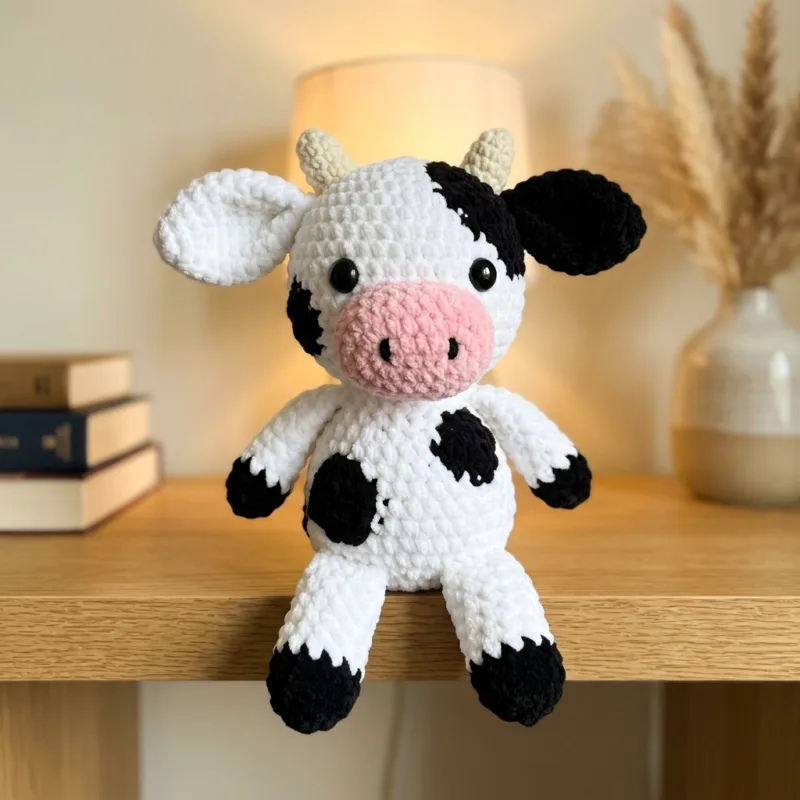
Sitting Cow Amigurumi Pattern with Chenille Yarn step detail

Why You'll Love This Sitting Cow Amigurumi Pattern with Chenille Yarn Pattern

I love how this cow looks so calm and sweet. The soft yarn makes her feel like a real plush toy from a shop, but every stitch is yours.

The black patches look hard, but they are only short colour changes. Take your time and you will be proud of her.

Switch Things Up

Try a brown and white cow for a farmhouse look. Make her in pink and cream for a baby gift. Add a tiny flower or a bell on a ribbon around her neck. You can also leave off the patches and make a plain white calf.


Materials Needed

— Main Fabric

01 Chunky chenille yarn (weight 5, bulky): about 100 g white
02 Chunky chenille yarn: about 50 g black
03 Chunky chenille yarn: about 10 g pink
04 Chunky chenille yarn: about 10 g cream
05 Polyester fiberfill stuffing
06 One pair of 12 mm black safety eyes
07 Black embroidery floss for the nostrils

— Tools Required

08 5 mm (H-8) crochet hook
09 Yarn needle
10 Stitch markers
11 Scissors
12 Pins

The Free Pattern

Intermediate 6 to 8 hours

0% complete

— Head :

Start with white. The black patch sits on one side of the head. Use a small separate ball of black and carry the white yarn behind the work.
Round 1: 6 sc in magic ring (6)
Round 2: inc in each st around (12)
Round 3: [sc, inc] 6 times (18)
Round 4: [2 sc, inc] 6 times (24)
Round 5: [3 sc, inc] 6 times (30)
Round 6: [4 sc, inc] 6 times (36)
Round 7: [5 sc, inc] 6 times (42)
Round 8: [6 sc, inc] 6 times (48)
Round 9: [7 sc, inc] 6 times (54)
Round 10-19: sc in each st around (54)
From Round 6 to Round 16, work about 10 stitches in black on the right side of the head to make the patch. Add a smaller black patch of 4 stitches on the left cheek around Rounds 14 to 17.
Push the safety eyes between Rounds 14 and 15, about 8 stitches apart. Do not close the backs yet.
Round 20: [7 sc, dec] 6 times (48)
Round 21: [6 sc, dec] 6 times (42)
Round 22: [5 sc, dec] 6 times (36)
Round 23: [4 sc, dec] 6 times (30)
Round 24: [3 sc, dec] 6 times (24)
Stuff the head firmly now, then keep stuffing as the hole gets smaller.
Round 25: [2 sc, dec] 6 times (18)
Round 26: [sc, dec] 6 times (12)
Round 27: dec 6 times (6)
Fasten off, thread the tail through the front loops of the last 6 stitches, pull tight and weave in the end.

— Muzzle :

Use pink yarn.
Round 1: 6 sc in magic ring (6)
Round 2: inc in each st around (12)
Round 3: [sc, inc] 6 times (18)
Round 4: [2 sc, inc] 6 times (24)
Round 5-7: sc in each st around (24)
Fasten off and leave a long tail for sewing. Stuff lightly. Embroider two short slanted nostrils with black floss before sewing it on.

— Ears (Make 2) :

Make one ear in white and one ear in black.
Round 1: 6 sc in magic ring (6)
Round 2: inc in each st around (12)
Round 3: [sc, inc] 6 times (18)
Round 4: sc in each st around (18)
Round 5: [sc, dec] 6 times (12)
Do not stuff. Fasten off and leave a long tail. Flatten the ear so it forms a soft cup.

— Ear Lining (Make 1) :

Use white yarn. This small disc goes inside the black ear.
Round 1: 6 sc in magic ring (6)
Round 2: inc in each st around (12)
Fasten off and leave a tail for sewing.

— Horns (Make 2) :

Use cream yarn. You start at the tip.
Round 1: 6 sc in magic ring (6)
Round 2: [sc, inc] 3 times (9)
Round 3: sc in each st around (9)
Round 4: [2 sc, inc] 3 times (12)
Round 5-6: sc in each st around (12)
Stuff lightly. Fasten off and leave a long tail.

— Body :

Start with white. Add black patches on the chest and sides with small separate balls of black, the same way as on the head.
Round 1: 6 sc in magic ring (6)
Round 2: inc in each st around (12)
Round 3: [sc, inc] 6 times (18)
Round 4: [2 sc, inc] 6 times (24)
Round 5: [3 sc, inc] 6 times (30)
Round 6: [4 sc, inc] 6 times (36)
Round 7: [5 sc, inc] 6 times (42)
Round 8: [6 sc, inc] 6 times (48)
Round 9-14: sc in each st around (48)
Work 2 or 3 small black patches of 5 to 8 stitches between Rounds 8 and 16.
Round 15: [6 sc, dec] 6 times (42)
Round 16: [5 sc, dec] 6 times (36)
Round 17-19: sc in each st around (36)
Round 20: [4 sc, dec] 6 times (30)
Round 21: [3 sc, dec] 6 times (24)
Round 22: sc in each st around (24)
Stuff firmly, making the bottom flat so she sits well. Fasten off and leave a long tail.

— Back Legs (Make 2) :

Start with black for the foot.
Round 1: 6 sc in magic ring (6)
Round 2: inc in each st around (12)
Round 3: [sc, inc] 6 times (18)
Round 4-5: sc in each st around (18)
Change to white in the last stitch of Round 5. Keep the colour change a little jagged for a patchy look.
Round 6-9: sc in each st around (18)
Stuff firmly. Fasten off and leave a long tail.

— Front Legs (Make 2) :

Start with black for the hoof.
Round 1: 6 sc in magic ring (6)
Round 2: inc in each st around (12)
Round 3-4: sc in each st around (12)
Change to white in the last stitch of Round 4.
Round 5-9: sc in each st around (12)
Stuff firmly. Fasten off and leave a long tail.

Assembly Instructions

  1. Stuff the head and body firmly, then pin the head onto the top of the body so the face looks forward and slightly up. Sew all the way around with the long tail.
  2. Pin the muzzle on the front of the head over Rounds 15 to 20 and sew it on with small stitches. Stuff a little more through the gap before closing.
  3. Sew the white ear to the viewer's left side of the head, near Round 9. Sew the white lining disc inside the black ear, then sew the black ear to the other side at the same height.
  4. Sew one cream horn above each ear on Round 6, slightly toward the front.
  5. Sew the front legs to the front of the body at Round 12, side by side. Sew the back legs on each side of the bottom at Round 5, with the feet pointing forward.
  6. Weave in all ends, trim any loose fibres and brush the chenille lightly with your fingers to make it fluffy.

Common Mistakes & How to Fix Them


Denise

I am Denise, and I design cuddly crochet toys that are easy to follow and fun to make.


Important Notes


I hope you enjoy making this little cow as much as I did. Share her with someone who needs a cuddle.

Crochet Abbreviations

01 sc — single crochet
02 inc — increase (2 sc in the same stitch)
03 dec — decrease (sc 2 stitches together)
04 st — stitch

You Ask, We Answer

How big is the finished cow?

She is about 9 inches (23 cm) tall when sitting, with a 5 mm hook and bulky chenille yarn.

Can I use a different yarn weight?

Yes. Worsted weight cotton and a 3.5 mm hook will give a smaller cow of about 6 inches. Use fewer grams of yarn.

Is this cow safe for babies and can I wash her?

Use embroidered eyes for children under 3. Hand wash gently in cool water and air dry, because chenille can lose its softness in a hot dryer.