
Peach and Coral Hibiscus Bathroom Set Crochet Pattern
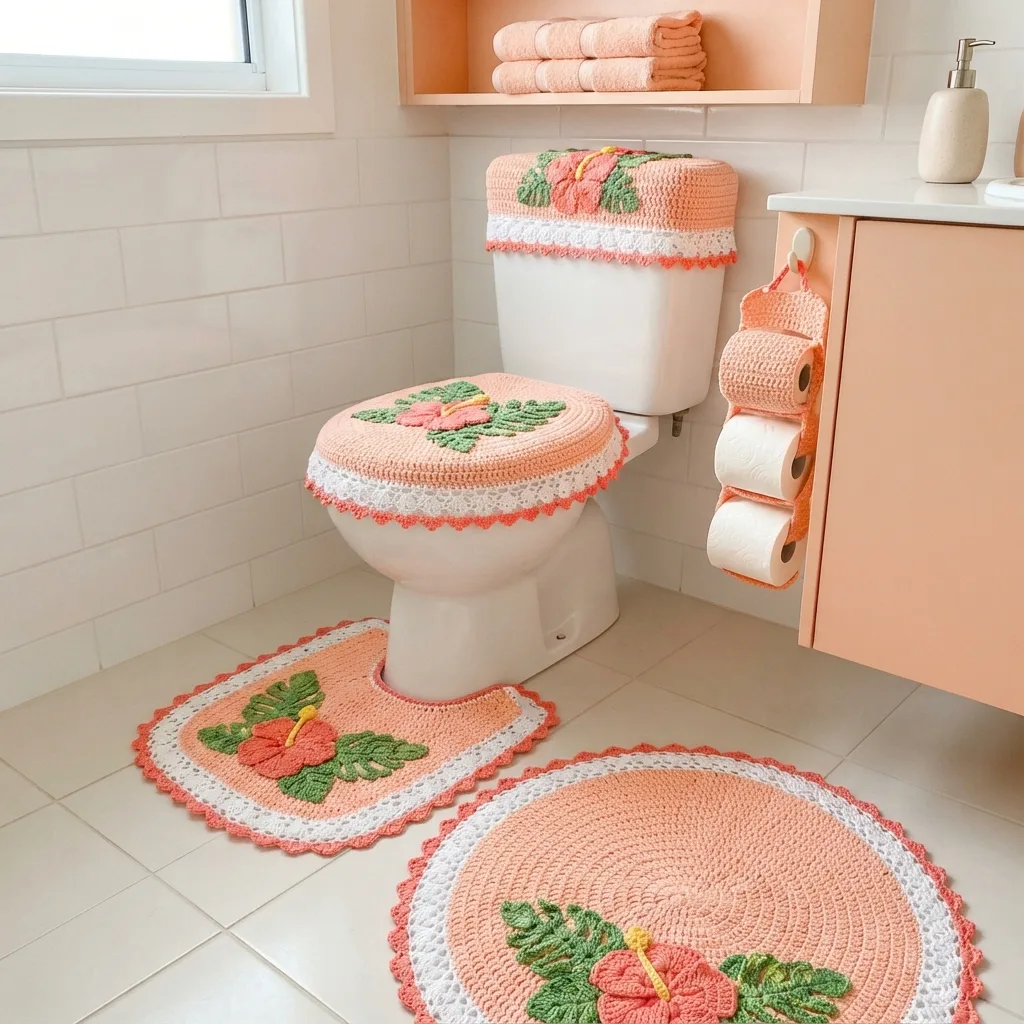
You need dc, tr, oval and circle increases and V-stitches, all written out and counted.
The hibiscus flowers are quick, and the solid pieces grow fast.
Coral hibiscus on soft peach, a little island holiday every morning.
About This Peach and Coral Hibiscus Bathroom Set Crochet Pattern Pattern
A few years ago I spent two weeks on an island where hibiscus grew everywhere. They climbed over fences, spilled into the road and filled the hotel bathroom in a little glass by the sink. Every morning a fresh coral flower was waiting there, and every morning it made me smile before I had even brushed my teeth. When I came home to gray skies, I missed that flower more than the beach. This set is how I brought it back.
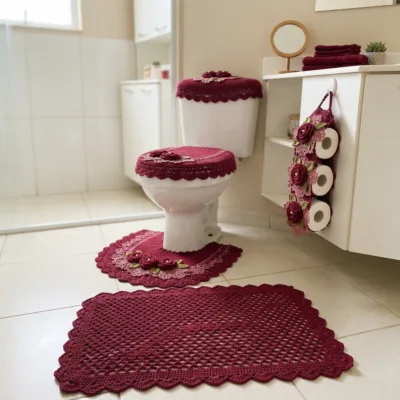
The set has five pieces. There is a rectangular tank lid cover with rounded corners, a round seat lid cover with an open ring of V-stitches, a U-shaped contour rug that hugs the base of the toilet, a large round rug with two V-stitch rings, and a hanging roll holder with three loops. Every piece is worked in a soft peach cotton, the color of the sky just after sunrise. Every piece carries coral 3D hibiscus flowers with sunshine yellow stamens and tropical green leaves. And every piece finishes with the same coral picot-shell edge, so the five parts look like one bright, happy family.
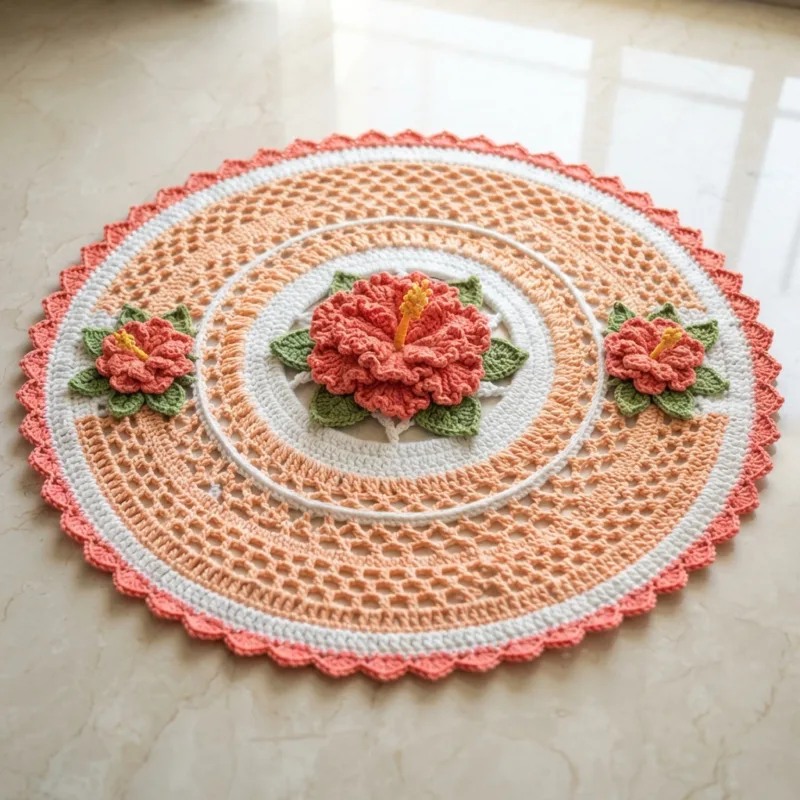
The hibiscus is the heart of the set. The large flower starts with a small ring of sc, grows to twenty stitches, and then opens into five broad petals made of hdc, dc and tall tr stitches. A final round of sc adds a ruffle, with two sc in every treble, so each petal waves at the edge like the real flower. Then you make a little stamen from a chain of slip stitches in yellow, sew it from the center across one petal, and add three tiny French knots at the tip. There are seven large hibiscus and ten small ones, which are worked in just two rounds.
The lace is light and easy. On the seat cover, a solid peach oval opens into a ring of V-stitches, each one just a dc, a chain and another dc in the same stitch. A second round places a new V in the middle of each V with a chain between, and the lace spreads out smoothly. The round rug has two of these rings, separated by solid rounds, which gives it a gentle striped look, like ripples on warm water.
The other pieces are simple. The tank cover is a rectangle worked in rows, with a back loop round that turns the sides down so it hugs the lid. The U-rug is worked in rows, with the two arms split off for the cut-out around the toilet base. The roll holder is a solid strip with three loops sewn on.
I chose worsted weight cotton because a bathroom is a damp room. Cotton handles moisture, washes well and does not pill. Matte cotton also keeps peach and coral soft and natural, instead of looking like plastic. This set has no pearls or beads at all, so it is safe for homes with small children.
Every row and round in this pattern ends with the stitch count in brackets, and I give standard sizes with notes on how to fit your own toilet. With a swatch and a measuring tape, you will have a little tropical corner that fits your bathroom perfectly.
Why You'll Love This Peach and Coral Hibiscus Bathroom Set Crochet Pattern Pattern
Let me tell you why this set makes me so happy. The first reason is the color. Peach and coral are warm, cheerful and gentle at the same time. They brighten a bathroom without shouting. On a dark winter morning, when I switch on the light and see this set, it feels like someone opened a window onto summer.
The second reason is the hibiscus. I love how quickly it grows. You start with a tiny ring, and after just two rounds you have five big petals. The ruffle round is my favorite part, because the flat petals suddenly come alive and wave like the real thing. Then the yellow stamen goes in, and the flower is finished. It takes about fifteen minutes, and it never stops being fun.
The third reason is that there are no pearls or beads. Many of my bathroom sets carry pearls, and they are lovely, but this one is made for busy family homes. Children can sit on the rug, pets can nap on it, and nothing small can come loose. It is also lighter and faster to finish, because there is nothing to sew on except the flowers.
- No pearls or beads, safe for homes with small children and pets.
- Quick hibiscus flowers that look real thanks to the ruffle round.
- Covers close with a drawstring and slip off for washing.
- Every row and round ends with a stitch count.
The fourth reason is how well it suits so many homes. I have seen this set in a beach house in Florida, in a city apartment with tiny windows and in a family bathroom full of rubber ducks. It fits everywhere because it brings a mood, not just a color. It is also a wonderful gift for anyone who loves summer, gardening or travel, and for anyone who could use a little brightness.
And the last reason is that hibiscus in the glass by the hotel sink. I never found out who put a fresh one there every morning, but I think of that person each time I make this flower. Small kindnesses like that stay with us. Making something bright for someone's home is my way of passing it on.
If you want a bathroom set that is cheerful, easy to care for and full of sunshine, this one is for you. Make one hibiscus tonight and see if you can stop at one.
Switch Things Up
This set changes easily with a few new colors. Here are my favorite ways to make it your own, all with the same pattern.
Turquoise and pink. Work the body in turquoise and the hibiscus in a soft pink, with yellow stamens and green leaves. It looks like a postcard from the Caribbean, bright and playful. Turquoise towels complete the look.
Cream and red. Make the body in cream and the hibiscus in a true red, like the flowers in a Hawaiian garden. Red on cream is bold and classic. Wash with a color catcher, because red will sit right against the cream.
Holiday red and green. For December, a red hibiscus looks a lot like a poinsettia. Work the body in white or cream, the flowers in Christmas red and the leaves in pine green, and the set becomes festive. It is a fun choice for anyone who spends the holidays somewhere warm.
Round or elongated toilets. The seat cover is written for a round lid. If yours is elongated, add chains to the starting chain and stitches to the straight sides, as the pattern note explains, and adjust the last sc round so the total is a multiple of four before the edge. Always measure your lid before you start.
Only the rugs. If you are short on time, make just the round rug and the U-rug. Those two pieces already bring the island mood to the floor. The round rug also looks lovely on its own in a child's room or on a sunny porch.
Matching extras. You can add a tissue box cover with a large hibiscus on top, or a small sink rug by working the round rug through Rnd 11 and finishing with the coral edge. A few small hibiscus sewn onto a plain hand towel are a sweet touch. These extras are not part of the original set, so adapt them at your own pace.
A different edge, or a little sparkle. If you prefer a simpler edge, skip the picots and work plain 5-dc shells instead. This set has no pearls, which makes it safe for small children. If your home has no little ones and you would like some sparkle, you can sew a small glass bead at the tip of each stamen, but for families, the yellow French knots are the better choice.
Styling tip. Keep the rest of the bathroom white and cream, and repeat the peach only in two rolled towels. Avoid adding real palm leaves, shells or tropical prints around the room. A calm, clean bathroom lets the hibiscus be the star. If you change the set's colors, change the towels to match.
Materials Needed
— Main Fabric
— Tools Required
The Free Pattern
0% complete
— Gauge, sizes and special stitches :
— Large hibiscus (Make 7, coral and sunshine yellow, 4 mm hook) :
— Small hibiscus (Make 10, coral and sunshine yellow, 4 mm hook) :
— Leaf (Make 14, tropical green, 4 mm hook) :
— Rectangular tank lid cover (Make 1, soft peach) :
— Round seat lid cover (Make 1, soft peach) :
— U-shaped contour rug (Make 1, soft peach) :
— Large round rug (Make 1, soft peach) :
— Hanging roll holder (Make 1, soft peach) :
— Coral picot-shell edge (all pieces) :
— Placement :
Assembly Instructions
- Make the 7 large and 10 small hibiscus, sew a yellow stamen onto each one and add the French knots.
- Make the 14 tropical green leaves.
- Make the tank cover, the seat cover, the U-rug, the round rug and the roll holder strip with its 3 loops and hanging loop.
- Work the coral picot-shell edge on all five pieces.
- Wash and block every piece flat with pins, opening the V-stitch rings and every picot shell.
- Block the large hibiscus too, gently stretching each ruffled petal so the waves stay even.
- Sew the hibiscus and leaves onto each piece following the placement section, and sew the 3 loops onto the roll holder strip, then weave the drawstrings through both covers.
- Place non-slip backing under the round rug and the U-rug before putting them on the floor.
Common Mistakes & How to Fix Them
<strong>Petals that cup instead of ruffle.</strong> The ruffle round on the large hibiscus is what makes it look real, but only if you work exactly two sc in each treble. If you work one, the petal stays flat and plain; if you work three, it curls into a cup. Count the sc on the first petal before you move on: there should be 16. Keep your tension relaxed, because tight sc pull the ruffle in. After you finish, gently stretch each petal edge between your fingers to open the waves, and pin the flower flat to dry.
<strong>Stamens that flop.</strong> A stamen made too loosely bends and lies flat, and the hibiscus loses its tropical look. Work the slip stitches firmly along the chain, so the stamen feels like a little cord. Sew it down from the center across only the first half of a petal, and leave the tip free so it lifts a little. Make the French knots tight and close together. If your stamens still flop, use the 3.5 mm hook for them only. It is a tiny detail, but it is the one people notice first.
<strong>V-stitch rings that ruffle or pull.</strong> The V-stitch rings lie flat only if every V sits in the right place. If you skip one stitch too few in the first V round, the ring ruffles; if you skip one too many, it pulls the rug into a bowl. Count your Vs at the end of each V round, which is much easier than counting stitches. On the round rug, you should have 32 in Rnd 9 and 48 in Rnd 13. If the number is off, pull back that round right away.
<strong>Covers that do not fit.</strong> Many people make the covers without measuring and later find them loose or too small. The sizes in this pattern are standard, but toilets vary a lot. Measure the length and depth of your tank lid and your seat lid before you start, and compare them with the finished sizes. Try each cover on its lid right before the eyelet round. If it is short, add a plain round or row of dc; if it is big, remove one. The drawstring only fixes a small difference, not several inches.

You Might Also Like
Important Notes
<strong>Make a swatch and measure your toilet.</strong> Before buying all the yarn, make one large hibiscus and a 4 x 4 in swatch in dc with a round of V-stitches. Wash and dry them flat. If you have more than 15 dc in 4 in, go up a hook size; if fewer, go down. Then measure your tank lid, your seat lid and the base of your toilet, and keep those numbers next to you while you work.
<strong>Always use non-slip backing.</strong> Crochet rugs can slide very easily on marble or tile, especially with wet feet coming out of the shower. Place a non-slip rubber mat or rug backing under the round rug and the U-rug. For the round rug, cut the backing into a circle about an inch smaller than the rug. This is a must in homes with older adults or small children, and it helps the rugs keep their shape.
<strong>Buy one dye lot.</strong> The yarn amounts are estimates and depend on your tension. Buy one extra skein of peach and one of coral, and check that every skein has the same dye lot number. Peach shades shift a lot between lots, sometimes more pink and sometimes more orange, and on two rugs side by side the difference shows right away. Keep one label of each color in case you need more.
<strong>Wash with a color catcher.</strong> In this set the coral edge and flowers sit right against the soft peach body, and the green leaves and yellow stamens touch the coral. Bright coral cotton can release dye in the first washes and tint the peach. Hand wash or use a gentle cycle in cold water, always with a color catcher sheet. Before the first wash, soak a coral scrap in a glass of cold water to check. Always dry flat, in the shade.
I hope this hibiscus set brings a little island sunshine into your bathroom, the way that fresh flower by the hotel sink brightened my mornings. I love to think of someone switching on the light on a gray day and seeing coral flowers they made with their own hands. Take your time, one petal at a time, and enjoy the color.
When you finish, I would love to see it. Tell me which colors you chose, whether you made the whole set or just the rugs, and who it was for. Your stories and photos are the best part of sharing these patterns. Happy crocheting.
Crochet Abbreviations
You Ask, We Answer
How do I fit the set to my toilet?
Start by measuring. For the tank cover, measure the length and depth of the top of the lid. The pattern is written for about 19 x 8 in. If your lid is longer, add chains to the starting chain in multiples of two, and if it is deeper, add rows before you work around the rectangle. For the seat cover, check whether your lid is round or elongated. The pattern is written for a round lid of about 14 x 17 in, and the pattern note explains how to make it longer. Try the cover on the lid before the eyelet round, because that is the last easy moment to change the fit. For the U-rug, measure the width of the toilet base where it meets the floor and add about half an inch of ease. Change the skipped stitches in multiples of two, then recount the edge so it stays a multiple of four before the picot shells.
Can I use a different yarn or other colors?
Yes. For a bathroom I really recommend cotton, because it handles moisture, washes well and does not pill. A cotton and bamboo blend also works if you like a soft sheen. I would avoid acrylic for the rugs, because it slides more and flattens over time. If you change the yarn weight, every piece will change size, so make a swatch and adjust the starting chains. The hibiscus ruffle looks delicate in a lighter yarn and bold in a heavier one, so make one test flower first. As for colors, the design works with many palettes. The key is good contrast between the body and the flowers, so each hibiscus stands out. The switch things up section has ideas for a turquoise and pink set, a cream and red set and a holiday version. Always buy all the yarn from one dye lot.
How do I wash and dry the pieces?
Hand washing in cold water with a mild soap is best, especially the first few times. If you use a machine, put each piece in a mesh laundry bag, choose a cold gentle cycle with a low spin and always add a color catcher sheet, because the coral touches the peach. Do not use bleach, because it fades peach and coral unevenly and weakens cotton. To dry, press the pieces between two towels to remove water without wringing. Then lay them flat on a dry towel, in the shade, and shape them with your hands: open the V-stitch rings, straighten every picot shell, stretch the ruffled petals and lift each stamen tip a little. Never hang wet pieces, because the rugs stretch under the weight of the water, and never tumble dry, because cotton shrinks and the covers will no longer fit. A quick reblock now and then keeps the set looking new.
Success!
Thanks for subscribing — check your inbox for a welcome note.
Abbreviations
- ch — chain
- sl st — slip stitch
- sc — single crochet
- sc2tog — single crochet 2 together (decrease)
- hdc — half double crochet
- dc — double crochet
- tr — treble crochet
- V — V-stitch: (dc, ch 1, dc) in the same st or sp
- picot — ch 3, sl st in the first of those ch
- sp / sps — space / spaces
- st / sts — stitch / stitches
- Rnd / Rnds — round / rounds