
Red Rose Flower Motif Curtain Crochet Pattern
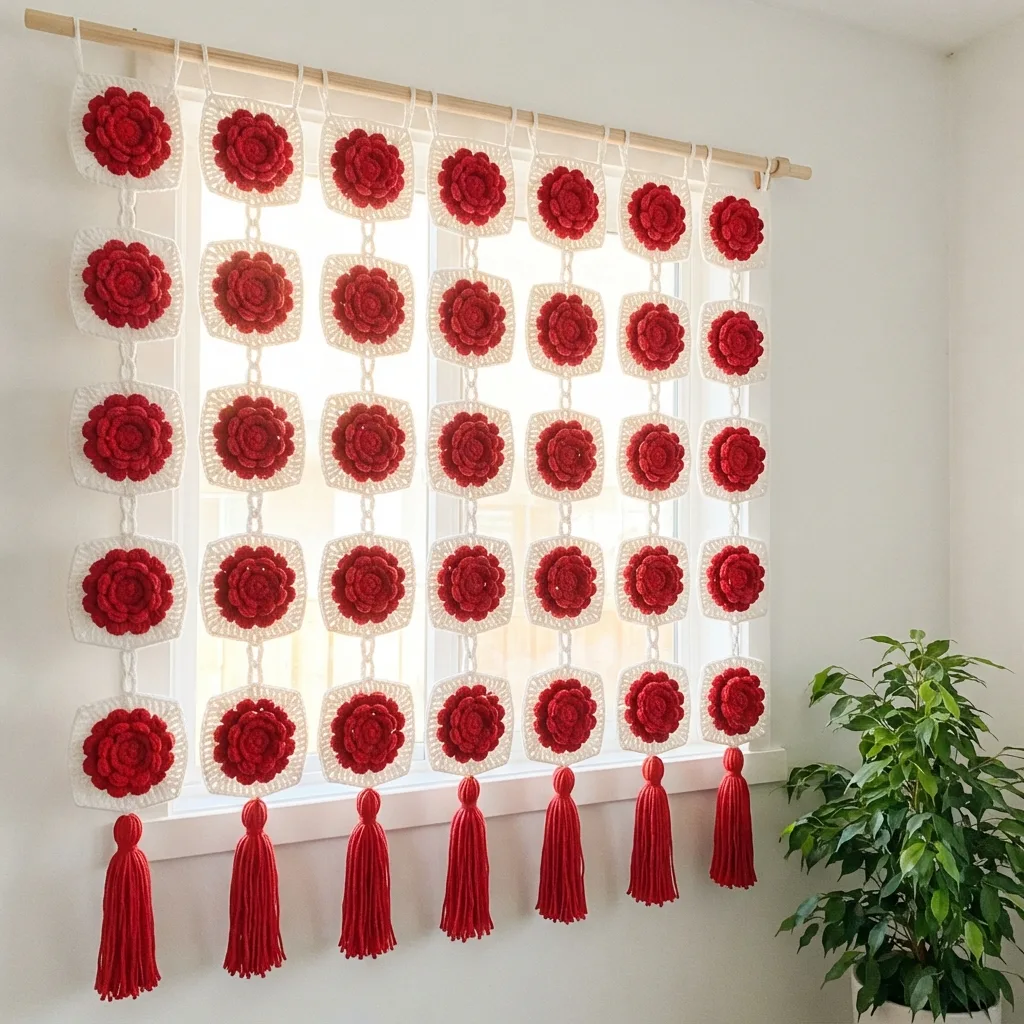
If you can work double crochet, a simple square and a stitch around a post, you can make every motif in this curtain.
Each motif takes about 45 minutes, so a few motifs a week will get you there without any rush at all.
The open chains and gaps let the daylight pour through, so the red flowers glow from morning until evening.
About This Red Rose Flower Motif Curtain Crochet Pattern Pattern
This red rose flower curtain is one of those projects that turns a plain window into the heart of a room. It is made of 48 square motifs, and each one has a layered red flower in the center and a crisp white square frame around it. The motifs hang in 8 separate columns of 6, linked to each other with short white chains, and every column ends in a long, full red tassel. Nothing is sewn into one big panel. Each column hangs on its own from two small white loops on a wooden rod, so the curtain moves softly and lets the light through every gap.
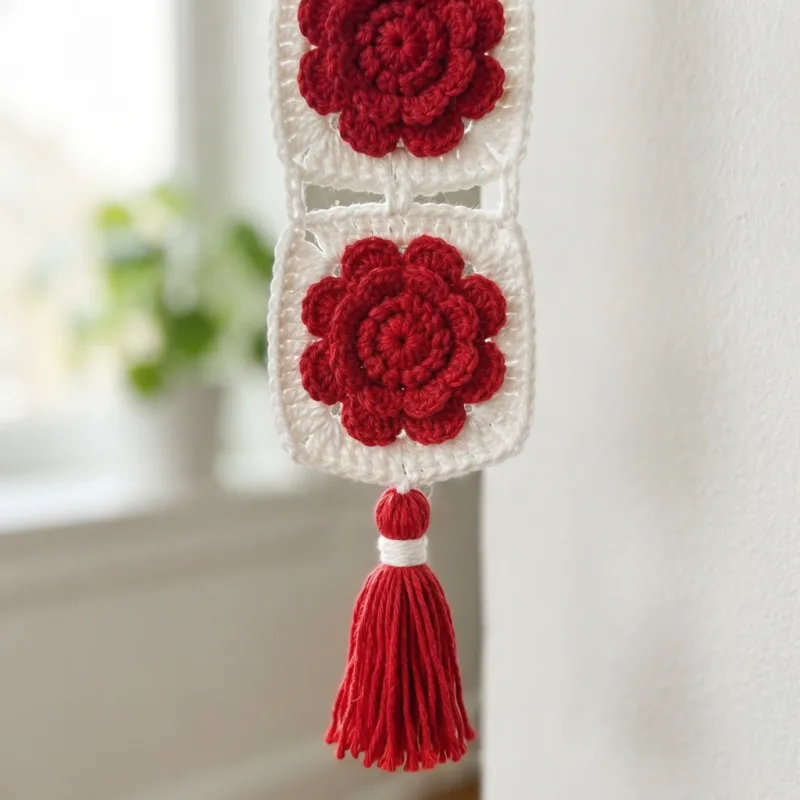
Let me walk you through the look piece by piece. The flower starts as a small solid circle of double crochet. On top of that circle sit 8 rounded petals, and behind them sits a second ring of 8 slightly larger petals, so the flower has real depth and looks almost like a little rose. The white border is worked behind the petals and then squared off with three rounds, which keeps the flower raised and makes the red stand out against the white. The last round is single crochet, which gives every motif a neat, firm edge that holds its shape when it hangs.
The finished curtain measures about 55 inches wide on the rod and about 58 inches long from the top of the loops to the ends of the tassels, which is roughly 140 by 147 cm. Each motif is about 6 inches square after blocking, each chain link adds about 2 inches, and each tassel hangs about 9 inches. That size suits a standard window very well. Further down I share how to make it narrower, wider, shorter or longer just by changing the number of columns and motifs, so you can fit almost any window or door in your home.
The stitches are all familiar ones: chain, slip stitch, single crochet, half double crochet and double crochet. The only technique that might be new to you is working a single crochet around the post of a stitch from an earlier round, behind the petals. That is how the second layer of petals and the white border sit behind the flower instead of on top of it. Once you have done it on your first motif, it becomes automatic, and you will not need to look at the pattern for that step again. I promise it feels much easier than it sounds on paper.
Joining is simple and very forgiving. Instead of sewing the motifs together, you link them with a short white chain from the center of the bottom edge of one motif to the center of the top edge of the next. Then you slip stitch back up the chain, which doubles it and keeps it from stretching under the weight of the motifs below. The tassels tie on at the bottom of each column, and the hanging loops are worked right into the top corners of the first motif in each column, so there is no separate header to make.
When it is finished and hanging, the curtain feels light and airy, not heavy like a solid panel. Sunlight comes through the open spaces between the columns and around the chain links, and the red flowers almost glow in the afternoon. It gives a little privacy without blocking the light, and it brings a warm, handmade feeling into a kitchen, a bedroom or a hallway. On a cloudy day it still looks cheerful, because the red and white read clearly even in soft light.
I would call this an intermediate project. It is not hard, but it does ask for patience, because you are making the same motif 48 times and you want them all to be the same size. If you enjoy small portable projects and like seeing a big piece come together slowly, this one is for you. A confident beginner who has made a few granny squares can absolutely do it, especially if you take your time with the first motif and keep it as your guide for all the others.
Why You'll Love This Red Rose Flower Motif Curtain Crochet Pattern Pattern
I love this curtain because it is really just one small flower made over and over, and that makes it the easiest big project I know. Each motif fits in a small bag with a hook and two little balls of yarn, so I can work on it in a waiting room, on the bus or on the sofa in the evening. I never feel tied to a huge heavy blanket on my lap. Every motif feels like a little win, and after a few weeks I have a pile of red roses that already looks like something special.
I also love what it does to a room. The first time I hung mine, the whole kitchen changed. The window went from a plain square of glass to a soft frame of red and white, and the light that came through had a warm, gentle color. Guests always walk up to it and touch the tassels. It is one of those pieces that people notice right away, even if they do not crochet at all, and it always starts a nice conversation.
There is a slow satisfaction in watching it grow that I really enjoy. At first you have one motif, then a short column, then a column with a tassel at the bottom. I like to hang each finished column on the rod as soon as it is done, so I can see the curtain fill the window little by little. It keeps me motivated on the days when I only have time for one or two motifs, because I can see exactly where the next column will go.
Here is what I enjoy most about this pattern:
- It is portable, one motif at a time.
- It uses only two colors, so planning is easy.
- There is no big seaming job at the end.
- The tassels are quick and fun to make.
- It makes a lovely gift for a new home.
It is also a good way to use up yarn. The motifs are small enough that a half ball of red or white from another project will still give you two or three of them. If you keep the same weight and fiber, nobody will ever notice that some motifs came from a different ball, as long as the shades match closely. I keep a small box just for leftover cotton, and projects like this empty it very nicely.
Making this curtain taught me a lot about tension. When you make 48 of anything, you start to see how your stitches change when you are tired or rushed. I learned to measure every fifth motif and to put a motif aside if it came out too small or too big. That habit has made all my other projects neater, and I think it will do the same for you. It is a small lesson, but it changed how I crochet.
Finally, I love it as a gift. A handmade curtain is something people keep for years. I made one for my daughter's first apartment, and every time I visit, I see it in her window and feel proud. It is a gift that is used every single day, and it brings a little bit of home with it wherever it goes.
Switch Things Up
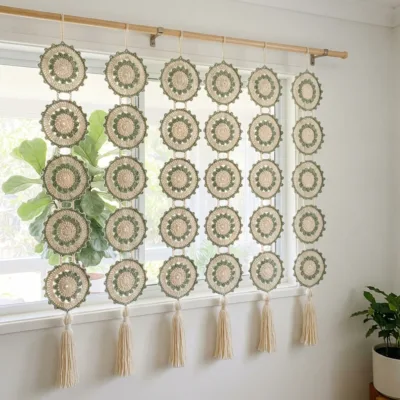
Try a green and cream palette for a calm, fresh look. Work the flower in a soft sage or leaf green and the border in cream, and make the tassels in the same green. This works beautifully in a kitchen with plants on the windowsill, because the curtain picks up the color of the leaves. You will need about the same amount of each color as in the red version, so the yarn list stays the same.
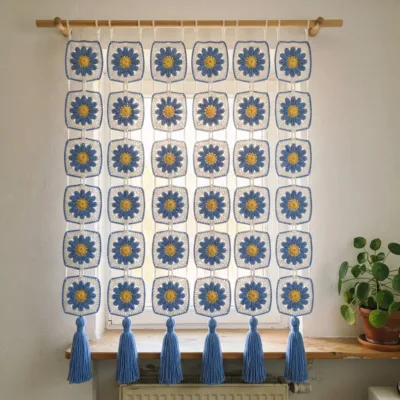
For a seaside feeling, make the flowers in a bright cornflower or royal blue and keep the border white. White tassels look light and airy with blue flowers, while blue tassels give a bolder finish. This combination looks lovely in a bathroom or a bedroom with white walls. It also stays fresh all year round, and it is a nice choice if you want something calm rather than bright.
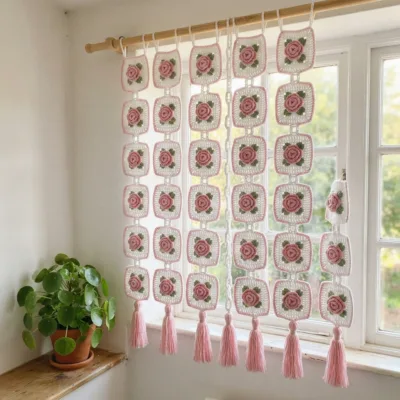
If you want something softer, use a dusty pink flower with a white border and pink tassels for a nursery or a little girl's room. For an elegant look, make the whole curtain in white and work only the first round of each flower in a golden yellow or mustard. White with golden details looks wonderful in a living room and catches the evening light. Both options use the same pattern with no changes at all, only the color changes.
Changing the size is just a matter of columns and motifs. Each column is about 6 inches wide plus a 1 inch gap, and each motif with its chain link adds about 8 inches of length. The loops and tassels add about 11 inches in total. Here is a quick guide:
- Narrow window, about 27 by 42 inches: 4 columns of 4 motifs (16 motifs).
- Standard window, about 55 by 58 inches: 8 columns of 6 motifs (48 motifs).
- Door, about 34 by 82 inches: 5 columns of 9 motifs (45 motifs).
- Room divider, about 69 by 90 inches: 10 columns of 10 motifs (100 motifs).
A shorter cafe curtain is one of my favorite variations. Make 8 columns of only 3 motifs each, which is 24 motifs, and hang it on a rod across the middle of the window. It will be about 34 inches long with the tassels. The bottom half of the window gets privacy while the top half stays open for light, which is perfect for a kitchen that faces the street.
For a doorway curtain, use the door size above but space the columns a little further apart, about 2 inches, so you can walk through easily. You can also make the chain links longer, 18 chains instead of 12, which makes the curtain lighter and lets it move more when someone passes. Make smaller tassels of about 6 inches so they do not tangle around your shoulders. A doorway curtain like this looks lovely between a kitchen and a hallway.
Tassel length changes the whole mood. Short, chunky tassels of about 6 inches, wound 40 times around a 7 inch card, look playful and modern. Long tassels of about 12 inches, wound 30 times around a 13 inch card, look dramatic and elegant, and they look especially good when the curtain stops just above a windowsill. Longer tassels use more yarn, so plan about 5 extra yards of red for each 12 inch tassel.
You can also change the yarn weight. In a sport weight cotton with a 3 mm hook, each motif comes out about 5 inches, and the standard layout becomes about 47 inches wide. In a worsted cotton with a 4.5 mm hook, each motif grows to about 7 inches, and the standard layout becomes about 63 inches wide, so you might make 7 columns instead of 8. Always make one motif first, block it and measure it before you plan your layout.
Materials Needed
— Main Fabric
— Tools Required
The Free Pattern
0% complete
— Flower Motif (Make 48, red flower with white border) :
— Layout :
— Chain Links and Joining (Make 40, white) :
— Tassels (Make 8, red) :
— Top Loops and Hanging (Make 16, white) :
Assembly Instructions
- Block all 48 flower motifs to 6 in (15 cm) square and lay them out in 8 columns of 6 motifs.
- Join the motifs in each column from the top down with 5 doubled white chain links, for 40 links in total.
- Make 8 red tassels and tie one to the center sc of the bottom side of the last motif in each column.
- Work 2 white hanging loops into the top corners of the first motif in each column, for 16 loops in total.
- Slide the columns onto the wooden rod in order, spacing them about 1 in (2.5 cm) apart.
- Give the hanging curtain a light steam, let it rest for a day, then trim all the tassels to the same length.
Common Mistakes & How to Fix Them
The most common problem with this curtain is ending up with motifs that are not all the same size. It happens because you make 48 of them over several weeks, and your tension changes with your mood, your tiredness and even the chair you sit in. When the motifs hang in columns, a small one stands out right away, and the columns end up at different lengths. To avoid it, measure your first motif after blocking and write the size down. Then check every fifth motif against it. If one is more than a quarter inch off, set it aside and make another one.
In Rounds 4 and 6 you work a single crochet around the post of a stitch from an earlier round, behind the petals. A common mistake is to grab a petal stitch instead, which pulls the petals flat and makes the flower look squashed and uneven. It happens most when the light is low or when the petals hide the stitches underneath. Fold the petals toward you with your thumb before you insert the hook, and look for the single crochet from the earlier round, which sits right between two petals. Count 8 single crochet around the flower before you move on.
A plain chain stretches a lot once the weight of several motifs hangs from it. If you skip the slip stitch row back up each link, the bottom motifs slowly pull the chains longer and the columns end up uneven and droopy after a few weeks on the rod. It happens because a chain has no structure on its own. Always slip stitch back up each link into the back bump of the chains, keep those slip stitches relaxed, and use exactly 12 chains for every link. Count your chains twice, because one missing chain on each link adds up quickly over a column.
Tassels can look thin, messy or uneven, and that is a shame because they are what people notice first. This happens when the yarn is wound too loosely around the card, when you wind a different number of times for each tassel, or when you trim them before the curtain has hung. Wind exactly 30 times for every tassel with the same gentle tension, tie the top very tightly and wrap the neck firmly. Hang the curtain first, let it rest for a full day, then trim all the tassels to the same length with sharp scissors while they hang straight down.
You Might Also Like
Important Notes
Gauge for this curtain is one motif of 6 inches (15 cm) square after blocking, made in DK cotton with a 3.5 mm hook. The first round of 16 double crochet should be about 1.5 inches across. If your motif comes out larger, go down half a hook size, and if it is smaller, go up half a size. Exact gauge matters less here than consistency, because every motif must match its neighbors. Keep your first motif as your measuring sample.
Block the motifs before you join them. Pin each motif to a 6 inch square on a blocking mat with straight edges and square corners, spray it with water until damp, and let it dry fully. While they are still damp, lift the petals gently with a fingertip so they stand up a little. Blocking in batches of 8 or 12 saves a lot of time. After assembly, a light steam from above relaxes the chain links and the tassels.
This curtain uses about 750 yards of red and 830 yards of white DK cotton, which includes the tassels, the chain links and the hanging loops, with a small extra for your gauge motif. Buy all the yarn for each color from the same dye lot at the same time. Two lots of red can look identical in the shop and still show a clear difference when they hang side by side in daylight. Check the dye lot number on every ball label before you buy.
The finished curtain weighs about 650 grams, so use a sturdy rod with brackets that are screwed into the wall rather than a light tension rod for the full size. Wash it by hand in cool water with mild soap, or on a gentle machine cycle inside a mesh laundry bag. Add a color catcher sheet every time, because red and white are washed together. Press out the water in a towel, then lay each column flat to dry and reshape the tassels.
I hope this red rose curtain brings as much light and warmth into your home as mine brought into my kitchen. It is a big project, but it is made of small, happy steps, and every motif you finish brings you closer to that lovely moment when you hang it up and see the sun shining through the flowers.
So do not think about all 48 motifs today. Just pick up your red yarn and your hook and make one little flower. Then make another one tomorrow. Before you know it, your window will be full of roses and you will wonder how it grew so fast. Happy crocheting, and thank you for making this with me.
Crochet Abbreviations
You Ask, We Answer
What is the finished size of this curtain?
The curtain as written measures about 55 inches wide on the rod and about 58 inches long from the top of the hanging loops to the ends of the tassels, which is about 140 by 147 cm. It is made of 8 columns with 6 motifs in each, so 48 motifs in total. Each motif is about 6 inches square after blocking, the chain links add about 2 inches each, and the tassels hang about 9 inches below the last motif. The width assumes a gap of about 1 inch between columns on the rod, and you can widen or close that gap a little just by sliding the loops. To change the size, add or remove columns for the width and add or remove motifs for the length. Each extra column adds about 7 inches of width, and each extra motif with its chain link adds about 8 inches of length. Measure your window first, then plan your layout on paper before you start.
Can I use a different yarn weight or make it in another size?
Yes, you can. The pattern works in any weight as long as you choose a hook that gives a firm, neat fabric. In sport weight cotton with a 3 mm hook, each motif is about 5 inches. In DK with a 3.5 mm hook, it is about 6 inches, and in worsted cotton with a 4.5 mm hook, it is about 7 inches. The stitch counts stay exactly the same, and only the size and the yarn amounts change. Heavier yarn makes a heavier curtain, so check that your rod and brackets can hold it. I would stay with cotton or a cotton blend, because it hangs straight, shows the petals clearly and does not stretch the way some acrylics do. Whatever you choose, make one motif first, block it and measure it. Then divide your window width by that size plus the gap to find how many columns you need, and do the same for the length.
How do I wash and care for the curtain?
Take the columns off the rod before washing, so the loops and chain links do not get stretched. Hand washing in cool water with a mild wool or baby soap is the gentlest option. If you prefer the machine, put each column in a mesh laundry bag and use a cold, gentle cycle with a slow spin. Always add a color catcher sheet, because the red can bleed into the white, especially in the first few washes. Do not wring the curtain. Roll it in a towel and press out the water instead. Lay the columns flat on a dry towel, straighten each motif with your hands and comb the tassels with your fingers so they dry straight. Avoid the dryer, because heat can shrink cotton and make the motifs uneven. Once dry, hang it back up and let gravity do the rest. A quick dusting with a soft brush every few weeks keeps it fresh between washes.
Success!
Thanks for subscribing — check your inbox for a welcome note.
Abbreviations
- ch — chain
- sl st — slip stitch
- sc — single crochet
- hdc — half double crochet
- dc — double crochet
- sk — skip
- st(s) — stitch(es)
- sp(s) — space(s)
- rep — repeat