
Tulip Hanging Curtain Crochet Pattern
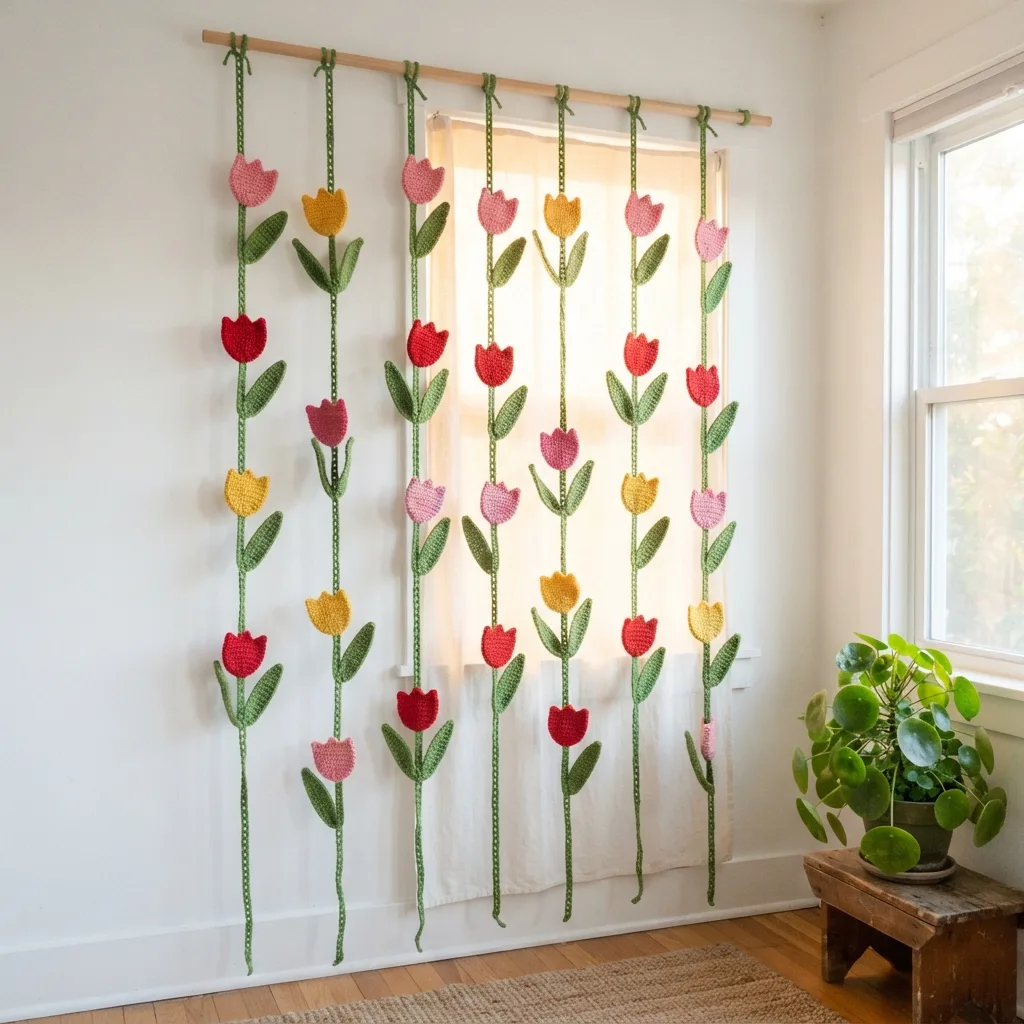
Each tulip is worked in simple rows of single crochet, with one row of petals at the top.
A tulip takes about twenty minutes, so this is one of the quickest flower curtains you can make.
Pink, red and yellow tulips in diagonal stripes make your window look like a tulip field in April.
About This Tulip Hanging Curtain Crochet Pattern Pattern
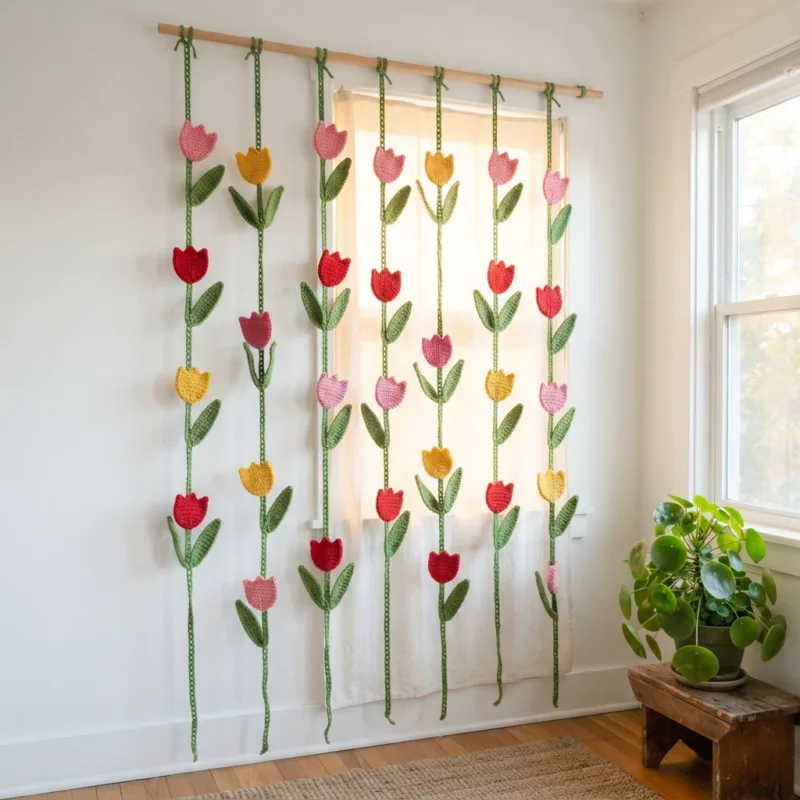
This curtain is a little tulip field in your window. It is made of nine green chain vines hanging from a wooden rod, and each vine carries five upright tulips with one long green leaf beside each flower. The tulips come in three cheerful colors: pink, red and yellow. Instead of mixing them at random, the colors run in diagonal stripes across the curtain, so the window looks like the neat, colorful rows of a tulip farm in spring. It is simple, bright and full of happy energy.
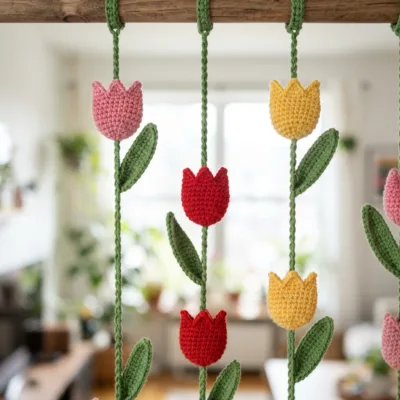
Each tulip is a flat motif worked in rows from the base up. You start with a short chain and work rows of single crochet, adding one stitch at each end of the first few rows so the tulip grows from a narrow base into a wide cup. Two straight rows give the cup its height. Then the last row makes three pointed petals across the top, each one a little fan of half doubles, doubles and trebles with a small chain at the tip. A finished tulip is about 3 inches tall and 3 inches wide at the top, with a clear, simple shape you can recognize from across the room.
The finished curtain measures about 40 inches wide and 62 inches long, from the rod to the bottom of the vines. Each vine is a firm green cord about 60 inches long with a small loop at the top for the rod. The tulips sit along the cord about 12 inches apart, and each one has a long leaf sewn at its base, pointing up and out to one side like a real tulip leaf. Because each vine hangs on its own, you can space them closer together for a fuller look or farther apart to fit a wider window.
The stitches are all basics: chain, slip stitch, single crochet, half double crochet, double crochet and treble crochet. Most of each tulip is plain single crochet, so it is a very relaxing pattern. The only shaping is a simple increase at the start and end of a few rows. The leaves are worked around a chain in one round, and the cords are long chains firmed up with a row of slip stitches. Everything is sewn together with a yarn needle using the tails you leave on each piece.
I used DK weight cotton in four colors: a bright pink, a true red, a sunny yellow and a fresh leaf green. Cotton gives the single crochet rows a smooth, neat look and keeps the tulips flat as they hang. It also holds the petal points crisp. In the window, the three flower colors look clean and fresh against the green, and the light coming between the vines makes the whole curtain glow like a spring morning.
This pattern is ideal for beginners. If you can work rows of single crochet and make a simple increase, you can make every tulip. It is also one of the quickest flower curtains I know, with only forty-five tulips and forty-five leaves. If you want a big, cheerful result without months of work, this is the curtain to start with.
Why You'll Love This Tulip Hanging Curtain Crochet Pattern Pattern
Years ago my husband and I took a spring trip to see the tulip fields in bloom. I will never forget standing at the edge of those long, straight rows of pink, red and yellow flowers stretching all the way to the horizon. The colors were so bright they almost did not look real. When I came home, I wanted to keep that feeling forever. This curtain is my way of bringing those fields into my kitchen, and every spring it makes me want to travel again.
The first thing I love is how simple each tulip is. Most of it is just rows of single crochet, which is the most soothing stitch I know. I can make a tulip while talking on the phone or listening to the radio. The petal row at the top is the only part that needs attention, and it comes out so pretty every time. There is a real joy in watching a plain little shape suddenly turn into a flower in the last row.
I also love how quick this curtain is compared with others. Forty-five tulips sounds like a lot, but each one takes about twenty minutes. I made the whole curtain over about a month of evenings, and I never felt rushed or tired of it. That makes it a wonderful first big project for a beginner, or a nice quick project between larger ones. You get a big, colorful result without months of work.
Here is what I learned while making it:
- Make all the tulips of one color in a row so they come out the same size.
- Count the stitches at the end of every increase row.
- Sew each tulip with the cord running up behind its center so it stays upright.
- Lay out all nine vines before sewing to check the diagonal stripes.
This curtain changed my kitchen in the happiest way. Before, the window had a plain fabric curtain that blocked half the light. Now the sun comes in all day, and the tulips look like they are growing right in the window. On gray winter days, it reminds me that spring is coming. My neighbors tell me they look forward to seeing it every time they walk by, and children always point at the colors.
It is a lovely gift project too. A single vine with five tulips makes a sweet present for Mother's Day, a spring birthday or a new home. Tulips stand for cheerful love and new beginnings, so they always feel right as a gift. I made one vine for my daughter's first apartment and one for a friend recovering from an illness, and both hung them in their kitchens.
Most of all, I love how this curtain keeps my memories of that spring trip alive. Every time the light comes through the pink, red and yellow tulips, I am standing at the edge of that field again with my husband beside me. That is the real gift of handmade things. They hold our happiest moments inside them, and I hope yours will hold some of your own.
Switch Things Up
Tulips are one of the easiest flowers to change, because each one is a simple shape worked in rows. You can change the colors, the layout, the size and the fullness of this curtain without changing the basic pattern. Here are the ideas I love most, with the numbers you need to plan each one. Mix and match them to make a tulip field that is all your own.
New tulip colors. Real tulips come in almost every color, so you have so many choices. Purple, lilac and white tulips feel calm and elegant in a bedroom. Orange, coral and yellow tulips look warm and sunny in a kitchen. All white tulips with green leaves feel fresh and simple in a bathroom. For something dramatic, try deep burgundy, plum and pink, which look rich and romantic against a white wall.
Two-color tulips. For a more detailed look, work the first five rows of each tulip in one color and the last three rows in another. A yellow base with red tips looks like the flamed tulips of old Dutch paintings. A white base with pink tips looks soft and sweet. You can also edge each tulip with a round of single crochet in a darker shade, which makes the shape stand out even more in the window.
Different color layouts. Diagonal stripes are my favorite, but you can also make each vine one color, so the curtain has vertical stripes like rows in a tulip field seen from above. Or make each row one color, so the stripes run across the window. A gradient from dark at the top to light at the bottom also looks lovely. Plan your layout on paper first, with one small box for each tulip.
Different sizes. The curtain grows by vines and by tulips. Each vine adds about 4.5 inches of width, and each extra tulip with its leaf adds about 12 inches of length and 40 chains to the cord. Here are the sizes I use most:
- Narrow window, about 22 x 50 in: 5 vines with 4 tulips each, 20 tulips.
- Standard window, about 40 x 62 in: 9 vines with 5 tulips each, 45 tulips.
- Door, about 31 x 86 in: 7 vines with 7 tulips each, 49 tulips.
- Room divider, about 58 x 98 in: 13 vines with 8 tulips each, 104 tulips.
A short cafe curtain. For the bottom half of a kitchen window, make 9 vines with 2 tulips each on cords of 90 chains. That is 18 tulips, and the curtain finishes about 40 inches wide and 28 inches long. Hang it on a rod halfway down the window frame for privacy at the sink while the sky stays open above. It is a lovely weekend project and a perfect first try.
A doorway curtain. For a doorway, use the door layout above and hang the vines on a tension rod inside the frame. The vines part gently when you walk through and fall back into place behind you. Measure from the rod to about 3 inches above the floor before you sew the last tulip, so nothing drags. A tulip doorway into a kitchen or a garden room feels like walking into spring.
Fuller vines. For a lush look, sew a tulip every 8 inches instead of every 12, which gives you 7 tulips per vine and 63 tulips in total. You can also sew two leaves at each tulip, one on each side, so the vines look greener. Small buds made from only Rows 1 to 4 of the tulip pattern look sweet tucked between the big flowers.
A different yarn weight. Sport weight cotton with a 2.75 mm hook makes tulips about 2.25 inches tall, so you can fit six tulips on each vine for a delicate look. Worsted weight cotton with a 4.5 mm hook makes tulips about 3.75 inches tall and needs about 40 percent more yarn. In any weight, measure 10 chains first so you know how many chains make the cord length you want. Make one test tulip before you buy all your yarn.
Materials Needed
— Main Fabric
— Tools Required
The Free Pattern
0% complete
— Tulip (Make 45: 15 pink, 15 red and 15 yellow) :
— Leaf (Make 45, green) :
— Vine Cords and Joining (Make 9, green) :
— Layout :
— Top Loops and Hanging :
Assembly Instructions
- Make 45 tulips, 15 in each color, keeping a long tail on every tulip for sewing.
- Make 45 green leaves and block the tulips and leaves flat with sharp petal and leaf tips.
- Make 9 green vine cords with their hanging loops and mark the tulip positions on each one.
- Sew 5 tulips to each cord, upright with the petals toward the rod, in the color order from the Layout section, and sew a leaf just below each tulip.
- Lay out all 9 vines in order and check the diagonal stripes of pink, red and yellow.
- Slide the loops onto the wooden rod, space the vines about 4.5 in apart and let the curtain hang for a day before trimming tails.
Common Mistakes & How to Fix Them
The most common problem is tulips that come out lopsided, wider on one side than the other. This happens when you forget an increase at one end of Rows 2 to 5, or work an extra stitch by accident. The cup then leans to one side and the three petals no longer line up. Count your stitches at the end of every increase row: 7, 9, 11 and 13. Place a stitch marker in the first and last stitch of each row so you never miss the edge stitches when you turn. Even rows give you a neat cup.
Another frequent mistake is uneven petals in Row 8. If you skip the wrong number of stitches, you end up with petals of different sizes or a petal that hangs off the edge. Before you start Row 8, check that you have exactly 13 stitches. Then follow the rhythm: slip stitch, skip one, petal, skip one, slip stitch. You should land on the last stitch of the row with your final slip stitch, and all three petals should be the same width with their points at the same height. If they do not, pull out the row and try again.
Tulips that flop forward or hang upside down are the third trap. A tulip is heavier at the top than at the base, so if you sew it to the cord only at the base, the petals tip forward or the whole tulip swings down. The cord must run straight up behind the center of the tulip, and you need stitches at both the base and the middle of Row 4. Those two points hold it upright. If a tulip already tips, add two or three more stitches near the top of the cup. Upright tulips look like a real field.
The last mistake is losing the diagonal color order. With forty-five tulips in three colors, one tulip in the wrong spot breaks the stripe and catches your eye every time you look at the window. Before you sew anything, lay all the tulips out on the floor in nine columns of five and check every row. Write the starting color on a sticky note for each cord. Then sew one vine at a time and set it aside, so the tulips stay in the right order. It saves a lot of unpicking later.

You Might Also Like
Important Notes
Gauge matters most for the tulips and the cords. With DK cotton and a 3.5 mm hook, a finished tulip should measure about 3 inches tall and 3 inches wide across the petals, and 10 chains should measure about 3 inches. At that gauge, the 200 chain cord is about 60 inches long. Make one test tulip before you start the rest. If it is much bigger or smaller, change your hook size.
Blocking makes the tulips flat and the petals sharp. Wet each tulip and leaf in cool water, press out the extra water in a towel and pin them flat on your blocking mat, with a pin in each petal tip and one at the base. Let them dry completely, usually overnight. Hang each vine cord overnight with a small weight at the bottom so it stretches before you sew anything on.
For the size shown you need about 100 grams each of pink, red and yellow and about 150 grams of green DK cotton. Buy each color at once from the same dye lot, because pinks and reds can vary quite a bit between lots. The finished curtain weighs only about 400 grams, under a pound, so any standard rod or a tension rod inside the window frame holds it easily.
Wash the curtain by hand in cool water with a mild detergent. Because red sits near yellow and pink, add a color catcher sheet to the water every time, especially for the first few washes. Never wring the vines. Roll each one in a towel to press out the water, then lay it flat to dry. While it is damp, pull each petal tip into a point and straighten every tulip on its cord.
Thank you for spending this time with me and my little tulip field. I hope this curtain brings the joy of spring into your home, whatever the season outside your window. Every time the light comes through the pink, red and yellow tulips, I feel that happy lift you only get from the first flowers of the year, and I hope yours does the same for you.
Do not wait for spring to begin. Pick up your hook tonight and make just one tulip. It takes about twenty minutes, and when those three little petals appear in the last row, I think you will be delighted. Then make the next one, and soon your window will be in bloom. Happy crocheting, my friend.
Crochet Abbreviations
You Ask, We Answer
How big is the finished curtain?
The curtain as written measures about 40 inches wide and 62 inches long, from the top of the rod to the bottom of the vines. That is about 102 by 157 centimeters, and it fits most standard windows. Each vine cord is about 60 inches long, plus a small loop at the top. Each tulip is about 3 inches tall and 3 inches wide across the petals, and the leaves are about 3.5 inches long. The width depends on how far apart you hang the vines. I space them about 4.5 inches apart, so the tulips and leaves on neighboring vines sit close without crowding each other. You can hang them closer for more privacy or farther apart for a lighter look. If your window is a different size, measure it first and use the size list in the variations section to choose how many vines and tulips you need.
Can I use a different yarn weight or make it a different size?
Yes, the pattern adapts very easily. With sport weight cotton and a 2.75 mm hook, each tulip comes out about 2.25 inches tall, so you can fit six tulips on every vine and make a more delicate curtain. With worsted weight cotton and a 4.5 mm hook, each tulip is about 3.75 inches tall and looks bold and cheerful, but you need about 40 percent more yarn. In any weight, measure 10 chains first so you know how many chains make the cord length you want. To change the size with the same yarn, add or remove whole vines for width, about 4.5 inches each. Add or remove tulips for length, about 12 inches and 40 chains each including the leaf. If you add vines, keep going through pink, red and yellow in order so the stripes continue. Always make one test tulip first.
How do I wash and care for my curtain?
Cotton is easy to care for, which is one reason I chose it for this curtain. Wash it by hand in cool water with a gentle detergent. You can also put each vine in a mesh laundry bag on a cold delicate cycle, but hand washing keeps the tulips flatter and the petals sharper. Add a color catcher sheet every time, at least for the first few washes, so the red cannot tint the yellow or pink tulips. Never wring the vines. Roll each one in a towel to press out the water, then lay it flat to dry. While it is damp, pull each petal tip into a point and check that every tulip sits upright on its cord. Between washes, a gentle shake outside removes most dust. For storage, coil each vine loosely and keep it in a cotton bag, out of direct sun.
Success!
Thanks for subscribing — check your inbox for a welcome note.
Abbreviations
- ch — chain
- dc — double crochet
- hdc — half double crochet
- rep — repeat
- sc — single crochet
- sl st — slip stitch
- sp — space
- st(s) — stitch(es)
- tr — treble crochet