
Royal Blue Lattice Rose Crochet Bed Cover Pattern
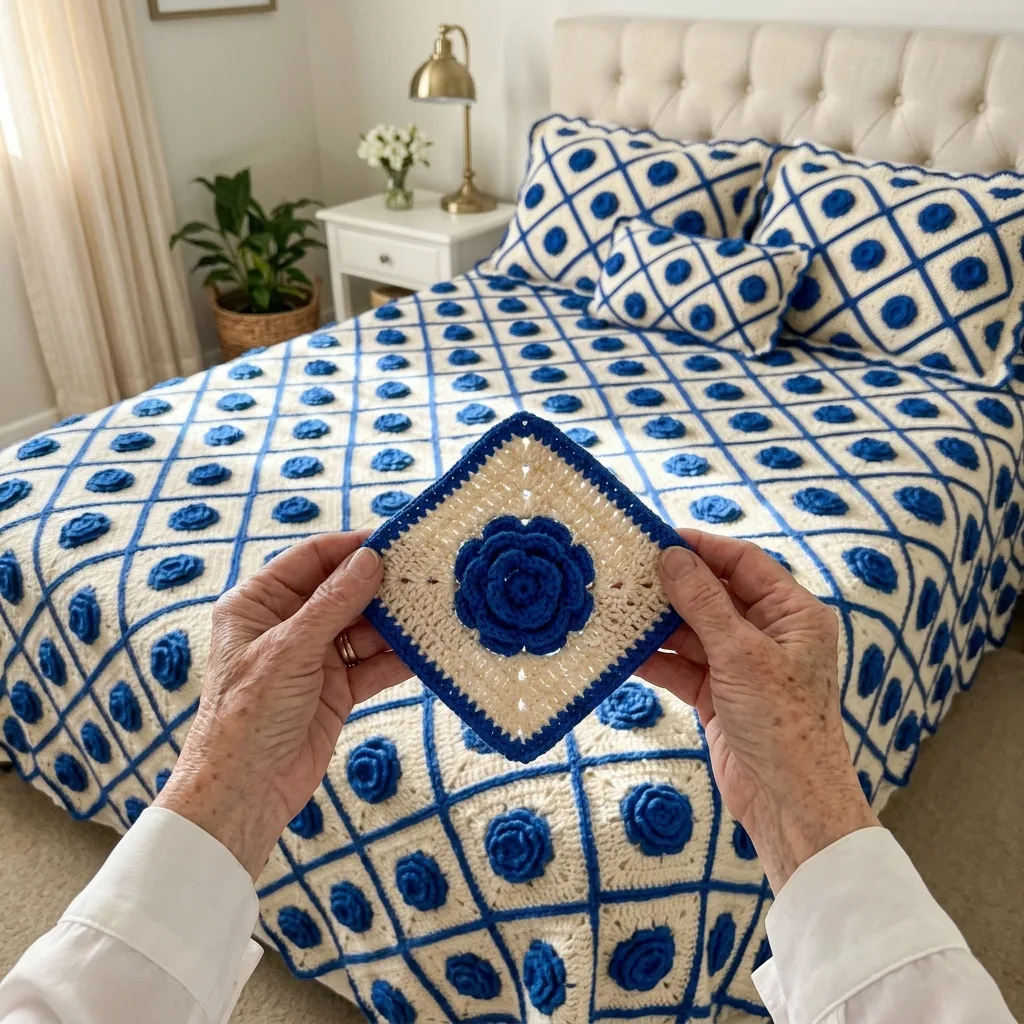
Comfortable with filet-style lattice work and a simple rose motif will get you through this one easily.
A longer bed-sized project best tackled a diamond at a time over a few months.
Every diamond gets its own dimensional rose, so the cream lattice becomes a field of small blooms.
About This Royal Blue Lattice Rose Crochet Bed Cover Pattern Pattern
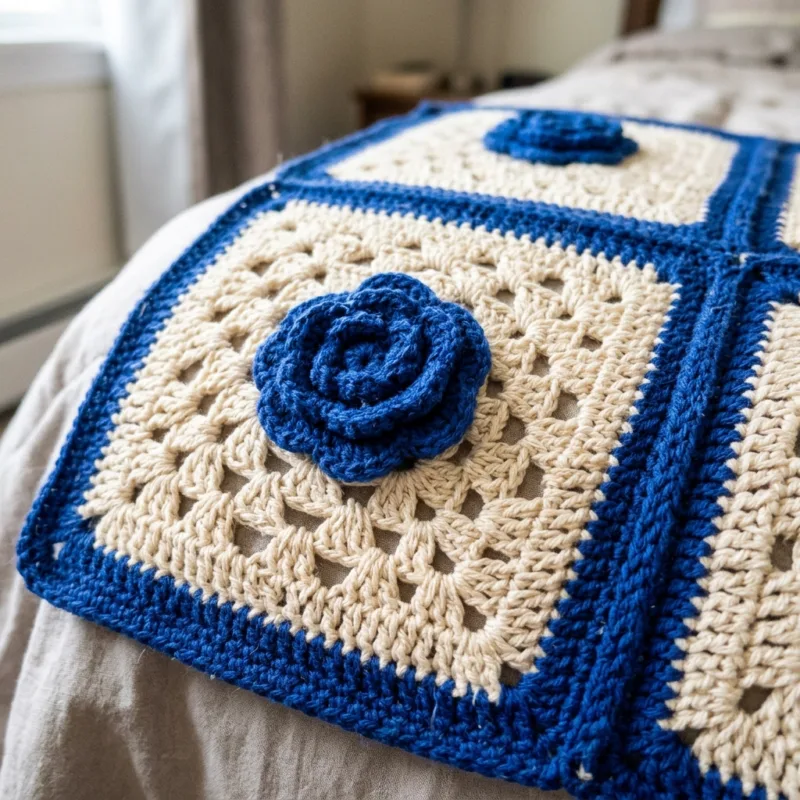
This bed cover is built around a cream crochet lattice, worked as a continuous grid of open diamond shapes, with a royal-blue frame picking out each individual diamond against the paler background. Right in the center of every framed diamond sits a small, raised royal-blue rose, worked separately and sewn down once the lattice is complete. The effect from across the room is almost like a field of blue flowers scattered over a cream trellis, and up close you get the satisfaction of all that careful diamond structure holding everything together.
Technically, this is a filet-adjacent construction. The lattice itself is worked in rows of chains and double crochets that open into a diamond grid rather than a solid fabric, which keeps the whole piece lighter and more breathable than a solid granny-square cover would be. The royal-blue diamond outlines are worked as you go, following the lattice rows but switching color at specific points to trace each diamond's frame. The roses are a compact spiral motif, five or six rounds worked in the round and then gently cupped before being tacked to the center of each diamond.
A queen-sized version of this cover finishes at approximately 90 by 96 inches, giving a generous drop down both sides of the mattress. The lattice repeat is sized so that a full diamond-and-rose unit measures about 6 inches across, which means you're working with a denser grid than a typical granny-square project, but each individual motif comes together quickly since it's mostly open chain-and-dc work rather than dense stitching.
The finished fabric has real drape thanks to the open lattice structure, while the blue diamond frames and roses keep it from reading as flimsy or plain. It falls over the edges of the bed softly rather than sitting stiffly, which makes it a lovely layering piece over a plainer base sheet or duvet.
I'd put this in confident-intermediate territory. If you've worked filet crochet or a lattice-style blanket before, the construction will feel familiar even though the finished look is more elaborate than a basic grid. The real skill here is less about any single difficult stitch and more about keeping your diamond color changes consistent across dozens of repeats, and about managing the separate rose motifs so you always have a stock of finished ones ready to attach as you go.
It's a wonderful choice for anyone who wants a bedroom piece with real presence without going fully solid or fully floral. The cream-and-royal-blue combination reads as classic and a little nautical-adjacent, equally at home in a crisp coastal bedroom or a more traditional, tailored one.
Why You'll Love This Royal Blue Lattice Rose Crochet Bed Cover Pattern Pattern
What I love most about this pattern is how the lattice structure keeps you oriented the entire time you're working on it. Because each diamond is its own small, countable unit, you always know exactly how far along you are, and you can see your progress accumulate row by row in a way that's genuinely motivating on a project this size.
The roses are wonderfully portable. I keep a small bag of royal-blue yarn, a hook, and a handful of started roses with me whenever I know I'll have a few idle minutes, and I just work through them one at a time wherever I am. By the time I sit down to actually work on the lattice itself, I usually already have a healthy stash of finished roses waiting to be sewn on, which makes the lattice sessions feel faster since I'm never stopping to make a rose mid-row.
This is also a lovely project for using up smaller amounts of a special royal-blue yarn you might be saving, since the roses themselves don't take very much per piece. You do want your main cream lattice color to be consistent and plentiful, since that's the color that carries the whole background, but the blue can genuinely stretch further than you'd expect.
Watching the lattice take shape on the bed as you join sections is one of my favorite parts of a project like this. Because the structure is open rather than solid, you can actually see the mattress or base layer through it as you work, which makes the whole thing feel less like a slow slog toward a finished rectangle and more like you're literally building a net of blue and cream over the bed, diamond by diamond.
A few things that stood out to me about this particular design:
- The open lattice keeps the whole project lighter in the hands and on the bed than a solid granny-square cover of the same size
- The roses are small enough to make anywhere, which keeps the project moving even on days you can't sit at a table
- The diamond frames give you a built-in placement guide, so you never have to guess where the next rose goes
- It photographs beautifully in natural light, since the open structure lets light pass through and catch the texture of both the lattice and the roses
What surprised me most making this one was how much faster the lattice rows went compared to a solid square pattern of a similar finished size. Because you're not filling in every stitch, a queen-sized cover in this pattern actually works up faster, row for row, than a solid granny-square equivalent, even though the finished look reads as more intricate.
Switch Things Up
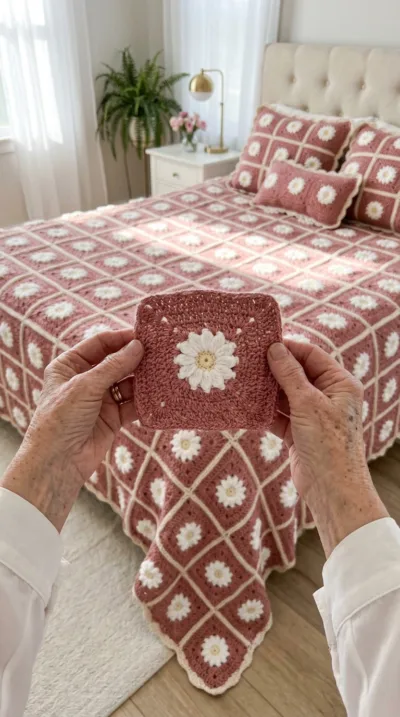
If royal blue and cream isn't your palette, this lattice-and-rose structure adapts beautifully to other colorways. A soft blush lattice frame with deep burgundy roses gives a more romantic, jewel-toned look, while a sage-green frame with ivory roses reads calmer and more botanical. For a more neutral, tonal version, try the same cream color for both the lattice and the frame, with just the roses in a contrasting accent, which lets the texture carry the design instead of the color.
Resizing is straightforward once you know each diamond-and-rose unit finishes at roughly 6 inches. For a twin bed you'll want about 13 units across by 15 down for good coverage with side drop. A full bed moves to about 14 by 15, a queen to about 15 by 16, and a king will want closer to 17 by 17 units, adjusting as needed for how much drop you prefer.
- Twin: approximately 195 diamond units
- Full: approximately 210 diamond units
- Queen: approximately 240 diamond units
- King: approximately 289 diamond units
For a smaller first attempt, scale the same lattice down into a baby blanket at around 8 units by 10 units, which gives you a sweet, airy nursery piece and lets you test your tension and diamond spacing before committing to a bed-sized version.
A lap throw works nicely at around 9 units by 13 units, giving good coverage for the sofa or the foot of the bed without the time investment of the full cover.
For coordinating pillows, a euro sham comes together nicely as a 5 by 5 unit panel backed with plain fabric or a second lattice panel, and a lumbar pillow works well at 4 units by 7 units.
If you'd like a different finish along the edge, a simple shell border instead of a straight scalloped edge gives the piece a softer, more traditional look, or you could finish with a single row of sc in the frame color for something cleaner and more modern.
Switching yarn weight changes the scale significantly. A lighter DK weight with a smaller hook will shrink each diamond unit to around 4.5 inches, meaning more units needed for the same bed coverage but a lacier, more delicate finished piece. Moving up to a worsted-chunky blend will enlarge each unit and reduce the total count, giving a bolder, faster-finishing cover with a more substantial look.
Materials Needed
— Main Fabric
— Tools Required
The Free Pattern
0% complete
— Lattice Diamond Unit (Make 240, cream background with royal-blue frame) :
— Raised Rose Motif (Make 240, royal blue) :
— Layout :
— Scalloped Border :
Assembly Instructions
- Block all finished lattice diamond panels and roses to consistent measurements before joining, since the open mesh structure shows size variance even more readily than a solid square would.
- Sew one royal-blue rose to the center of every diamond frame, using the long tail left from each rose for a neat attachment.
- Lay the panels out in your chosen grid on a large flat surface or your actual bed to confirm the diamond orientation is consistent before joining.
- Join the panels into strips, then join the strips together, matching mesh spaces carefully so the lattice lines stay continuous across seams.
- Weave in all remaining ends on the wrong side of the piece once joining is complete.
- Work the scalloped border in cream around the entire outer edge.
- Block the entire finished bed cover flat once more, pinning out the scallops and gently opening the mesh spaces so the lattice lies evenly before it goes on the bed.
Common Mistakes & How to Fix Them
The most common issue with this pattern is losing track of the diamond color-change points partway through a long lattice row, which results in frames that don't line up cleanly from row to row. Mark your pattern repeat clearly and count carefully at the start of each new diamond, especially after a break, rather than relying on where the previous row's color change looked like it fell.
Pulling the mesh too tight is another frequent mistake, and it flattens the open lattice look the pattern depends on. Keep your tension relaxed through the chain spaces so the diamonds stay open and airy rather than cinching closed, checking periodically that your mesh spaces are consistent in size across the piece.
Skipping the cupping step on the roses before sewing them down is an easy shortcut that costs you the raised, dimensional look that makes this pattern special. Take the extra moment to gently shape each rose before attaching it, and you'll get a much more three-dimensional, textured finished cover.
Carrying the unused color too tightly along the back of the work when switching between cream and blue can pucker the mesh from behind. Carry your floats with a little slack, roughly matching the width of the stitches they span, so the fabric lies flat rather than drawing in.

You Might Also Like





Important Notes
Gauge matters significantly on this open-mesh pattern since the lattice spaces themselves are part of what determines your finished size, not just the stitch count. Make a full test diamond first and measure it before calculating your full grid.
Because the piece is an open mesh rather than a solid fabric, it benefits even more than a solid cover from thorough blocking. A gentle wet block, pinned out with the mesh spaces opened evenly, makes a real difference to how the lattice drapes once it's on the bed.
Buy your cream background yarn in a single large purchase from one dye lot whenever possible, since it's the color that dominates the visual field and any subtle shade shift would be very noticeable across a bed-sized piece.
Wash the finished cover on a gentle cycle in cold water with a mild detergent and lay flat to dry. The open mesh structure can distort more easily than a solid fabric if hung to dry, so always dry this one flat.
However big you decide to make this one, I hope the rhythm of diamond, rose, diamond, rose carries you through it the way it carried me. There's something satisfying about a project built from small, repeatable, countable units-you always know exactly where you stand.
If a full bed cover feels like a lot to commit to right away, start with one diamond and one rose. See how the open lattice feels in your hands and how the blue sits against the cream, and let that single unit tell you whether this is the project for your next few months.
Crochet Abbreviations
You Ask, We Answer
What size bed does this pattern make?
As written, the pattern works for a queen bed using a 15 by 16 grid of diamond units, finishing at approximately 90 by 96 inches with a generous drop on both sides. Adjusted unit counts for twin, full, and king sizes are included in the Switch Things Up section. Because each unit finishes at a predictable 6 inches, you can also calculate your own custom grid for an unusual mattress size by measuring your bed and dividing by 6, adding a couple of extra rows for drop.
Will the open lattice let the mattress or base layer show through?
A little, by design-that's part of what keeps this cover light and breathable rather than heavy and solid. If you'd prefer a more opaque look, you can layer this cover over a solid-color flat sheet or duvet in a coordinating shade, which lets the lattice and roses read as a decorative layer on top rather than the only thing between you and the mattress. Many people actually prefer this layered look, since it lets a complementary base color peek through the open diamonds.
How should I wash and care for the finished bed cover?
Wash on a gentle cycle in cold water with a mild detergent and lay the piece flat to dry rather than hanging it, since the open mesh can stretch out of shape if dried hanging up. Reshape the diamonds and gently re-cup any flattened roses by hand once the piece is dry, and it will keep its crisp, dimensional look for years of regular use.
Success!
Thanks for subscribing — check your inbox for a welcome note.
Abbreviations
- ch — chain
- sl st — slip stitch
- sc — single crochet
- dc — double crochet
- sp — space