Amanda's Creative Corner Crochet · Kitchen
Free Crochet Patterns Handmade with Love

Cream and Teal Puff Flower Granny Square Bed Cover Crochet Pattern
Jump to Pattern
Cream and Teal Puff Flower Granny Square Bed Cover Crochet Pattern
120-160 Hours 0 made this
Intermediate Level

You need puff stitches, double crochet rounds and a scalloped border.

120-160 Hours

Every 10 inch square is a small project you can carry anywhere.

Two Colors Only

Cream and teal keep the whole bed cover calm, fresh and easy to plan.

About This Cream and Teal Puff Flower Granny Square Bed Cover Crochet Pattern Pattern

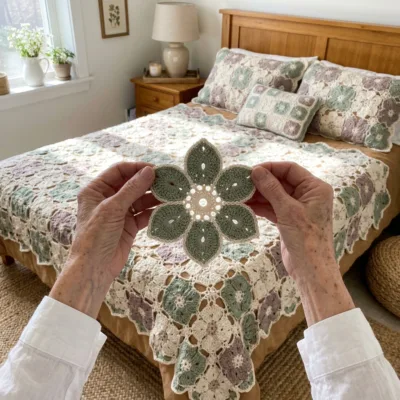
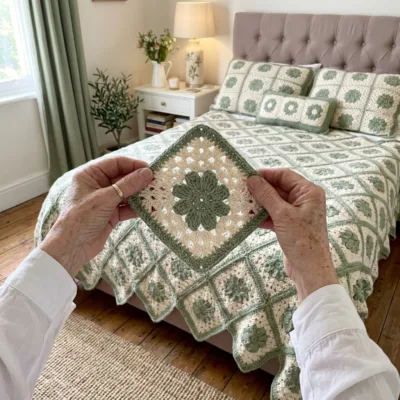
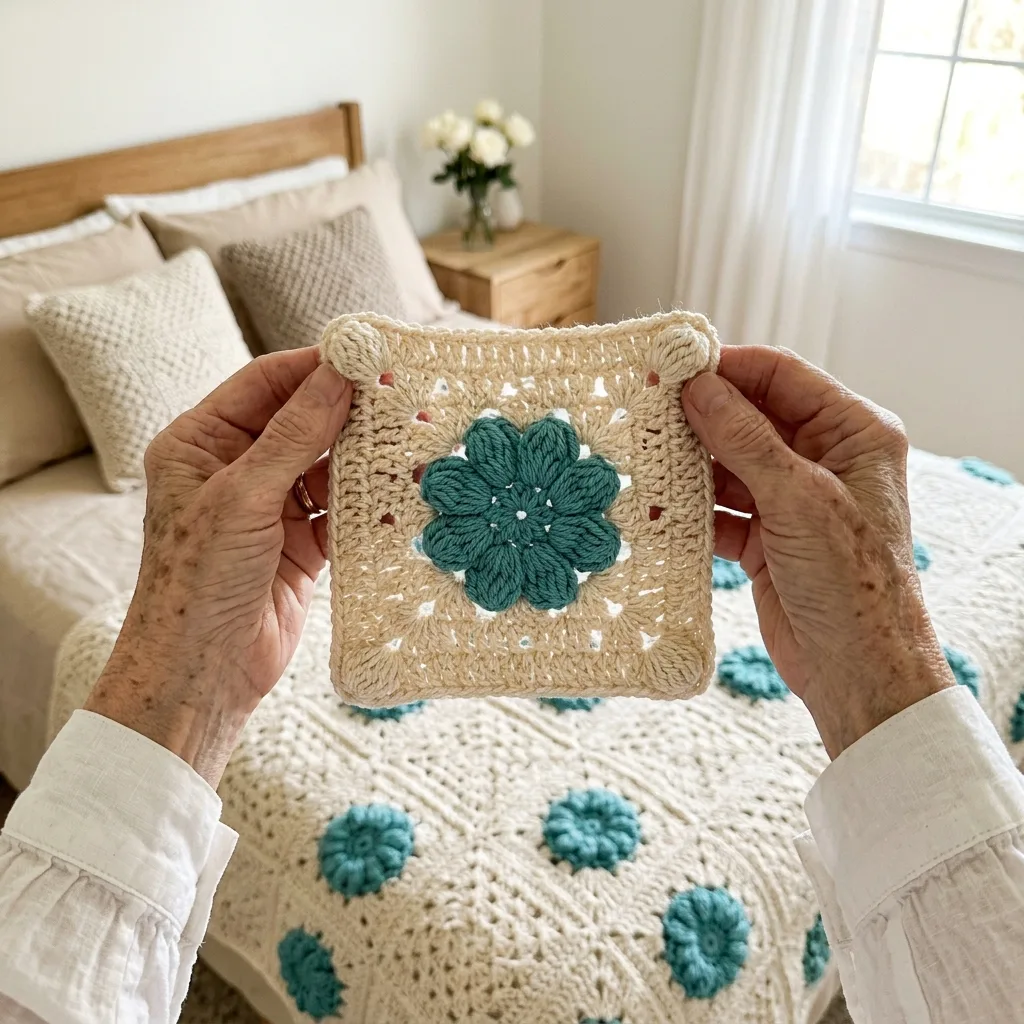
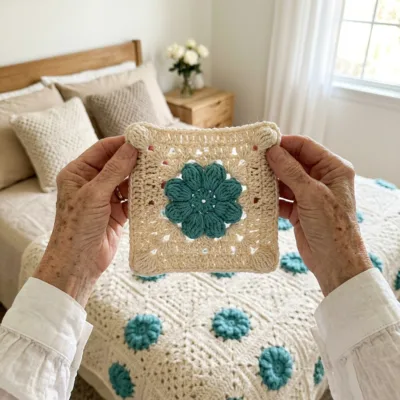
This bed cover is made from 48 identical 10 inch granny squares, set in a grid of 6 columns by 8 rows. Each square has a puffy teal flower in the center, a ring of cream puff stitch bobbles at the corners and cream double crochet rounds to square it off.

The squares are joined with slip stitch seams and finished with a cream shell border, a teal arc round and a scalloped edge with a teal trim. It measures about 70 by 90 inches, works in US terms and suits a confident beginner ready for a big project, or anyone who loves a classic granny square.
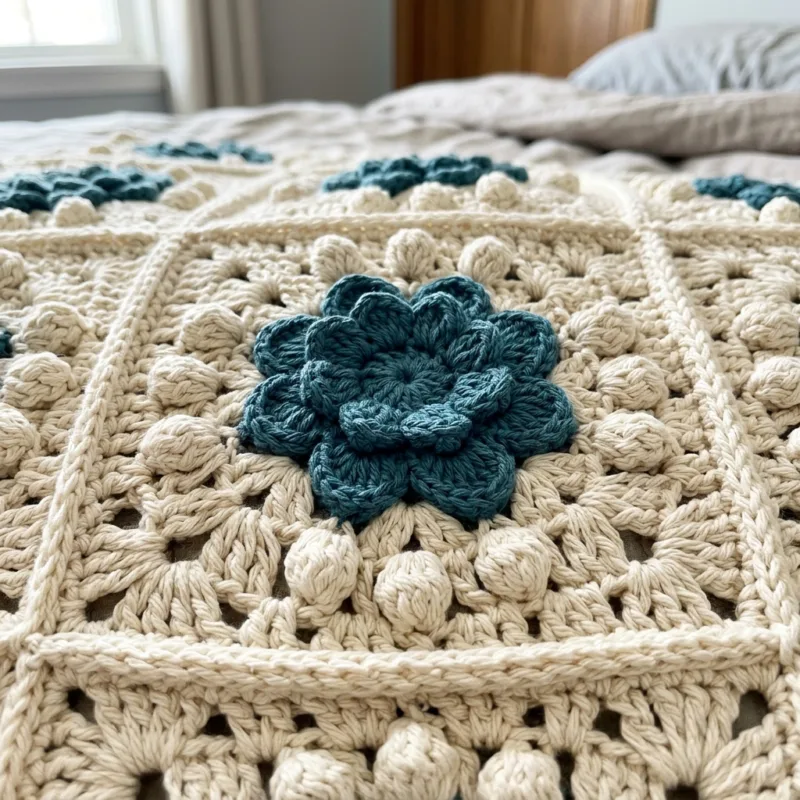
Cream and Teal Puff Flower Granny Square Bed Cover Crochet Pattern step detail

Why You'll Love This Cream and Teal Puff Flower Granny Square Bed Cover Crochet Pattern Pattern

I love that every square is small and portable. You can make a flower on the sofa, in the car or at a friend's house, and the bed cover grows without you noticing.

I also love how two colors are enough. The soft cream lets the teal flowers glow, and the whole bedroom feels calm and cozy.

Switch Things Up

Try sage green or dusty rose flower centers on the cream, or a navy and cream version for a classic look. Make 12 squares in a 3 by 4 grid for a baby blanket, or 20 squares in a 4 by 5 grid for a throw. You can also skip the teal rounds in the border for an all cream finish, or crochet a matching cushion cover from one big square.


Materials Needed

— Main Fabric

01 Worsted weight cotton yarn, cream: about 5,400 yards (2,700 g) for the squares and the border
02 Worsted weight cotton yarn, teal: about 1,300 yards (650 g) for the flower centers and two border rounds
03 Buy a little extra cream, because the cover is heavy and the border uses a lot of yarn

— Tools Required

04 4.0 mm (G-6) crochet hook
05 Yarn needle
06 Stitch markers
07 Scissors
08 Blocking mats and pins
09 Measuring tape

The Free Pattern

Intermediate 120-160 Hours

0% complete

— Flower Puff Granny Square (Make 48, teal center and cream frame) :

Puff stitch (puff st): (yo, insert hook in the stitch, yo, pull up a loop) 3 times in the same stitch, so there are 7 loops on the hook, yo and pull through all 7 loops.
Round 1 (teal): Ch 4, join with sl st to form a ring. Ch 1, 12 sc in the ring, join with sl st to first sc. (12 sc)
Round 2 (teal): Ch 2 (does not count as a stitch), puff st in the same sc, ch 1, *puff st in the next sc, ch 1; repeat from * around, join with sl st to top of first puff st. (12 puff sts and 12 ch-1 sps)
Round 3 (teal): Sl st into the next ch-1 sp, ch 1, 2 sc in the same sp, 2 sc in each remaining ch-1 sp around, join with sl st to first sc. (24 sc)
Round 4 (teal): Ch 1, 2 sc in the same sc as the join, sc in the next sc, *2 sc in the next sc, sc in the next sc; repeat from * around, join with sl st to first sc. Fasten off teal. Place a marker in the 1st, 10th, 19th and 28th sc to mark the four corners. (36 sc)
Round 5 (cream): Join cream in the first marked sc, ch 2 (does not count as a stitch), *(puff st, ch 3, puff st) in the marked sc, (ch 1, skip 1 sc, puff st in the next sc) 4 times, ch 1; repeat from * around, joining the last ch 1 to the top of the first puff st with a sl st. (24 puff sts, 20 ch-1 sps and 4 ch-3 corner sps)
Round 6 (cream): Sl st into the next ch-3 corner sp, ch 3 (counts as dc), (2 dc, ch 2, 3 dc) in the same sp, *dc in each puff st and 1 dc in each ch-1 sp across the side (11 dc), (3 dc, ch 2, 3 dc) in the next corner sp; repeat from * twice more, dc in each puff st and ch-1 sp across (11 dc), join with sl st to top of ch-3. (68 dc and 4 ch-2 corner sps: 17 dc on each side between corner sps)
Round 7 (cream): Sl st in each of the next 2 dc and into the corner sp, ch 3, (2 dc, ch 2, 3 dc) in the same sp, *dc in each of the next 17 dc, (3 dc, ch 2, 3 dc) in the next corner sp; repeat from * twice more, dc in each of the next 17 dc, join with sl st to top of ch-3. (92 dc and 4 ch-2 corner sps: 23 dc on each side between corner sps)
Round 8 (cream): Sl st in each of the next 2 dc and into the corner sp, ch 3, (2 dc, ch 2, 3 dc) in the same sp, *dc in each of the next 23 dc, (3 dc, ch 2, 3 dc) in the next corner sp; repeat from * twice more, dc in each of the next 23 dc, join with sl st to top of ch-3. (116 dc and 4 ch-2 corner sps: 29 dc on each side between corner sps)
Round 9 (cream): Sl st in each of the next 2 dc and into the corner sp, ch 3, (2 dc, ch 2, 3 dc) in the same sp, *dc in each of the next 29 dc, (3 dc, ch 2, 3 dc) in the next corner sp; repeat from * twice more, dc in each of the next 29 dc, join with sl st to top of ch-3. (140 dc and 4 ch-2 corner sps: 35 dc on each side between corner sps)
Round 10 (cream edging): Sl st in each of the next 2 dc and into the corner sp, ch 1, 3 sc in the same sp, *sc in each of the next 35 dc, 3 sc in the next corner sp; repeat from * twice more, sc in each of the next 35 dc, join with sl st to first sc. Fasten off. The square should measure about 10 inches. (152 sc: 35 on each side plus 3 in each corner)
Make a test square first and measure it. If it is smaller than 10 inches, go up a hook size. If you change the size of the square, the border counts below change too.

— Layout (6 columns x 8 rows) :

Lay all 48 squares out in a grid of 6 columns across and 8 rows down. All squares are the same, so the grid is easy to plan. Turn every flower to the same direction so the cover looks even.
The joined center measures about 60 x 80 inches before the border, and about 70 x 90 inches after the border.

— Border (Make 1, worked around the whole cover) :

The border is worked in the round with the right side facing and adds about 5 inches on every side. Each square edge has 38 stitches counted from the stitch after one corner center to the next corner center, and the counts below are based on that.
Round 1 (cream): Join cream in the center sc of any outer corner, ch 1, 3 sc in the same sc, *sc in each sc along the edge, working 1 sc in each sc of the squares and 1 sc in each corner center where two squares meet (227 sc along each top and bottom edge, 303 sc along each long side), 3 sc in the next outer corner center sc; repeat from * around, join with sl st to first sc. (1,072 sc: 227 on each top and bottom edge, 303 on each long side, plus 3 in each corner)
Round 2 (cream): Sl st into the center sc of the first corner, ch 1, 3 sc in the same sc, *sc in each sc across to the next corner center sc, 3 sc in the corner center sc; repeat from * around, join with sl st to first sc. (1,080 sc: 229 on each top and bottom edge, 305 on each long side, plus 3 in each corner)
Round 3 (cream): Sl st into the center sc of any corner, ch 3 (counts as dc), 6 dc in the same sc (7 dc corner shell). *Sc in the next sc, [skip 1 sc, 3 dc in the next sc, skip 1 sc, sc in the next sc] 57 times along each top and bottom edge or 76 times along each long side, 7 dc in the center sc of the next corner; repeat from * around, ending after the last edge, and join with sl st to top of ch-3. (826 dc and 270 sc: 266 side shells and 4 corner shells)
Round 4 (teal): Join teal in the center dc of any corner shell, ch 1, (sc, ch 3, sc, ch 3, sc) in the same dc, *ch 3, sc in the next sc, [ch 3, sc in the center dc of the next shell, ch 3, sc in the next sc] 57 times along each top and bottom edge or 76 times along each long side, ch 3, (sc, ch 3, sc, ch 3, sc) in the center dc of the next corner shell; repeat from * around, ending the last repeat with ch 3 and a sl st to the first sc. (548 sc and 548 ch-3 arcs)
Round 5 (cream): Join cream in any sc, ch 1, sc in the same sc, *3 dc in the next ch-3 arc, sc in the next sc; repeat from * around, ending with 3 dc in the last arc, join with sl st to first sc. (1,644 dc and 548 sc: 548 mini fans)
Round 6 (teal): Join teal in any sc, ch 1, sc in the same sc, *ch 3, skip 3 dc, sc in the next sc; repeat from * around, ending with ch 3, join with sl st to first sc. Fasten off and weave in the ends. (548 sc and 548 ch-3 arcs)
The fans may ruffle slightly at the corners. Steam or wet block the border flat and the scallops will settle.

Assembly Instructions

  1. Make 48 Flower Puff Granny Squares, weave in all ends, and block every square to 10 inches.
  2. Lay the squares out on a large floor or bed in 6 columns by 8 rows, turning every flower the same way.
  3. Join the squares into 8 strips of 6. Hold two squares with right sides together and slip stitch through the back loops of both edges from corner center sc to corner center sc (39 stitches).
  4. Join the 8 strips in the same way, matching the seams, and slip stitch through all four corners where four squares meet.
  5. Lightly steam the joined center so it lies flat.
  6. Work Border Rounds 1 and 2 around the whole piece to set the stitch counts, then Rounds 3 to 6, changing color as written.
  7. Wet or steam block the finished cover on a clean floor with mats and pins, shaping each scallop, and let it dry fully.

Common Mistakes & How to Fix Them

Loose puff stitches look floppy, so pull up each loop to the same height and keep your tension even.

Missing the marked corners in Round 5 makes the square lopsided, so place the four markers before you start.

Squares of different sizes cause wavy seams, so measure each one and block it to 10 inches before joining.

Changing the square size without updating the border changes the stitch counts, so recount before you start Round 3.


Denise

Denise designs cozy granny square blankets and home decor patterns, and she writes every round with exact stitch counts so you can follow along with confidence.


Important Notes

Gauge: each finished square should measure about 10 inches with a 4.0 mm hook. Make one test square before you start.

Blocking matters for the scalloped border, so pin each fan flat while it dries.

Yarn amounts are approximate. The cover is heavy, so buy extra cream.

Wash the finished cover in cold water on a gentle cycle and dry it flat.


I hope you enjoy making this cream and teal bed cover as much as I enjoyed designing it. Take it one flower at a time, and share it with someone you love when it is done.

Crochet Abbreviations

01 ch — chain
02 sl st — slip stitch
03 sc — single crochet
04 dc — double crochet
05 sp(s) — space(s)
06 st(s) — stitch(es)
07 yo — yarn over
08 puff st — puff stitch, worked as described in the Flower Puff Granny Square

You Ask, We Answer

How big is the finished bed cover?

It measures about 70 by 90 inches after blocking, which suits a full size bed or works as a generous cover on a larger bed.

Can I use a different yarn weight or make it smaller?

Yes. A different yarn weight changes the square size, so make a test square first. For a throw, make 20 squares in a 4 by 5 grid and recount the border stitches.

How do I wash it?

Wash it in cold water on a gentle cycle and lay it flat to dry. Cotton yarn can soften and relax a little with washing, which adds to its charm.