Amanda's Creative Corner Crochet · Kitchen
Free Crochet Patterns Handmade with Love

Flower Granny Square Bed Cover Crochet Pattern
Jump to Pattern
Flower Granny Square Bed Cover Crochet Pattern
150-200 Hours 0 made this
Intermediate Level

You should be comfortable with sc, dc and working into front and back loops.

150-200 Hours

Each square is small and portable, so you can work on it anywhere.

Raised Cream Seams

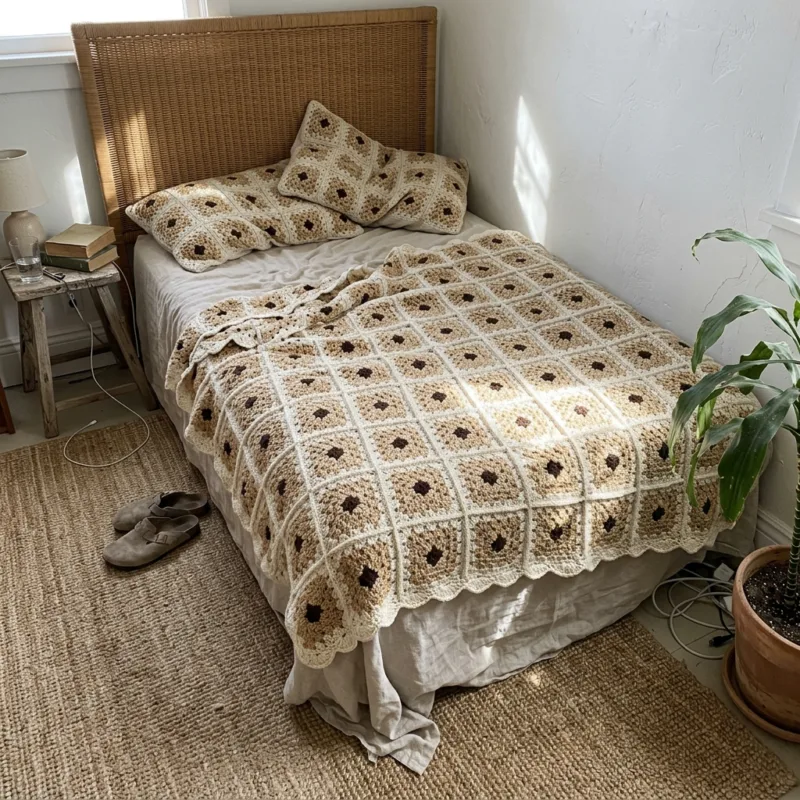
Cream seams frame every tan flower and make the cover look like one piece of lace.

About This Flower Granny Square Bed Cover Crochet Pattern Pattern

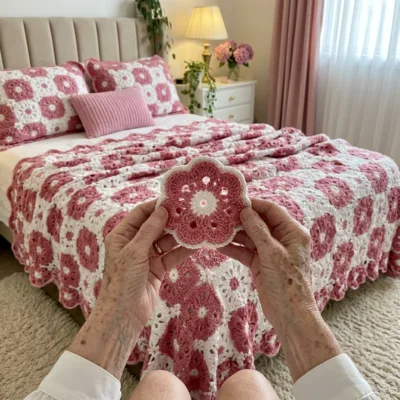
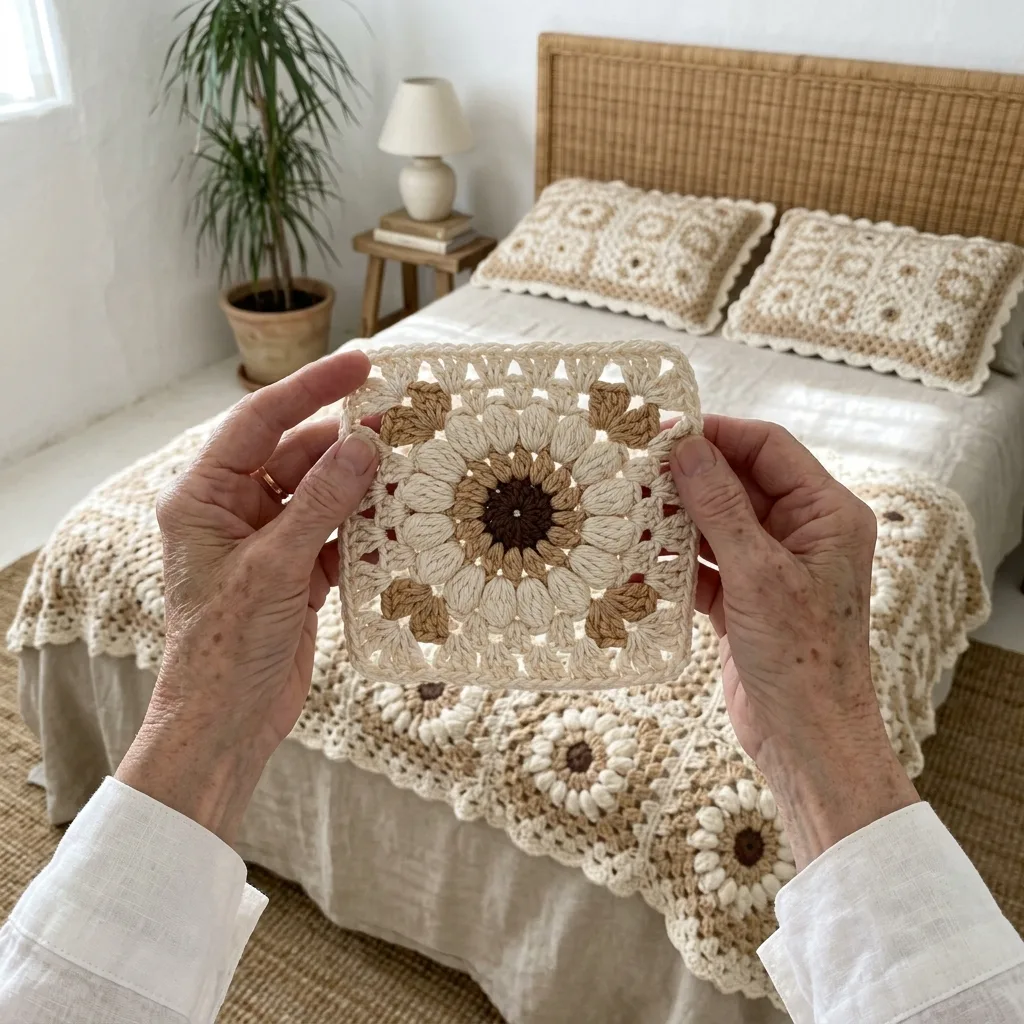
This bed cover is made from 195 flat flower squares. Each one has a tiny dark brown center, a tan ring, twelve puffy cream petals, tan corner blocks and open cream lace rounds. The squares are joined with raised cream seams that form a neat grid.

It finishes at about 88 by 102 inches with the scalloped shell border, which fits a queen bed with a generous drape. You will use sc, dc and a simple slip stitch seam. It suits crocheters who have made a few granny squares and want a big, calm project.
Flower Granny Square Bed Cover Crochet Pattern step detail

Why You'll Love This Flower Granny Square Bed Cover Crochet Pattern Pattern

I love that every square is small enough to carry in a bag. I worked mine on the sofa, in waiting rooms and on long evenings, and the pile of squares grew faster than I expected.

The tan and cream palette is quiet and warm in a bedroom. It also makes a lovely gift for a new home, and the raised cream seams make the finished cover look like a single piece of lace.
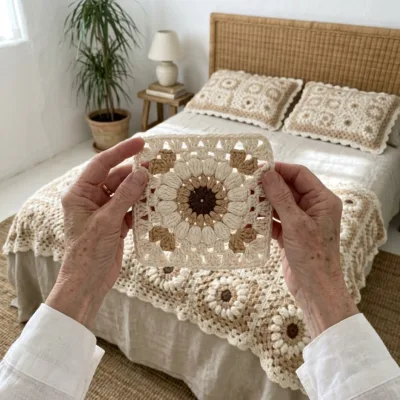

Switch Things Up

Try sage green flower rings with a cream body for a fresh look, or navy and cream for a bolder one. For a baby blanket, make 6 by 8 squares, which gives about 39 by 52 inches. For a throw, make 8 by 10 squares, which gives about 52 by 65 inches. You can also work the tan rounds in soft gray for a more modern feel.


Materials Needed

— Main Fabric

01 Worsted weight cotton yarn, cream: about 3,400 g (about 5,800 yd) for the petals, square bodies, seams and border
02 Worsted weight cotton yarn, tan: about 800 g (about 1,400 yd) for the flower rings and corner blocks
03 Worsted weight cotton yarn, dark brown: about 170 g (about 300 yd) for the flower centers
04 Buy about 10 percent extra of each color for swatching and mistakes

— Tools Required

05 4.0 mm (G-6) crochet hook
06 Yarn needle for weaving in ends
07 Stitch markers
08 Sharp scissors
09 Blocking mats and rust-proof pins
10 Measuring tape

The Free Pattern

Intermediate 150-200 Hours

0% complete

— Flower Granny Square (Make 195, cream and tan) :

Each square uses three colors: dark brown for Round 1, tan for Rounds 2, 3 and 5, and cream for Rounds 4, 6, 7 and 8. Unless told otherwise, join each round with a sl st to the first stitch. Each finished square should measure about 6.5 inches along each side after blocking.
Round 1 (dark brown): Make a magic ring, ch 1, 12 sc in the ring, join with sl st to the first sc and pull the ring tight. Fasten off. (12 sc)
Round 2 (tan): Join tan in any sc, ch 1, 2 sc in each sc around, join with sl st to the first sc. (24 sc)
Round 3 (tan): Ch 1, sc in each sc around, join with sl st to the first sc. Fasten off. (24 sc)
Round 4 (cream petals): Working in the front loops only of Round 3, join cream in any front loop, ch 3 (counts as a dc), 4 dc in the same loop, sl st in the next front loop, *5 dc in the next front loop, sl st in the next front loop*, repeat from * to * 10 more times. Fasten off. (12 petals of 5 dc each, 60 dc)
Round 5 (tan): Fold the petals forward. Join tan in any unworked back loop of Round 3, ch 3 (counts as a dc), 2 dc in the same back loop, ch 2, 3 dc in the same back loop (first corner made), dc in each of the next 5 back loops, *(3 dc, ch 2, 3 dc) in the next back loop, dc in each of the next 5 back loops*, repeat from * to * 2 more times, join with sl st to the top of the ch 3. Fasten off. (44 dc and 4 ch-2 corner sp, 11 dc along each side)
Round 6 (cream): Join cream in any ch-2 corner sp, ch 3 (counts as a dc), 2 dc in the same sp, ch 2, 3 dc in the same sp (first corner made), *[ch 1, sk next dc, dc in next dc] 5 times, ch 1, sk next dc, (3 dc, ch 2, 3 dc) in the next ch-2 sp*, repeat from * to * 2 more times, [ch 1, sk next dc, dc in next dc] 5 times, ch 1, sk next dc, join with sl st to the top of the ch 3. (44 dc, 24 ch-1 sp and 4 ch-2 corner sp)
Round 7 (cream): Sl st in each of the next 2 dc and into the first ch-2 sp, ch 3 (counts as a dc), 2 dc in the same sp, ch 2, 3 dc in the same sp, *dc in each dc and in each ch-1 sp along the side (17 dc), (3 dc, ch 2, 3 dc) in the next ch-2 sp*, repeat from * to * 2 more times, dc in each dc and in each ch-1 sp along the last side (17 dc), join with sl st to the top of the ch 3. (92 dc and 4 ch-2 corner sp, 23 dc along each side)
Round 8 (cream): Sl st in each of the next 2 dc and into the first ch-2 sp, ch 1, (sc, ch 2, sc) in the same sp, *sc in each of the next 23 dc, (sc, ch 2, sc) in the next ch-2 sp*, repeat from * to * 2 more times, sc in each of the next 23 dc, join with sl st to the first sc. Fasten off and weave in ends. (100 sc and 4 ch-2 corner sp, 23 sc between corners)
Block every square to the same size before joining. Pin out the four corners so the sides stay straight and the cream lace opens up.

— Layout :

Arrange the squares in 15 rows of 13 squares each (195 squares in total). Every square is identical, so the pattern comes from the tan flowers inside the cream lace and the raised cream seams.
Lay the whole cover out on a bed or a large floor first and step back to check that all squares face the same way before joining.
Join the squares with cream. Hold two squares with wrong sides together and work a sl st seam through the back loops of both, matching the ch-2 corner spaces at each end. Each seam runs along 25 sc, so the raised ridge shows on the right side.
Row plan: Row 1 to Row 15: 13 squares across, each square joined to its neighbors along every shared side. (15 rows, 13 squares per row, 195 squares)

— Border (cream) :

Round 1: Join cream in any outer corner ch-2 sp, ch 1, 3 sc in the same sp, sc in each sc along the edge and 1 sc at each seam join, working 3 sc in each outer corner ch-2 sp. Join with sl st to the first sc. (337 sc along each top and bottom edge, 389 sc along each side edge, 12 sc in the 4 outer corners, 1,464 sc in all)
Round 2: Ch 1, sc in the same st, *sk next sc, 5 dc in the next sc, sk next sc, sc in the next sc*, repeat from * to * 364 more times, sk next sc, 5 dc in the next sc, sk next sc, join with sl st to the first sc. Fasten off and weave in ends. (366 shells of 5 dc and 366 sc)
The Round 1 count is a multiple of 4 on purpose, so the shells land evenly. If you change the grid size, use 25 sc for each square edge plus 1 sc at each join, add 3 sc at each outer corner, and make sure the total divides by 4.

Assembly Instructions

  1. Weave in all ends on every flower square and block each one to about 6.5 by 6.5 inches.
  2. Lay out the squares in 15 rows of 13 and check that they all face the same way.
  3. Join the squares into 15 rows with a cream sl st seam through the back loops of both squares, wrong sides together, matching corner space to corner space.
  4. Join the rows together with the same cream seam, lining up the corner joins so the grid stays straight.
  5. Block the whole bed cover flat, pin the outer edges straight and let it dry fully.
  6. Work Border Round 1 in cream around the outer edge, placing 3 sc in each outer corner so the cover lies flat.
  7. Work Border Round 2 to make the scalloped shells, then weave in the last ends and give the cover a light steam.

Common Mistakes & How to Fix Them

Squares of different sizes make the grid wavy, so check each one against a 6.5 inch template before you join.

Working Round 5 into the front loops instead of the unworked back loops of Round 3 hides the petals, so always fold the petals forward first.

Skipping the wrong dc in Round 6 changes the ch-1 space count and pulls the corners out of shape, so count 5 dc and 6 ch-1 spaces on every side.

Seams worked too tightly make the cover stiff and pucker the grid, so keep your slip stitches loose and even.


Denise

Denise is a crochet designer who loves turning simple granny squares into cozy projects for the home.


Important Notes

Each finished square should measure about 6.5 inches. If yours are larger or smaller, change your hook size by 0.5 mm.

Block every square before joining. Cotton holds its shape well once it is pinned and dried flat.

Buy all your yarn for each color from the same dye lot to avoid shade differences across the cover.

Machine wash cold on a gentle cycle and dry flat, or follow the care label on your yarn.


I hope this bed cover brings as much warmth to your bedroom as it did to mine. Take your time, enjoy each little flower, and tell me how yours turns out.

Crochet Abbreviations

01 ch — chain
02 sl st — slip stitch
03 sc — single crochet
04 dc — double crochet
05 sk — skip
06 sp — space
07 st — stitch

You Ask, We Answer

What is the finished size of the bed cover?

With 195 squares of about 6.5 inches, laid out 13 across by 15 down, the cover is about 84.5 by 97.5 inches before the border and about 88 by 102 inches after it.

Can I use a different yarn weight or make it smaller?

Yes. DK cotton gives smaller squares, so you will need more of them. For a throw, make 8 by 10 squares, and for a baby blanket make 6 by 8 squares.

How do I wash and care for the finished cover?

Wash it cold on a gentle cycle with mild soap, reshape it while damp and dry it flat. Avoid high heat so the cotton keeps its shape.