
Amanda's Creative Corner Crochet · Kitchen
Free Crochet Patterns Handmade with Love

Upcycled Flannel Patchwork Bed Cover Crochet Pattern
Jump to Pattern
Upcycled Flannel Patchwork Bed Cover Crochet Pattern
120-160 Hours 421 made this
Intermediate Level

You need basic single crochet and a little patience with counting.

120-160 Hours

Every square is small, so you can work a few at a time.

Made From Old Shirts

Worn flannel shirts become a cozy bed cover full of memories.

About This Upcycled Flannel Patchwork Bed Cover Crochet Pattern Pattern

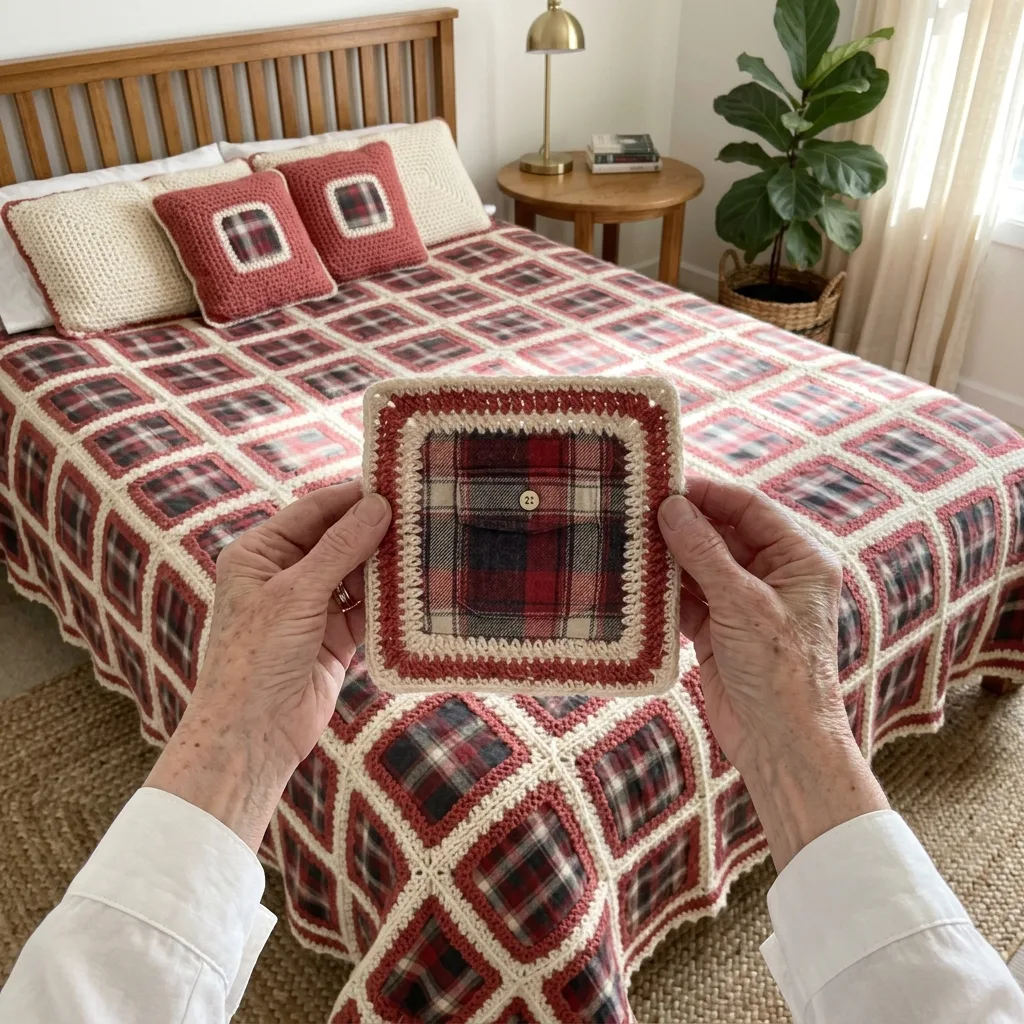
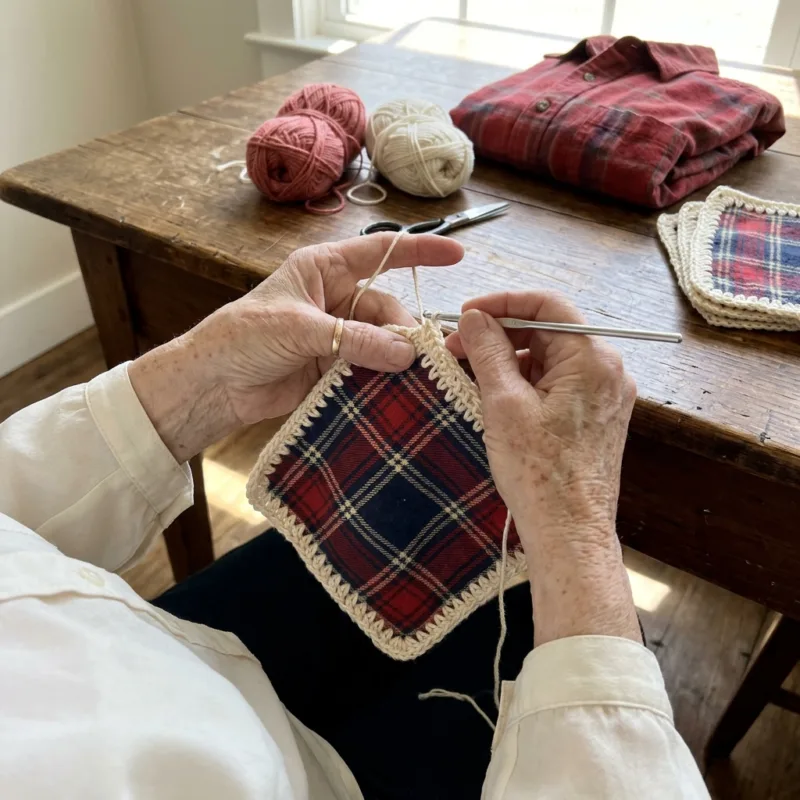
This bed cover turns old plaid flannel shirts into a patchwork you can keep for years. Each 6 inch flannel square gets small holes along its edge, then four rounds of single crochet in dusty red and cream. The framed squares are joined with slip stitches, which makes a thin cream lattice, and the cover ends with a picot edge.

The finished size is about 80 by 93 inches, made of 168 squares in a 12 by 14 grid. It suits crocheters who like portable projects and anyone with a closet of shirts they cannot throw away.
Upcycled Flannel Patchwork Bed Cover Crochet Pattern step detail

Why You'll Love This Upcycled Flannel Patchwork Bed Cover Crochet Pattern Pattern

I love that every square starts as a small, quiet project. I can punch the holes in the evening, crochet a frame on the porch and carry a few squares in my bag. The bed cover grows without ever feeling like a mountain.

It is also a lovely way to keep a favorite shirt close. When I look at the plaid squares, I remember who wore them. It makes the bedroom feel warm and lived in.

Switch Things Up

Try soft denim squares with light blue and cream yarn, or autumn plaids in rust and forest green. For a baby blanket, make 6 squares across and 7 down for about 39 by 46 inches. For a sofa throw, make 8 across and 10 down. You can also frame one square for a matching pillow cover, or swap the picot edge for a plain single crochet border.


Materials Needed

— Main Fabric

01 About 800 g (1,850 yards) of DK weight cotton yarn in cream, estimated for 168 squares, seams and border
02 About 580 g (1,350 yards) of DK weight cotton yarn in dusty red
03 14 adult cotton flannel shirts, or about 6 yards of plaid flannel, cut into 168 squares of 6 inches (15 cm)
04 About 4 yards (45 inch wide) of lightweight iron-on interfacing to stabilize the flannel

— Tools Required

05 3.5 mm (E-4) crochet hook
06 1/8 inch (3 mm) hole punch, leather punch or sharp awl
07 Rotary cutter, ruler and cutting mat
08 Iron and pressing cloth
09 Yarn needle
10 Stitch markers
11 Scissors
12 Blocking mats and pins
13 Measuring tape

The Free Pattern

Intermediate 120-160 Hours

0% complete

— Prepare the Flannel Squares (Make 168, plaid flannel) :

Wash and dry the shirts on hot so the flannel shrinks before you start. Cut the shirts apart and press the fabric flat.
Iron interfacing to the back of the flannel, then cut 168 squares measuring 6 inches (15 cm). For 12 of the squares, center a shirt chest pocket, with its button, inside the square.
On each square, mark holes 1/4 inch (6 mm) in from the raw edge and about 1/4 inch (6 mm) apart. Place one hole in each corner and 22 holes between every pair of corner holes. Punch all holes through the fabric and interfacing.
Hole check: 4 corner holes + 4 sides x 22 holes between corners (92 holes)

— Framed Flannel Square (Make 168, 156 plain and 12 with a pocket, dusty red and cream) :

Work with the right side of the flannel facing you. Push the hook through each hole from front to back. The first round sits close to the edge, so keep your tension relaxed.
Round 1 (dusty red): Join dusty red with a sl st in any corner hole. Ch 1, 3 sc in the same corner hole, *sc in each of the next 22 holes, 3 sc in the next corner hole; rep from * twice more, sc in each of the last 22 holes, sl st to first sc (100 sc)
Round 2 (dusty red): Ch 1, *sc in next st, 3 sc in next st, sc in next st, sc in next 22 sts; rep from * 3 more times, sl st to first sc (108 sc)
Round 3 (cream): Join cream in the first sc of Round 2. Ch 1, *sc in next 2 sts, 3 sc in next st, sc in next 24 sts; rep from * 3 more times, sl st to first sc (116 sc)
Round 4 (cream): Ch 1, *sc in next 3 sts, 3 sc in next st, sc in next 25 sts; rep from * 3 more times, sl st to first sc. Fasten off and weave in the ends (124 sc)
Between two corner middle stitches, each side has 30 stitches. These are the stitches you will join. The middle stitch of each 3 sc corner group is left open for joining.

— Layout :

Lay the squares out on a bed or the floor in a grid of 12 squares across and 14 squares down (168 squares).
Sort the plaids into three or four families. Place them so that no two squares of the same plaid touch. Scatter the 12 pocket squares across the grid, keeping a few near the center.
Take a photo of the layout and number each strip so you can find your place while joining.

— Join the Squares (Make 310 seams, cream) :

Join 12 squares into one strip (11 seams per strip), then make 14 strips (154 seams). Join the 14 strips together with 13 seams of 12 squares each (156 seams). Total: 310 seams.
Seam: Place two squares with right sides together. Join cream in the back loops of the first stitch after a corner middle stitch on both squares. Sl st through the back loops of both squares across the 30 sts, leaving the corner middle stitches unworked (30 sl st)
At every point where four squares meet, work 1 sc through all four corner middle stitches to close the gap.

— Border (cream and dusty red) :

Each outer edge uses 30 sts from every square plus 1 st at every seam. The top and bottom have 371 sts each (12 x 30 + 11). The two sides have 433 sts each (14 x 30 + 13).
Round 1 (cream): Join cream with a sl st in any outer corner middle st. Ch 1, 3 sc in the same st, sc in each of the next 371 sts across the top, 3 sc in the corner middle st, sc in each of the next 433 sts down the side, 3 sc in the corner, sc in the next 371 sts across the bottom, 3 sc in the corner, sc in the next 433 sts up the side, sl st to first sc (1620 sc)
Round 2 (cream): Ch 1, sc in each st around, working 3 sc in the middle st of each 3 sc corner group, sl st to first sc (1628 sc)
Round 3 (dusty red): Join dusty red in any st. Ch 1, sc in each st around, working 3 sc in the middle st of each corner, sl st to first sc (1636 sc)
Round 4 (cream): Join cream in any st. Ch 1, sc in each st around, working 3 sc in the middle st of each corner, sl st to first sc (1644 sc)
Round 5 (dusty red picot): Join dusty red in any st. Ch 1, *sc in next 4 sts, picot (ch 3, sl st in the first ch); rep from * 410 more times, sl st to first sc. Fasten off and weave in the ends (1644 sc and 411 picots)
A picot may not land exactly on a corner, which is fine. Keep the 4 sc rhythm going so the edge stays even.

Assembly Instructions

  1. Wash, dry and cut the flannel, then iron on the interfacing and cut the 168 squares.
  2. Punch the 92 holes in each square, then crochet the four framing rounds around every square.
  3. Lay out all 168 framed squares in a grid of 12 across and 14 down and photograph your layout.
  4. Join the squares into 14 strips of 12 squares with slip stitch seams in the back loops.
  5. Join the 14 strips together, matching the corners, and close every four-square intersection with one sc.
  6. Work the border rounds around the whole cover, then finish with the dusty red picot round.
  7. Weave in all ends, wet block the cover flat and pin it to size, and let it dry completely.

Common Mistakes & How to Fix Them

Punching holes too close to the fabric edge makes the flannel pull and fray, so keep every hole 1/4 inch in and iron on the interfacing first.

Skipping the corner stitch counts makes the squares curl. Count 100, 108, 116 and 124 stitches after each round.

Joining squares in the wrong direction mixes up the plaid layout, so photograph your grid and number the strips.

Working the seams too tightly makes the cover pucker. Use a hook one size larger for the joins if the seam feels stiff.


Denise

Denise designs cozy crochet patterns for the home, with a soft spot for projects that reuse beloved fabric.


Important Notes

One framed square should measure about 6.5 inches (16.5 cm). Make one test square before you cut all the flannel, because sizes and yarn amounts are estimated.

Block the finished cover flat. Check the yarn amounts and buy a little extra of each color.

Wash on a cold gentle cycle with a color catcher, since the red flannel and cream yarn share the cover, and dry flat.


I hope this pattern helps you turn a pile of old shirts into a cover you will reach for every night. Send me a note when you finish your first square.

Crochet Abbreviations

01 ch — chain
02 sc — single crochet
03 sl st — slip stitch
04 st(s) — stitch(es)
05 rep — repeat
06 picot — ch 3, sl st in the first ch

You Ask, We Answer

What is the finished size?

About 80 by 93 inches (203 by 236 cm) with the border, made of 168 squares in a 12 by 14 grid.

Can I use another yarn weight or fabric?

Yes. Worsted cotton works with a 4.0 mm hook, but the stitch counts and finished size will change, so make a test square first. Denim, shirting or quilting cotton also work with interfacing.

How do I wash and care for it?

Wash on a cold gentle cycle with a color catcher, then lay it flat to dry. Avoid high heat so the cotton yarn and flannel keep their shape.





