
Navy and White Anemone Flower Square Bedspread Crochet Pattern
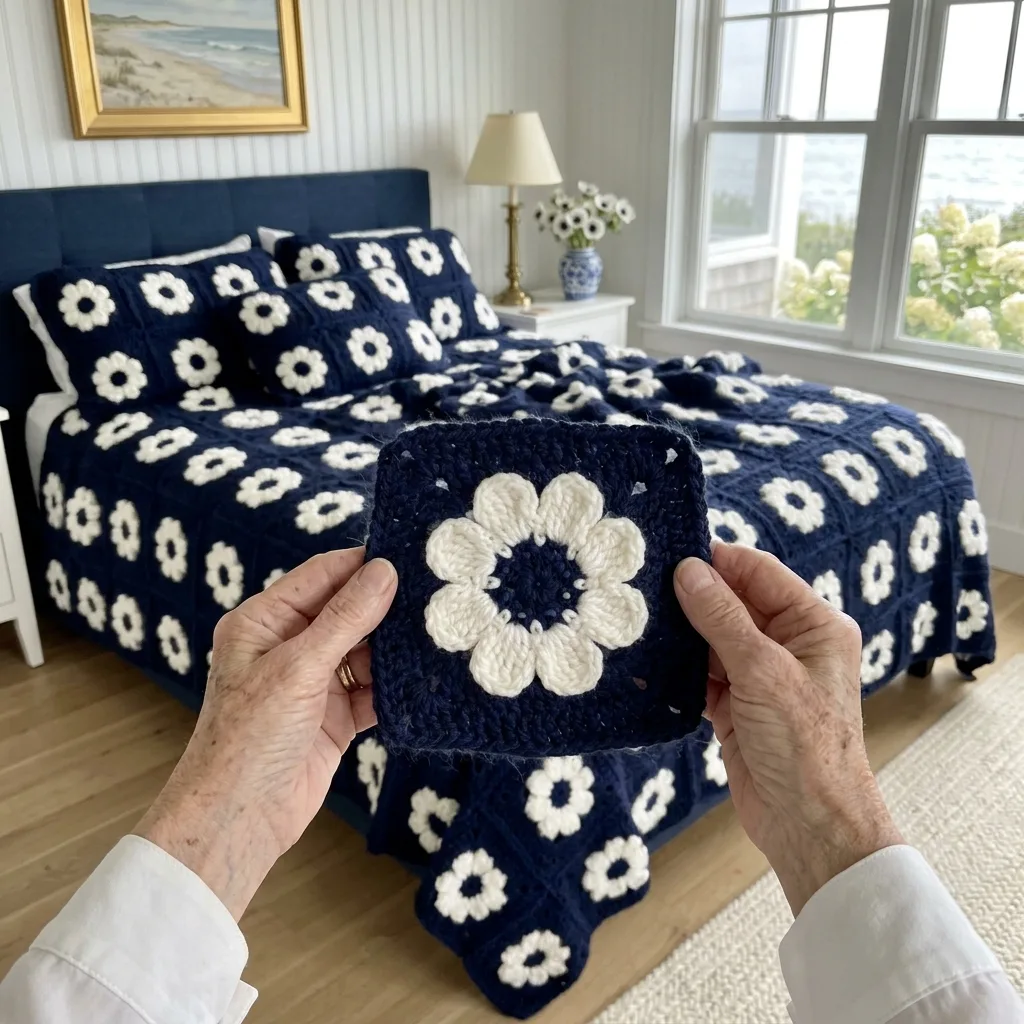
Big shell petals, a ring of bobbles and easy rounds in chunky yarn.
Chunky yarn and only 72 squares make this a quick bedspread.
Big white anemones on deep navy look crisp, fresh and seaside-ready.
About This Navy and White Anemone Flower Square Bedspread Crochet Pattern Pattern
This bedspread is a bold, cheerful garden of white anemones on a deep navy sea. It is made from seventy-two chunky squares, each with one big flower that almost fills the whole square. Every square begins with a small navy disc, then a ring of navy bobbles pops up around it like the dark stamens of a real anemone. Six big white petals open out around the center, each one a generous shell of double and treble crochet with a neat outline. Behind the flower, a few rounds of navy build the square, and a final round of single crochet finishes it, ready for joining. On the bed, the white flowers seem to float on the navy, bright and crisp.
The finished bedspread measures about 100 by 112 inches (254 by 284 cm) including the edge. It is a grid of 8 squares across and 9 squares down, with each square measuring 12 inches after blocking, plus three rounds of navy edging. On a queen mattress that gives a drop of about 20 inches on each side and at the foot, so the chunky fabric falls toward the floor in deep, cozy folds. Because the squares are big and the yarn is chunky, there are only seventy-two of them, which makes this a satisfying project that grows quickly.
The stitches are chain, slip stitch, single crochet, half double crochet, double crochet and treble crochet, plus a bobble stitch and reverse single crochet. A bobble is several half-finished double crochets worked into the same stitch and closed together, so they puff up into a round little ball. Here they make the dark ring around the flower center. The petals are big shells worked into single stitches, which makes them easy to shape and fun to watch grow. There are only two color changes per square.
The navy background is built behind the flower in a clever way. After the petals are finished, the navy is joined at the back and chain loops are worked behind each petal. Those loops are filled with double crochet, and from there the circle quickly turns into a square with graded stitches at the corners. This keeps the petals standing out in front, raised and three-dimensional, instead of lying flat into the background. The squares are joined with navy single crochet, and a navy corded edge frames the whole bed.
In chunky yarn the bedspread is thick, warm and wonderfully squishy, with a lovely weight in the drape. The white petals stand up from the navy, so the surface has real texture and catches the light beautifully. Navy and white are a timeless pair, crisp and calm, and they feel instantly coastal, like a sailing boat on a summer sea or a beach house with blue and white china. They suit white beadboard, navy headboards, brass lamps and fresh hydrangeas.
I rate this pattern as beginner friendly. The stitches are basic, the rounds are short and clearly counted, and the chunky yarn makes everything easy to see. The bobble stitch and working behind the petals take a little practice, but after one square they will feel natural. It suits anyone who wants a bold, eye-catching bedspread without a huge time commitment. It is a perfect project for a new crocheter who wants something impressive, and for experienced makers who want a quick, cheerful win.
Why You'll Love This Navy and White Anemone Flower Square Bedspread Crochet Pattern Pattern
We have a little cottage by the sea, and every summer the anemones bloom white along the garden fence, with their dark centers nodding in the sea breeze. I wanted a bedspread that would bring that feeling into our bedroom, and navy and white was the only choice. The first time I finished a square and laid it on the bed, it looked like a flower on the night sea. I could hardly wait to make the next one.
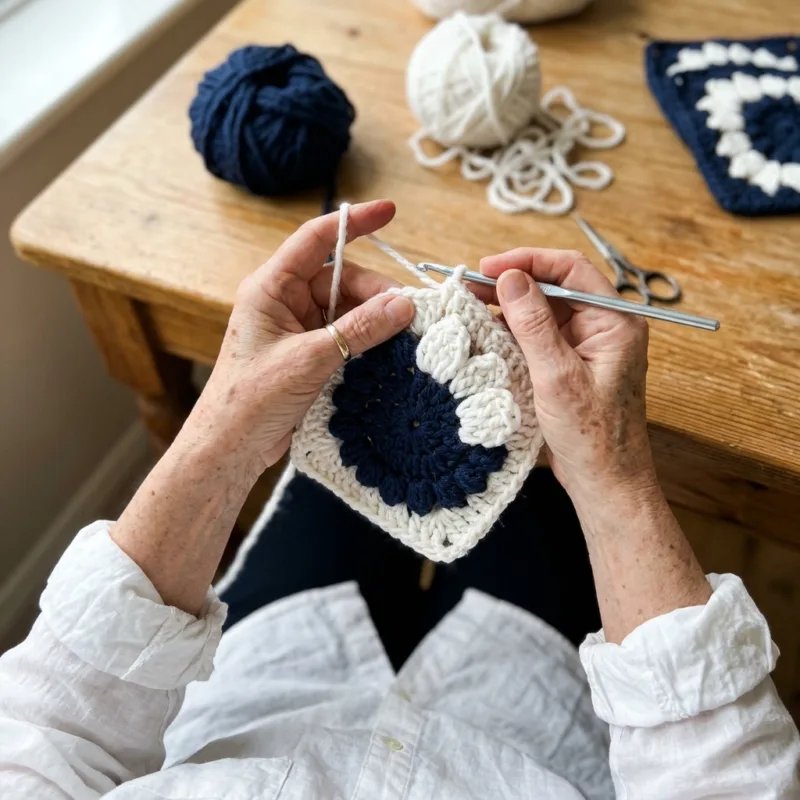
I love how quickly the squares grow in chunky yarn. A little navy disc, a ring of bobbles, six big petals, and suddenly you have a whole flower in your hands. The navy background goes on in just a few rounds, and the square is done. I can make one in an evening without rushing, and seeing the pile grow so fast kept me excited all the way through. It is one of the most satisfying projects I have ever made.
The bobble ring is my favorite little detail. Twelve navy bobbles pop up around the center, each one plump and round, and they make the flower look so real. They remind me of the dark stamens that real anemones have, and they give the white flower a lovely contrast right in the middle. I always smile when I close the last bobble and see the full ring.
Here is why this bedspread is so close to my heart:
- Big white flowers on navy look bold, fresh and coastal.
- Chunky yarn makes each square quick and satisfying.
- Only seventy-two squares for a whole queen bed.
- The raised petals give real texture you can feel.
- Navy hides everyday wear, so it is practical too.
This bedspread changed our cottage bedroom completely. We have white beadboard walls, a navy headboard and a big window looking out to the sea, and the room was fresh but a little bare. Now the navy and white bedspread ties everything together: the headboard, the blue and white vase, the painting of the beach and the view outside. In the morning, with the sun coming in, it feels like waking up on a boat. Our grandchildren call it the flower boat bed.
Making it taught me a few useful lessons. I learned to work the bobbles with a firm hand so they stay round and plump. I learned to work the navy loops behind the petals loosely, so the petals can stand up instead of being pulled flat. And I learned to block each square with the petals carefully shaped, which makes every flower look full and open on the bed.
Most of all, I love that this bedspread is warm, sturdy and made for real life. Chunky yarn is cozy on cool evenings, navy hides the little marks of everyday use, and the flowers stay bright and cheerful wash after wash. I hope it will be on a bed by the sea for many summers to come, and that someday my grandchildren will take it to their own homes and remember our cottage.
Switch Things Up
The easiest change is the color pair. Keep a dark background and a light flower, and the design will always look bold. Forest green with cream looks like a white flower in a woodland, while charcoal with white is crisp and modern. Burgundy with blush feels rich and romantic, and black with ivory is dramatic and elegant. For a softer look, try dusty blue with white, or sage with cream.
You can change the size by changing the number of squares. Each square is 12 inches after blocking, and the edge adds about 2 inches on every side. The sizes below include a drop on the sides and the foot. For a coverlet that sits only on top of the mattress, take away two squares in each direction.
- Twin: 6 by 8 squares (48), about 76 by 100 inches
- Full: 7 by 8 squares (56), about 88 by 100 inches
- Queen: 8 by 9 squares (72), about 100 by 112 inches
- King: 10 by 9 squares (90), about 124 by 112 inches
A sofa throw is a lovely smaller version. Make 4 by 5 squares, twenty in total, for a throw of about 52 by 64 inches with the edge. It takes about twenty-five hours and uses less than a third of the yarn. The big flowers look striking on a white or gray sofa, and it makes a wonderful gift for a beach house or a new home. It is also perfect for trying the pattern before the full bedspread.
For a baby blanket, use a soft chunky baby yarn and make 3 by 3 squares for a blanket of about 40 inches square. Navy and white look smart for a nautical nursery, while pale pink with white or soft yellow with white are sweet and gentle. The bobbles are firmly closed and the fabric is solid, but always use it with an adult nearby and keep heavy blankets out of the crib for young babies.
Matching pillows make the bed look finished, just like in my photos. One square makes the front of a 12 inch cushion, and two squares side by side make a lovely sham for a standard pillow. Make the back from another square or a plain navy panel, join them with navy single crochet on three sides, slip in the pillow and close the last side. For a striking accent, make one pillow with a navy flower on a white square.
You can also reverse the colors on some squares. Make a few squares with a navy flower on a white background and place them in a checkerboard with the white flowers on navy. The result looks bold and graphic, perfect for a modern room. Or make every square in a different flower color on navy, like white, yellow, pink and sky blue, for a playful wildflower bedspread.
If you would like a different edge, there are easy options. For a softer finish, replace the reverse single crochet with a round of small white shells, which picks up the color of the flowers. For a bolder frame, work the last round in white. For a relaxed beach house feel, add navy tassels at the four corners. Keep the edge firm, since chunky bedspreads are heavy.
You can also play with the yarn weight. In worsted yarn with a 5 mm hook, squares come out at about 9 inches, so you need more of them, and the bedspread is lighter and drapes more. In super bulky yarn with a 9 mm hook, squares grow to about 16 inches, and 6 by 7 squares cover a queen bed very quickly. Acrylic or wool blends are lighter and warmer than chunky cotton. Always make one test square in your new yarn and measure it before you buy the rest.
Materials Needed
— Main Fabric
— Tools Required
The Free Pattern
0% complete
— Anemone Flower Square (Make 72, navy and white) :
— Layout (8 x 9 grid, 72 squares) :
— Navy Seam Join (Color A) :
— Navy Corded Edge (Color A) :
Assembly Instructions
- Make 72 Anemone Flower Squares and weave in the four ends of each square as you finish it.
- Block every square to 12 by 12 inches, pinning the corners square and easing the petals forward, and let them dry completely.
- Lay the squares out in 9 rows of 8 following the Layout section, with the petals in the same position on every square.
- Work all the horizontal seams with the Navy Seam Join, wrong sides together, one full row at a time.
- Work all the vertical seams the same way, with a ch 1 across each place where four corners meet.
- Work Rounds 1 to 3 of the Navy Corded Edge around the whole bedspread.
- Weave in the last ends and lay the bedspread flat overnight so the edge settles.
Common Mistakes & How to Fix Them
Flat or uneven bobbles. The navy bobbles in Round 3 only look round and plump when all four loops are pulled up to the same height and closed firmly. If some loops are short, the bobble looks lopsided, and if you close it loosely, it flattens and disappears into the round. Pull each loop up to the height of a double crochet, keep them even on the hook, and close the bobble with one firm pull. Push each bobble to the front with your finger after you make it. Twelve round bobbles make the center look like a real anemone.
Petals that cup or ruffle. Each petal in Round 5 is a big shell of nine stitches in one stitch, and it must sit flat and round. If you skip only one stitch instead of two on each side, the petals crowd together and ruffle. If your trebles are tight, the petals cup forward like spoons. Skip exactly 2 sts on each side of every petal and pull each treble up to its full height. After Round 6, lay the flower on the table and check that all six petals are the same size and lie flat.
Pulling the petals flat with the navy loops. The ch-8 loops in Round 7 go behind the petals and hold the whole flower to the square. If you work the loops tight, they pull the petals back and the flower sinks into the navy instead of standing out. Work the chains at a relaxed tension and make sure each sc goes around the post of the Round 5 sc between petals, from the back. In Round 8, hold the petals forward with your thumb as you work the dc into each loop, so the navy grows behind them.
Corners in the wrong place. Round 9 turns the circle of 60 stitches into a square, with a corner every 15 stitches. If you miscount, one side gets more stitches than the others, the square slants and the flower sits off center. Place markers in the 1st, 16th, 31st and 46th stitches before you start, and work the corners only in the marked stitches. Count 14 stitches between corners as you go: 3 dc, 3 hdc, 2 sc, 3 hdc and 3 dc. A straight square makes joining easy and keeps every flower centered on the bed.

You Might Also Like






Important Notes
Gauge and square size matter in this pattern. With bulky yarn and a 6 mm hook, the flower after Round 6 should measure about 9 inches (23 cm) across the petals, and the finished square should block to 12 inches (30 cm). Make one square and block it before you buy all your yarn. If it is smaller, go up a hook size. If it is larger, go down a size. All the grid sizes in this pattern assume a 12 inch square.
Block every square before you join. Pin it at 12 by 12 inches with straight sides and square corners, and ease the petals forward so they stand up from the navy. Chunky acrylic and wool blends can be gently steamed, holding the iron above the fabric without touching it. Cotton blends can be sprayed with water and left to dry. Lay the finished bedspread flat overnight after the edge is done.
This bedspread uses about 3,300 grams of navy and 1,800 grams of white for the queen size. Buy all of it at once, and check that every ball has the same dye lot number on the label. Navy can vary from lot to lot, and on a big dark background, a change in shade will show clearly in daylight. Buy one or two extra balls of each color so you do not run short at the edge.
Wash the bedspread according to the yarn label, usually on a gentle cool cycle in a large capacity machine. Navy is a strong dark color right next to white petals, so always add a color catcher sheet, especially in the first several washes. Never use bleach. Do not wring or twist it, since the wet weight is considerable. Lay it flat to dry, easing the petals forward. Avoid a hot dryer, which can felt wool blends.
I hope this bedspread brings a breath of sea air and a garden of bright flowers into your bedroom. It is a quick and joyful project, made of big, happy squares: a navy center, a ring of plump bobbles, six white petals and a deep navy frame. Do not let the size of a bedspread worry you. You do not have to make them all today. You only have to make the first flower.
So gather your navy and your white, settle into a cozy chair with a cup of tea, and start with that little ring of twelve double crochet. Add your bobbles, open your petals and wrap the flower in navy. Lay your first square on the bed and imagine the whole sea of anemones. Then make another. Before you know it, you will have a bold, beautiful bedspread to enjoy for many years. Happy crocheting, my friends.
Crochet Abbreviations
You Ask, We Answer
What is the finished size of this bedspread?
The bedspread in the photos measures about 100 by 112 inches (254 by 284 cm) including the edge. It is made from 72 squares in a grid of 8 across and 9 down, and each square measures 12 inches after blocking. The navy corded edge adds about 2 inches on each side. On a standard queen mattress, which is 60 by 80 inches, this size gives a drop of about 20 inches on each side and at the foot, so the chunky fabric falls toward the floor, with extra length at the head to tuck under the pillows. If your bed is taller or lower, measure from the top of the mattress to the floor and add or remove squares to suit. Remember that a 12 inch square depends on your gauge, so measure your first blocked square and multiply by the number of squares you plan before you buy all your yarn. The variations section lists grids for twin, full and king beds too.
Can I use a different yarn weight or make it smaller?
Yes. The pattern works in any yarn weight, but the size of each square will change, so you need to adjust the number of squares. In worsted yarn with a 5 mm hook, squares come out at about 9 inches, and you would need about 11 by 12 squares for the same queen size. In super bulky yarn with a 9 mm hook, squares grow to about 16 inches, and 6 by 7 squares cover a queen bed very quickly. To make a smaller piece, simply make fewer squares: twenty squares in a 4 by 5 grid make a sofa throw, and nine squares make a baby blanket. The rounds and stitch counts of the square stay exactly the same in every case, and so do the join and the edge method. For the edge, each side of Round 1 has 27 sc per square minus 1, so you can work out your counts before you start.
How do I wash and care for the bedspread?
Always follow the care instructions on your yarn label, since chunky yarns vary a lot. Most cotton blends and acrylics can be washed on a gentle cool cycle in a large capacity machine with a mild detergent. Always add a color catcher sheet, because navy can release dye onto the white petals, especially in the first washes. Never use bleach, not even on the white flowers, as it weakens the yarn and can turn the navy patchy. A chunky bedspread is very heavy when wet, so do not hang it from a line, as the weight will stretch the squares. Instead, lay it flat over a drying rack or on clean towels, turning it once and easing the petals forward. Avoid a hot dryer. Between seasons, fold it loosely and store it in a cotton bag with a sachet of lavender or cedar.
Success!
Thanks for subscribing — check your inbox for a welcome note.
Abbreviations
- A — Color A, deep navy blue
- B — Color B, white
- ch — chain
- sl st — slip stitch
- sc — single crochet
- hdc — half double crochet
- dc — double crochet
- tr — treble crochet
- bobble — bobble stitch of 4 unfinished dc closed together
- reverse sc — reverse single crochet (crab stitch), worked from left to right
- yo — yarn over
- sk — skip
- st(s) — stitch(es)
- sp(s) — space(s)
- ch-2 sp — the space made by 2 chains (same for ch-8)
- rep — repeat