
White and Blue Flower Bed Cover Crochet Pattern
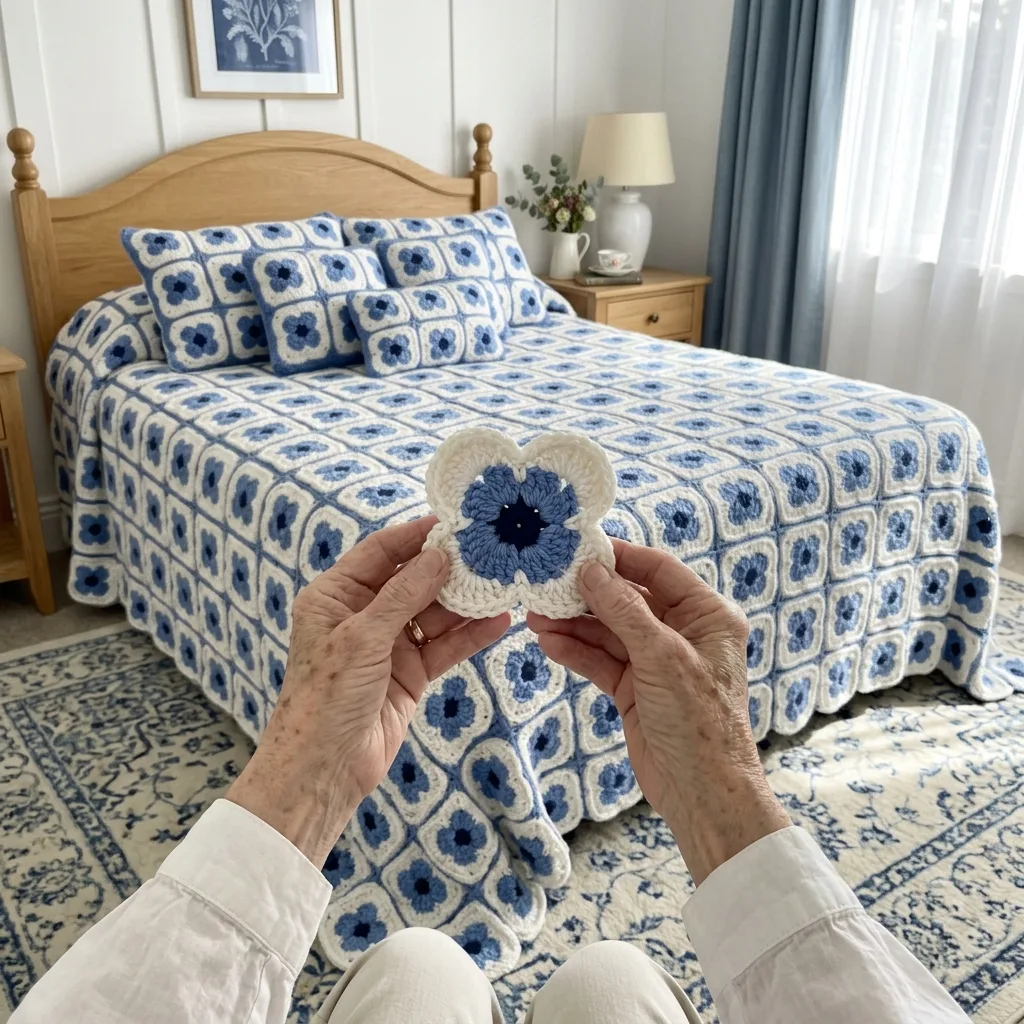
You need basic stitches, simple clusters of double crochet and reverse single crochet for the rope edge.
Each motif takes around fifty minutes, so a couple of flowers a day builds a full bed cover over a few months.
A round of reverse single crochet gives every petal a thick, braided outline that makes the flowers stand out.
About This White and Blue Flower Bed Cover Crochet Pattern Pattern
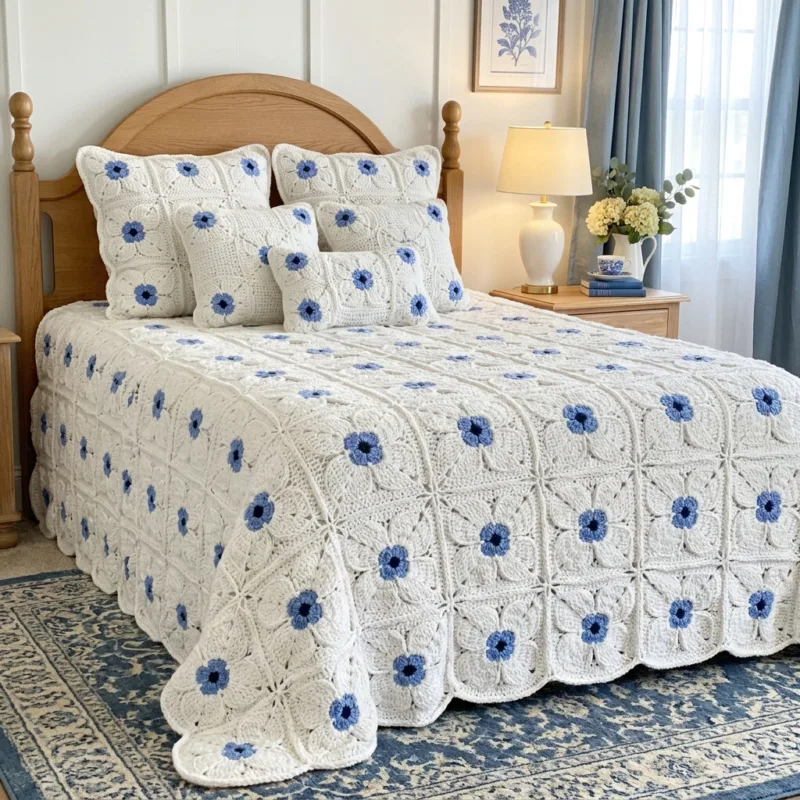
This white and blue flower bed cover is built from square motifs, and each one holds a big, soft flower with four rounded petals. The petals are a clean soft white and the center is a little cornflower-blue flower with a dark navy middle, like a forget-me-not sitting inside a larger bloom. When the motifs are joined, the petals of neighboring flowers meet and leave small open diamonds between them. From across the room, the bed looks like a lace quilt scattered with tiny blue flowers. Up close, you notice the thick rope edge around every petal, and that is the detail that makes people want to touch it.
Each motif begins with a tiny navy magic ring of single crochet. Then you switch to blue and work four small petals, each made of four double crochet, so the center looks like a little flower of its own. In white, you chain loops behind the blue petals and fill each loop with double crochet to make the base of the big petals. The next round shapes each petal with a smooth curve, rising from single crochet at the sides to treble crochet across the top. An outline round of single crochet rounds out the shape, and the final round is reverse single crochet, also called crab stitch, which twists into a thick braided rope around every petal.
The motifs are joined as you go in that last rope round. Each petal points to a corner of the motif. Along every side, two petals of one motif meet two petals of the next one, and they are linked at one point on each petal. At every corner, the petal tips of the motifs that meet there are joined at a single point. Because the petals are rounded, the space in the middle of each side stays open, and that is what creates the airy diamond lattice you see in the photo. There is no sewing, no seaming and no filler pieces to make, only yarn tails to weave in.
The finished bed cover measures about 98 by 105 inches. That is 14 motifs across and 15 motifs down, which makes 210 motifs in total. Each motif is about 7 inches square after blocking. On a queen bed, the cover lies across the top and drops about 19 inches on each side and about 25 inches at the foot, so it reaches toward the floor on most frames. I used worsted weight cotton with a 4.5 mm hook. The switching things up section gives you motif counts for twin, full, king, a throw, a baby blanket and matching pillow covers.
The finished cover has real weight and a lovely, relaxed drape. The solid petals give it body, while the open diamonds keep it breathable, so it works in spring, summer and on cool autumn nights layered over a blanket. The rope edges add texture you can feel with your fingertips. White and blue is a classic pairing, and it looks fresh in a cottage bedroom, a coastal guest room or a simple farmhouse space. After a wash or two, the cotton softens and the petals settle into a gentle, lived-in shape that feels like it has always belonged on the bed.
This pattern suits an intermediate crocheter who is comfortable with double and treble crochet and ready to try reverse single crochet. If you have never made crab stitch before, practice it on a small swatch first, because it works from left to right and feels strange for the first few stitches. The motif is the same every time, so after the first dozen you will hardly need the pattern. It is a long project that rewards patience. Every motif is small enough to carry in a bag, so you can make one on a lunch break and watch your stack grow week by week.
Why You'll Love This White and Blue Flower Bed Cover Crochet Pattern Pattern
I love this bed cover because it feels calm and cheerful at the same time. White and blue always remind me of fresh laundry drying in the sun and of the little blue flowers that pop up along garden paths in spring. Every time I finish a motif, I hold it up to the light and smile at that tiny blue flower in the middle. It is a simple joy, but it kept me going through more than two hundred motifs. Each one feels like a small present to myself.
The rope edge is my favorite part. Reverse single crochet takes a little practice, and I will be honest, my first few rounds looked lumpy. But once my hands found the rhythm, I could not stop. That thick, twisted outline turns a plain petal into something that looks carved. It also makes the motifs sturdy, so the bed cover holds its shape even after many washes. Learning that one stitch made me a better crocheter, and now I add it to edges on all kinds of projects.
I also love that the motifs are joined while you make them. I have finished blankets in the past where I left all the seaming for the end, and it took weeks. With this pattern, the bed cover simply grows. Each new motif clicks into place beside its neighbors, and the open diamonds appear on their own. It is so satisfying to spread the growing piece across my lap in the evening and see a little more of the bed covered each week.
- Three colors only, so shopping is simple.
- The same motif every time, easy to memorize.
- Joined as you go, with no filler pieces to make.
- A rope edge that looks special but uses one basic stitch.
This cover changes a bedroom completely. My guest room used to feel plain, and now it feels like a bright cottage room in the country. Friends who stay over always ask about it, and they are surprised to hear every flower was made by hand. A handmade bed cover brings a softness to a room that no store-bought bedding can match. It tells your family and your guests that someone cared enough to spend months making the space beautiful.
Finally, I love how much this project gives back. It is a slow make, and that slowness became part of my week. I made motifs while my tea cooled, while I listened to audiobooks and during long visits with my neighbor. It taught me patience, it taught me a new stitch, and it gave me a piece I will pass down one day. If you have been looking for a big project that still feels gentle and peaceful, I think you will enjoy this one as much as I did.
Switch Things Up
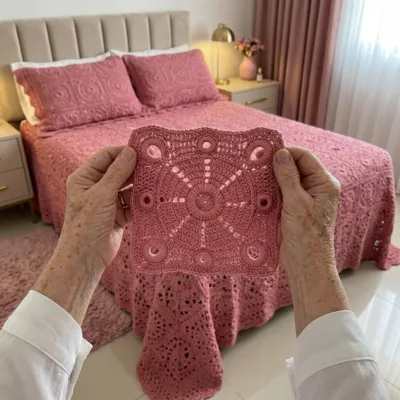
The easiest change is the color of the little center flower. Keep the white petals and swap the cornflower blue for soft blush pink, butter yellow, sage green or lavender. A dusty rose center with a deep burgundy middle feels romantic and vintage. A sunflower yellow center with a brown middle makes a cheerful farmhouse look. You can also make every center a different pastel for a playful garden feel. Just keep the middle darker than the center petals, because that little dark dot is what makes each flower look finished.
You can make this bed cover in any size by changing the number of motifs. Each motif is about 7 inches square, so divide your bed width and length, including the drop, by 7. Here are the counts I use:
- Twin: 11 by 14 motifs, 154 motifs, about 77 by 98 inches.
- Full: 13 by 14 motifs, 182 motifs, about 91 by 98 inches.
- Queen: 14 by 15 motifs, 210 motifs, about 98 by 105 inches.
- King: 16 by 15 motifs, 240 motifs, about 112 by 105 inches.
For a sofa throw, join 7 motifs across and 9 motifs down. That is 63 motifs and finishes at about 49 by 63 inches. It is a great way to try the pattern before you commit to a whole bed cover, and it is just as pretty folded at the end of a bed or draped over a reading chair. If you make two motifs most evenings, a throw takes about a month. It also makes a lovely wedding or housewarming gift.
A baby blanket is sweet in this pattern too. Join 5 motifs across and 5 down for 25 motifs, about 35 inches square. Use soft cotton or a cotton blend and choose a light palette like white with pale blue or white with pale pink. Because of the open diamonds, I see this as a decorative blanket for a crib rail, a stroller or a photo, used with a grown-up nearby. Families often keep a handmade baby blanket for years, so it is a gift with real meaning.
To make matching pillow covers, join 3 motifs across and 4 down for a 21 by 28 inch panel, which fits a standard pillow. Make two panels and join them on three sides with single crochet, slip in the pillow and close the last side. For a small lumbar pillow, join 2 motifs by 4. Choose pillow inserts in white or a soft blue so the open diamonds show a matching color. Matching crochet pillows make the whole bed look finished and pulled together.
You can change the edge if you want a different finish. For a lighter look, skip Border Round 3 and finish with single crochet. For a more decorative edge, add a picot after every fifth stitch in Border Round 3. You could also add a short fringe of white yarn along the two long sides for a vintage bedspread look. I recommend keeping at least Border Rounds 1 and 2, because they connect the outer petals and keep the scalloped edge from stretching.
Finally, try a different yarn weight. In DK cotton with a 4 mm hook, each motif is about 6 inches square, so a queen needs about 16 by 18 motifs. In bulky cotton with a 6 mm hook, the motif grows to about 9 inches, and a queen needs only about 11 by 12 motifs. Bulky yarn makes a chunky, cozy cover that works up fast, while DK makes a finer, more delicate lace. Always make and block one motif first, then measure it and plan your grid from that number.
Materials Needed
— Main Fabric
— Tools Required
The Free Pattern
0% complete
— Flower Motif (Make 210: navy middle, cornflower blue center, white petals) :
— Layout :
— Border (white) :
Assembly Instructions
- Make your first Flower Motif completely, then block it and check that it measures about 7 inches square.
- Work every following motif with the join-as-you-go Rnd 7, linking it to the motif on its left and the motif above it at the side join points and the corner tips.
- Continue row by row until the grid is 14 motifs across and 15 motifs down, leaving the open diamonds between the side joins.
- Weave in every tail as you go, hiding navy and blue tails inside the center and white tails inside the rope edge.
- Work Border Rounds 1, 2 and 3 around all 50 outer motifs.
- Pin the bed cover flat on blocking mats with a pin in every outer petal, mist with water and let it dry completely before unpinning.
Common Mistakes & How to Fix Them
The most common mistake is working the reverse single crochet too tightly. Because crab stitch works backwards from left to right, many makers grip the yarn harder without noticing. A tight rope round makes the petals cup and curl, and the motifs will not lie flat when joined. If your motif looks like a shallow bowl, this is usually why. Relax your hand, pull each loop up a little taller than usual and keep the stitches loose and even. You can also go up half a hook size for Round 7 only. Check your first motif flat on the table before you make more.
Another mistake is joining at the wrong stitch so the side joins do not line up. If one motif joins at stitch 6 and the next at stitch 8, the open diamonds become lopsided and the rows slowly drift out of square. This happens when you lose count of the 30 stitches on a petal. To prevent it, place stitch markers at stitches 7, 15 and 24 on every petal of a finished motif before you join to it. Then you only need to match marker to marker. If a diamond looks uneven, undo the rope round on that motif and rejoin it.
Many makers let the blue center petals show white gaps or pull out of shape in Round 3. The white chain loops should sit behind the blue petals, so the blue stays on top and the white loops act as a hidden frame. If you work the loops in front, white chains cross over the blue flower and it looks messy. If the chains are too short, the blue petals buckle. Fold each blue petal toward you before you make the slip stitch, and always chain exactly 5. That keeps the little center flower flat, round and clearly visible.
The last common mistake is weaving tails in the wrong place, so navy or blue ends peek through the white petals. Dark tails woven through white stitches show clearly, especially after washing when the cotton relaxes. This happens because there are three colors per motif and the ends add up fast. Hide navy tails only inside the navy ring, and blue tails only along the backs of the blue petals. Hide white tails inside the thick rope edge, where they disappear completely. Weave each tail in both directions so it stays put through many washes. Do this as you go, never at the end.

You Might Also Like

Important Notes
Gauge matters because small differences multiply across 210 motifs. A blocked motif should measure about 7 inches square. If yours is a quarter inch too large, the bed cover will grow by about 3.5 inches in width and nearly 4 inches in length. Make and block one test motif before buying all your yarn, and measure again every few weeks. Tension often loosens as we relax into a long project, so compare new motifs with your first one and adjust your hook if needed.
Blocking makes the petals round and the diamonds open and even. Pin the finished bed cover flat on blocking mats, placing a pin in each outer petal so the scallops line up. Mist the cover with cool water until it is damp, then let it dry completely before removing the pins. Cotton keeps its blocked shape well. You can also block motifs in small batches before joining, which makes the join points easier to line up and keeps the grid square.
The yarn amounts are for the queen size in worsted weight cotton, so adjust them for other sizes or yarns. Buy all of your white yarn from the same dye lot, plus about 10 percent extra. White shades can differ from lot to lot, and a slightly warmer or cooler white will show clearly across a large bed cover. If you must use two lots, alternate them row by row across the grid so any small difference is spread out evenly and hard to notice.
Wash the bed cover by hand or on a gentle cold cycle inside a large mesh laundry bag. Because the cornflower blue and navy sit right next to white petals, add a color catcher sheet to the first few washes in case the darker dyes bleed. Use a mild detergent and no bleach. Do not hang the cover to dry, because wet cotton is heavy and will stretch. Lay it flat on towels, shape the petals with your hands and let it dry fully before using it again.
I hope this white and blue flower bed cover brings a little fresh spring morning into your bedroom. It is a big project, but every motif is a small, happy step, and that tiny blue flower in the middle will make you smile every single time. Take your time and enjoy the rhythm of the rope edge once your hands find it.
You do not have to think about all 210 motifs today. Just pick up your navy yarn, make a magic ring and finish one flower. Then make another tomorrow. Before long you will be joining them and watching a whole bed of blue flowers grow across your lap. Happy crocheting, my friend.
Crochet Abbreviations
You Ask, We Answer
What is the finished size of this bed cover?
The queen version finishes at about 98 by 105 inches after blocking. That is 14 motifs across and 15 motifs down, with each motif measuring about 7 inches square. On a standard queen mattress, the cover lies across the top and drops about 19 inches on each side and about 25 inches at the foot, which reaches toward the floor on most bed frames. If your bed is tall or you want a longer drop, add one more motif on each side. If you prefer a coverlet that only reaches the sides of the mattress, use the full layout of 13 by 14 motifs. Measure your own bed, including the mattress height and frame, and divide by your blocked motif size. That gives you the exact grid for the look you want and helps you buy the right amount of yarn before you start.
Can I use a different yarn weight or make a different size?
Yes, the pattern works in many yarn weights because the motif stays the same. In DK cotton with a 4 mm hook, each motif is about 6 inches square, and in bulky cotton with a 6 mm hook it grows to about 9 inches. The stitch counts never change, only the motif size and the number of motifs you need. Make one test motif in your chosen yarn, block it and measure it, then divide your desired width and length by that number. The section on switching things up lists motif counts for twin, full, queen, king, a throw, a baby blanket and pillow covers. For the border, count 29 single crochet for each side motif and 59 for each corner motif, plus one ch-3 space for every outer motif, so the edge always fits the grid you choose.
How do I wash and care for this crochet bed cover?
Wash it by hand in cool water or on a gentle cold cycle inside a large mesh laundry bag to protect the petals and the open diamonds. Use a mild detergent and never bleach, because bleach can yellow white cotton and fade the blue centers. Add a color catcher sheet to the first few washes, since the cornflower blue and navy sit right beside white petals. Do not wring or twist the cover. Press out the water gently, then lay it flat on clean towels and shape the petals and the scalloped edge with your hands. Let it dry completely before putting it back on the bed. Never hang it while wet, because the weight of the wet cotton will stretch the motifs. Between seasons, store it loosely folded in a breathable cotton bag, away from direct sunlight, so the white stays bright.
Success!
Thanks for subscribing — check your inbox for a welcome note.
Abbreviations
- ch — chain
- sc — single crochet
- hdc — half double crochet
- dc — double crochet
- tr — treble crochet
- rev sc — reverse single crochet (crab stitch), worked from left to right
- sl st — slip stitch
- MR — magic ring
- st(s) — stitch(es)
- lp(s) — loop(s)
- sp(s) — space(s)
- rep — repeat
- Rnd — round