Amanda's Creative Corner Crochet · Kitchen
Free Crochet Patterns Handmade with Love

Christmas Granny Square Bedspread Crochet Pattern
Jump to Pattern
Christmas Granny Square Bedspread Crochet Pattern
120-160 Hours 3 made this
Beginner Friendly

If you can make a granny square, you can make this whole bedspread.

120-160 Hours

Fifty-six portable squares make this a long project you can work on a little at a time.

Christmas Checkerboard

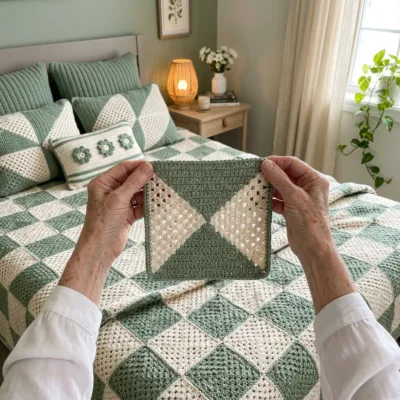
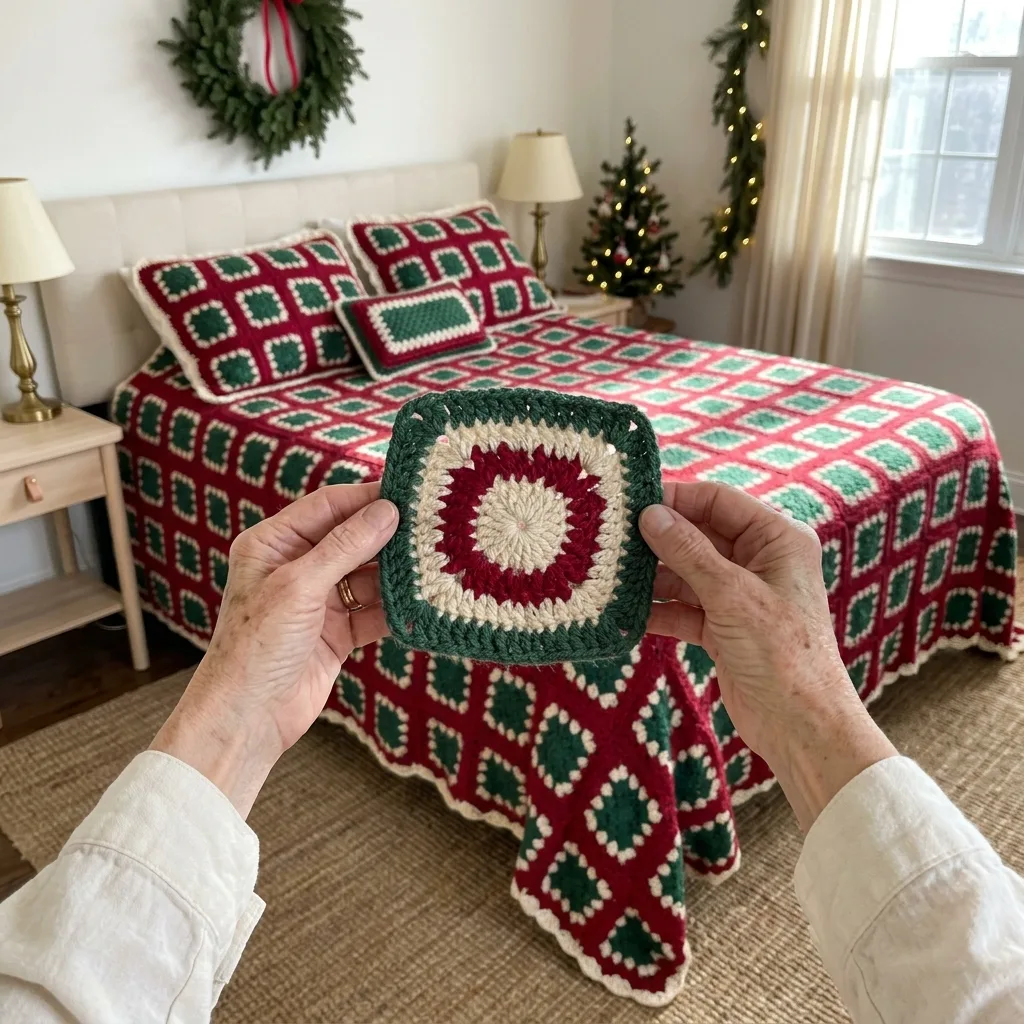
Red and green squares ringed in cream sit side by side like a holiday quilt.

About This Christmas Granny Square Bedspread Crochet Pattern Pattern

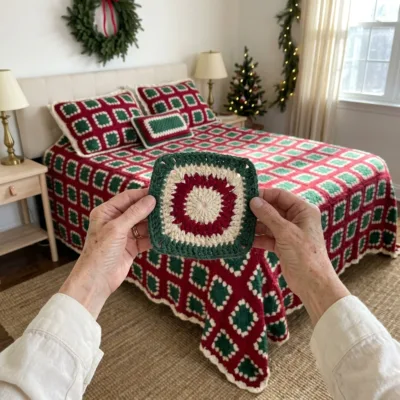
This bedspread is made from 56 granny squares, 28 with a red band and 28 with a green band. Every square starts with a cream center and has a cream ring near the middle, and the squares alternate in a checkerboard so the red and green play across the bed.

The finished size is about 77 by 88 inches, with each square measuring about 11 inches. You will use double crochet clusters, slip stitch joining and a simple shell edge. It suits anyone who has made a granny square before and wants a big, cozy project for the holidays.
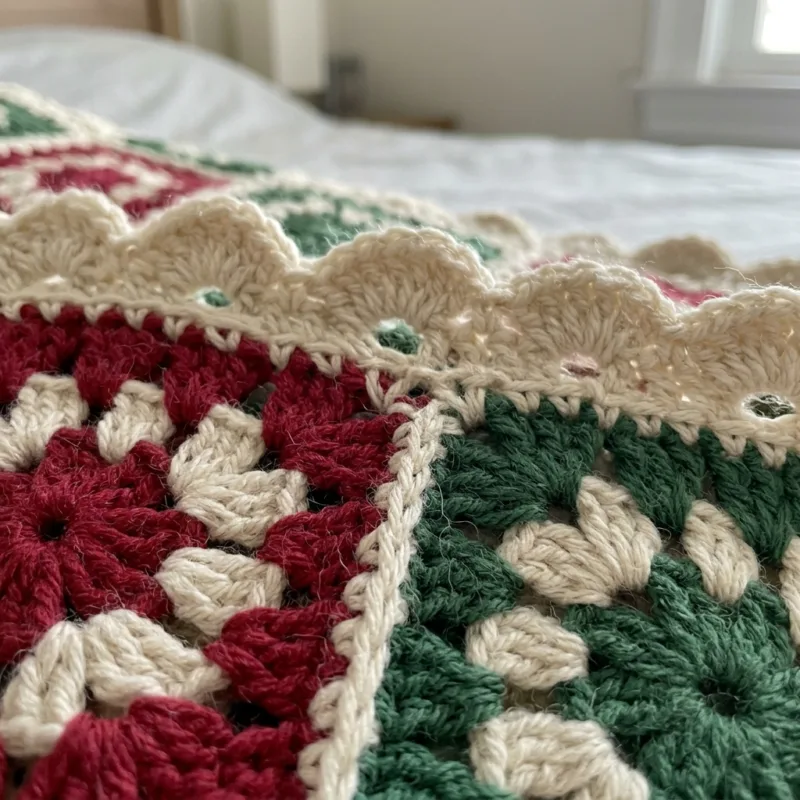
Christmas Granny Square Bedspread Crochet Pattern step detail

Why You'll Love This Christmas Granny Square Bedspread Crochet Pattern Pattern

I love that every square is small enough to carry in a bag. You can make one by the tree in the evening and join a whole row on the weekend.

Red, green and cream feel like Christmas morning without being loud. It makes a wonderful gift, and it looks lovely on the bed long after the holidays are over.

Switch Things Up

Try navy, white and silver for a winter look, or burgundy, sage and ivory for a softer holiday. Make 4 by 5 squares for a lap throw, or 5 by 6 squares for a sofa blanket. You can also sew two squares together into a matching pillow cover, or change the shell edge to a simple picot edge.


Materials Needed

— Main Fabric

01 DK weight (3) cotton yarn in cranberry red: about 400 g (about 1,000 yd) for the red rounds
02 DK weight cotton yarn in forest green: about 480 g (about 1,200 yd) for the green rounds, the joining and the first 2 edge rounds
03 DK weight cotton yarn in cream: about 280 g (about 700 yd) for the centers, the cream rings and the shell edge

— Tools Required

04 3.5 mm (E-4) crochet hook
05 Yarn needle
06 Stitch markers
07 Scissors
08 Blocking mats and pins
09 Measuring tape

The Free Pattern

Beginner 120-160 Hours

0% complete

— Granny Square (Make 56: 28 with a red band, 28 with a green band) :

Color plan for the red band square (make 28): Rounds 1 and 2 cream, Rounds 3 and 4 cranberry red, Round 5 cream, Rounds 6 to 8 forest green. Color plan for the green band square (make 28): Rounds 1 and 2 cream, Rounds 3 and 4 forest green, Round 5 cream, Rounds 6 to 8 cranberry red.
From Round 2 on, begin each round with a sl st in any ch-2 corner sp. Join the new color there when the color changes. When the color stays the same, just sl st into the nearest corner sp and carry on. Sizes and yarn amounts are estimated, so make one square first and check that it measures about 11 inches after Round 8.
Round 1: Make a magic ring, ch 3 (counts as first dc), 2 dc in the ring, ch 2, *3 dc in the ring, ch 2; repeat from * 2 more times. Pull the ring tight and sl st to the top of the ch-3 to join. (12 dc, 4 ch-2 corner sps)
Round 2: Sl st into the nearest corner sp, ch 3 (counts as first dc), 2 dc, ch 2, 3 dc in the same sp, ch 1, *(3 dc, ch 2, 3 dc) in the next corner sp, ch 1; repeat from * 2 more times. Sl st to the top of the ch-3 to join. (24 dc, 4 ch-2 corner sps, 4 ch-1 sps)
Round 3: Join the round color in any corner sp, ch 3 (counts as first dc), 2 dc, ch 2, 3 dc in the same sp, ch 1, *3 dc in the next ch-1 sp, ch 1, (3 dc, ch 2, 3 dc) in the next corner sp, ch 1; repeat from * 2 more times, 3 dc in the next ch-1 sp, ch 1. Sl st to the top of the ch-3 to join. (36 dc, 4 ch-2 corner sps, 8 ch-1 sps)
Round 4: Sl st into the nearest corner sp, ch 3, 2 dc, ch 2, 3 dc in the same sp, ch 1, *(3 dc in the next ch-1 sp, ch 1) twice, (3 dc, ch 2, 3 dc) in the next corner sp, ch 1; repeat from * 2 more times, (3 dc in the next ch-1 sp, ch 1) twice. Sl st to the top of the ch-3 to join. (48 dc, 4 ch-2 corner sps, 12 ch-1 sps)
Round 5: Join cream in any corner sp, ch 3, 2 dc, ch 2, 3 dc in the same sp, ch 1, *(3 dc in the next ch-1 sp, ch 1) 3 times, (3 dc, ch 2, 3 dc) in the next corner sp, ch 1; repeat from * 2 more times, (3 dc in the next ch-1 sp, ch 1) 3 times. Sl st to the top of the ch-3 to join. (60 dc, 4 ch-2 corner sps, 16 ch-1 sps)
Round 6: Join the round color in any corner sp, ch 3, 2 dc, ch 2, 3 dc in the same sp, ch 1, *(3 dc in the next ch-1 sp, ch 1) 4 times, (3 dc, ch 2, 3 dc) in the next corner sp, ch 1; repeat from * 2 more times, (3 dc in the next ch-1 sp, ch 1) 4 times. Sl st to the top of the ch-3 to join. (72 dc, 4 ch-2 corner sps, 20 ch-1 sps)
Round 7: Sl st into the nearest corner sp, ch 3, 2 dc, ch 2, 3 dc in the same sp, ch 1, *(3 dc in the next ch-1 sp, ch 1) 5 times, (3 dc, ch 2, 3 dc) in the next corner sp, ch 1; repeat from * 2 more times, (3 dc in the next ch-1 sp, ch 1) 5 times. Sl st to the top of the ch-3 to join. (84 dc, 4 ch-2 corner sps, 24 ch-1 sps)
Round 8: Sl st into the nearest corner sp, ch 3, 2 dc, ch 2, 3 dc in the same sp, ch 1, *(3 dc in the next ch-1 sp, ch 1) 6 times, (3 dc, ch 2, 3 dc) in the next corner sp, ch 1; repeat from * 2 more times, (3 dc in the next ch-1 sp, ch 1) 6 times. Sl st to the top of the ch-3 to join and fasten off. (96 dc, 4 ch-2 corner sps, 28 ch-1 sps)
Each side of a finished square has 24 dc and 7 ch-1 sps, which is 31 stitches, plus a ch-2 corner sp at each end. Weave in the ends and block every square to about 11 inches before joining.

— Layout and Joining :

Arrange the 56 squares in 7 columns and 8 rows, about 77 by 88 inches. Alternate the red band and green band squares like a checkerboard, with a red band square in the top left corner (28 red band, 28 green band). All squares face the same way.
Hold two squares with wrong sides together. Join with forest green: sl st through the ch-2 corner sps of both squares, then sl st through the back loops of both squares in each of the 31 stitches along the side, and end with a sl st through the next pair of ch-2 corner sps. (33 sl st per seam)
Join the squares into 8 strips of 7 squares first (48 seams), then join the 8 strips with 7 long seams of 7 squares each (49 seams). There are 97 seams in total. At each point where four squares meet, sl st through all four corner sps so the corner stays neat.

— Outer Edge (forest green and cream) :

Count the edge stitches this way. The outside of the cover is 30 square sides long, and each side has 31 stitches, which is 930. Add 2 sc at each of the 26 joins between squares (52) and 3 sc in each of the 4 outer corners (12). The total is 930 + 52 + 12 = 994 sc.
Round 1 (forest green): Join forest green with a sl st in any stitch on the outer edge. Ch 1, sc in each dc and each ch-1 sp along every square side, work 2 sc at each join between two squares (1 sc in each of the two joined ch-2 corner sps), and work 3 sc in each outer corner sp. Sl st to the first sc to join. (994 sc)
Round 2 (forest green): Ch 1, sc in each sc around, working 3 sc in the center sc of each outer corner group. Sl st to the first sc to join and fasten off. (1,002 sc)
Round 3 (cream): Join cream with a sl st in any sc. Ch 1, then work the following 167 times: skip 2 sc, 5 dc in the next sc, skip 2 sc, sl st in the next sc. Sl st to the first st to join and fasten off. (167 shells, 835 dc, 1,002 sts used)

Assembly Instructions

  1. Make 28 granny squares with a red band and 28 with a green band, following the color plan in the Granny Square section.
  2. Weave in all ends and wet block every square to about 11 inches, then let them dry completely.
  3. Lay the squares out in 7 columns and 8 rows in a red and green checkerboard, as in the Layout and Joining section.
  4. Join the squares into 8 strips of 7 with forest green, working 33 sl st on every seam.
  5. Join the 8 strips with 7 long seams, checking that the checkerboard stays correct and the corners of four squares meet neatly.
  6. Work the Outer Edge with 2 sc rounds in forest green around the whole cover.
  7. Finish with the cream shell round, then block the edge lightly and weave in the last ends.

Common Mistakes & How to Fix Them

Losing count of the clusters on a side. Check each round against the stitch count in brackets, because every round must end with 12 dc for every round number.

Forgetting the ch-1 between clusters in the later rounds. These spaces make the open holes and keep the squares flat.

Joining with right sides together. Keep the wrong sides together so the seams sit on the back.

Mixing up the color plan so that two squares of the same type sit side by side. Lay the whole checkerboard out before you start joining.


Denise

Denise is a crochet designer who loves turning classic granny squares into patterns that are easy to follow.


Important Notes

Gauge: the first 4 rounds of a square measure about 5 inches, and the full 8 rounds should block to about 11 inches. Make one square first and change your hook size if needed.

Yarn amounts and sizes are estimated, so buy a little extra of each color and keep the same dye lot together.

Block each square flat before joining so the corners are sharp and the squares are all the same size.

Wash gently in cool water with a color catcher, because the red yarn can bleed onto the cream and green. Dry flat.


I hope this cover brings a little extra warmth to your Christmas. Send me a message when your first square is done, I would love to hear how it turned out.

Crochet Abbreviations

01 ch — chain
02 sl st — slip stitch
03 sc — single crochet
04 dc — double crochet
05 sp — space
06 st — stitch

You Ask, We Answer

How big is the finished bedspread?

With 7 by 8 squares of about 11 inches each, it measures about 77 by 88 inches. Add a column or a row of squares for a larger bed, or leave some out for a throw.

Can I use a different yarn weight?

Yes. Worsted cotton with a 4 mm hook makes larger squares of about 13 inches, so you would need fewer of them. Keep the stitch counts the same and check the square size first.

How do I wash and care for it?

Wash on a gentle cycle in cool water with a color catcher, then lay it flat to dry. Reshape the squares by hand while it is damp.