
Cream and Burgundy Maltese Cross Square Bed Cover Crochet Pattern
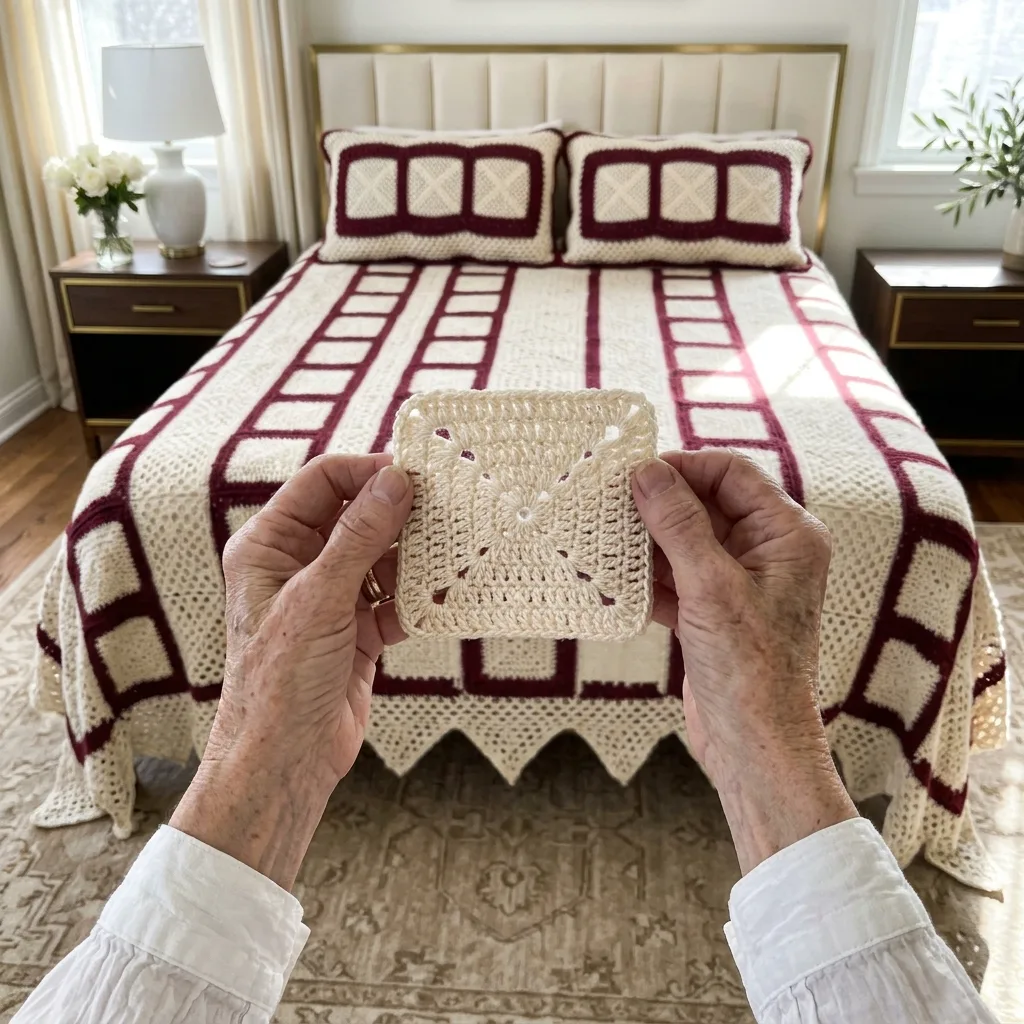
Solid arms and chain arches grow together round by round, then a squaring round with taller stitches.
Only 63 squares of about 10 inches, plus 25 lacy points along the edges.
Four solid arms form a cross while chain arches fill the corners like windows of light.
About This Cream and Burgundy Maltese Cross Square Bed Cover Crochet Pattern Pattern
This bed cover reminds me of the lace in old church windows and the patchwork quilts my grandmother kept in her linen closet. Each square has a small ring in the center and four solid arms that grow wider as they reach the edges, forming a classic Maltese cross. In the four corners between the arms, rows of open chain arches curve around like little windows. The squares are made in cream and burgundy and set in tall stripes, and every edge square ends in a lacy point, so the cover hangs in a row of pennants along both sides and the foot.
What I love most about this square is how the solid and the lace grow together. In every round, each arm gets two stitches wider, while each corner gets one more chain arch. The arms stay firm and smooth, and the corners stay light and open. By the seventh round, the arms are 13 stitches wide and each corner holds six arches. Then a squaring round turns the circle into a square, using taller and taller stitches in the corners, from double crochet up to double treble crochet, so the corners reach out to meet the edges.
Three more rounds frame the square: a round of single crochet, a round of double crochet with generous corners and a final round of single crochet. The finished square measures about 10 inches on each side, with 37 stitches per side. Because the squares are fairly large, the queen size needs only 63 of them, set in 7 columns and 9 rows, which makes this one of the quicker bed covers in my collection.
The squares are joined with a cream whipstitch through the back loops, so the seams lie flat and sit quietly between the stripes. The cream columns sit on both outer edges and in the middle, and the burgundy columns sit between them, so the cover looks balanced and frames the bed nicely. In each stripe, the crosses line up from top to bottom like a row of stained glass panels.
The pointed edge is worked straight onto the outer squares, in the color of each square. Each point is a triangle of seven rows that alternate between solid double crochet and open mesh, losing three stitches at each end of every row, so the point looks lacy and striped at the same time. A final cream round of single crochet with a picot at every tip runs around the whole cover. With the points, the queen cover measures about 77 by 94 inches.
The stitches are chain, slip stitch, single crochet, double crochet, treble crochet and double treble crochet. What makes this pattern intermediate is keeping the arms and arches in step round after round, and working the squaring round with its mix of stitch heights. I give the count for the arms and the arches at the end of every round, so you can check each square before moving on.
The finished cover is light, crisp and full of contrast. The solid arms give it structure, the chain arches give it air, and the burgundy and cream stripes make it bold and elegant. It looks lovely in a classic bedroom with dark wood and brass, in a guest room with white roses on the nightstand or in a cozy room dressed for the holidays. It is a timeless design that feels both vintage and fresh.
Why You'll Love This Cream and Burgundy Maltese Cross Square Bed Cover Crochet Pattern Pattern
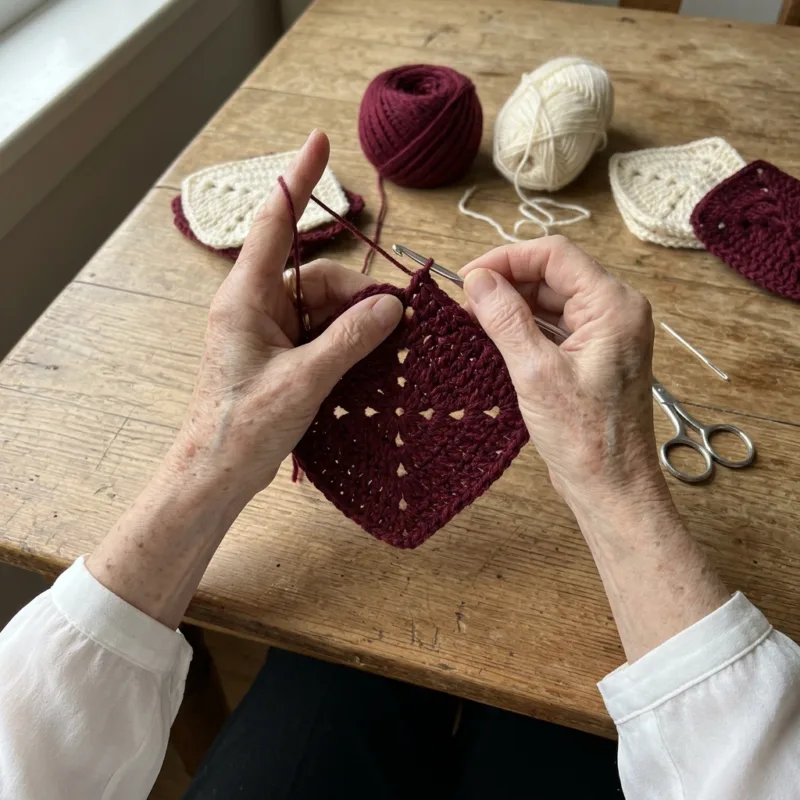
I fell in love with this square the first time I held it up to a window. The solid arms looked dark against the glass, and the light poured through the chain arches in the corners, just like sunlight through old lace curtains. I could not stop making them. There is something about a square that is part solid and part air that feels both sturdy and delicate, and I think that balance is what makes this cover so special.
The rounds have a pleasing rhythm. On each arm, you work two stitches into the first and last stitch and one into the middle ones. In each corner, you chain three and catch the next arch. Arm, corner, arm, corner, around and around. After a few squares, my hands knew the pattern by heart, and I could work while listening to the radio or chatting with a friend. Each square takes me about an hour and a half, which fits beautifully into an evening.
I love the squaring round in particular. It is the round where the square suddenly appears. Until then, you have a round flower of arms and arches, and then the double trebles reach out into the corners and pull everything into shape. Every time I finish that round and see a neat square in my lap, I feel a little burst of satisfaction. It is a clever bit of crochet engineering that is easy to work.
Here are the habits that kept this project smooth for me:
- Count the arm stitches at the end of every round before moving on.
- Keep your corner chains at the same relaxed tension so the arches match.
- Make all the cream squares in one stretch, then all the burgundy ones.
- Block every square before joining, because the arches love to be stretched open.
The colors make me happy every time I walk into the room. Burgundy is warm, rich and grown up, and cream keeps it bright and fresh. Set in stripes, they look like old-fashioned ribbon or the awning of a little café. In winter, the cover feels festive and cozy, and in summer, the cream stripes and open arches keep it light and airy. It is a cover for every season.
I love the pointed edge too. After joining the squares, the points feel like a fun little extra, and they work up quickly, just seven rows each. Because they alternate solid and mesh rows, each one looks like a tiny striped pennant. Hanging down the sides of the bed, they move gently when you pass by, and they make the whole cover look playful and finished.
Finally, I love that this design feels like an heirloom from the first day. The Maltese cross is an old and much-loved motif, and it gives the cover a sense of history and meaning. I can imagine this cover being handed down, folded at the end of a bed in a family home for many years. If you make it, I hope it becomes that kind of treasure for you.
Switch Things Up
Choose a new color pair. The stripes and crosses look wonderful in many combinations. Navy and white feel fresh and coastal, forest green and cream look classic and woodsy, and dusty blue with ivory is soft and calm. For a cheerful look, try mustard and white. You can also make the whole cover in one color, such as ecru, for a delicate vintage feel where the crosses and arches show through texture alone.
Make it for any bed. Each square is about 10 inches, and the points add about 3.5 inches along both sides and the foot. Use an odd number of columns so the same color sits on both outer edges. The number of points is the number of columns plus twice the number of rows. These sizes include the points:
- Twin: 5 by 9 squares, 45 squares and 23 points, about 57 by 94 inches
- Queen: 7 by 9 squares, 63 squares and 25 points, about 77 by 94 inches
- King: 9 by 9 squares, 81 squares and 27 points, about 97 by 94 inches
Make a sofa throw. Five columns by six rows, 30 squares, with points only along the two short ends, makes a throw of about 50 by 67 inches. That is 10 points in all, five at each end. It looks lovely folded over the back of a sofa with the points hanging down, and it is a great way to try the pattern before committing to a whole bed. It also makes a thoughtful housewarming gift.
Make a baby blanket. Three columns by four rows, 12 squares, without points, gives a blanket of about 31 by 41 inches once you add two rounds of single crochet around the outside. For a baby, I would close up the corners a little by working the chain arches with ch 2 instead of ch 3, so the openings are smaller. Pale blue and white or soft pink and cream look lovely in a nursery.
Make matching pillow shams. A sham like the ones on my bed uses one cream square in the center and two burgundy squares on either side worked only through Rnd 8, so they are a little narrower. Join the three, work two rounds of single crochet around the front and back it with a plain burgundy panel. A single square with a round of picots makes a pretty cushion for a reading chair.
Change the layout. Stripes are elegant, but the same squares make other patterns. Alternate the colors in every row for a checkerboard, or make a central panel of burgundy squares surrounded by a frame of cream squares, like a large picture on the bed. You could also make every square half and half, with two cream arms and two burgundy arms, for a pinwheel effect. Lay out a few squares before you decide.
Change the edge. The lacy points are playful, but you can choose a calmer finish. Skip the points and work two rounds of cream single crochet with a round of shells for a soft scalloped edge, or simply a round of reverse single crochet for a clean outline. You can also work all the points in cream, so they frame the cover in one color, or all in burgundy for a bold border.
Change the yarn weight. In DK cotton with a 4 mm hook, each square comes out about 8 inches, so a queen needs about 9 by 11 squares. In bulky yarn with a 6.5 mm hook, the squares grow to about 13 inches, and a queen needs only 5 by 7 squares. The points scale with the squares. Always make one square first, block it and measure it before you plan your layout and buy yarn.
Materials Needed
— Main Fabric
— Tools Required
The Free Pattern
0% complete
— Maltese Cross Square (Make 63: 36 cream and 27 burgundy) :
— Layout and Joining :
— Lacy Points :
— Edge :
Assembly Instructions
- Make one Maltese cross square, block it and check that it measures about 10 inches with 37 stitches on each side.
- Make all 63 squares, 36 in cream and 27 in burgundy, and block each one to the same size.
- Lay out the squares in 7 columns of 9, with cream columns on both outer edges and in the middle, and all arms pointing straight up and down.
- Whipstitch the squares into columns with cream through the back loops, then join the columns side by side.
- Work a lacy point on the outer side of every square along both long sides and the foot, each in the color of its square.
- Work the cream edge round around the whole cover, weave in all ends and block the points into neat triangles.
Common Mistakes & How to Fix Them
Arms that do not grow evenly. In Rnds 3 to 7, every arm must grow by exactly 2 dc, with 2 dc in the first and last dc of the arm. If you forget an increase on one arm, that arm is narrower than the others, the cross turns lopsided and the squaring round no longer fits. This is easy to miss because the arches distract the eye. Count each arm at the end of every round: 5, 7, 9, 11 and then 13 dc. If one arm is off, fix it before you start the next round, because each round builds on the one before.
Uneven chain arches. The corner arches show clearly on the finished cover, and if some are tight and some are loose, the corners look messy and the square may curl at one corner. Tight arches also pull the arms toward each other and make the square cup. Keep your ch 3 at the same relaxed tension every time, and lay the square flat after Rnd 5 to check that it is smooth. If the corners curl up, loosen the chains. If they ruffle, tighten them a little. Consistent arches are the secret to a cover that lies flat.
Working the squaring round in the wrong spaces. In Rnd 8, each corner has six ch-3 spaces, and you work into the spaces only, skipping the single crochet between them. If you work into a single crochet by mistake, or put the corner ch 3 between the wrong spaces, the corner tilts to one side and the square is not square. Before you start each corner, count the six spaces and place a stitch marker between the 3rd and 4th, where the corner chain goes. The stitches should rise from dc to tr to dtr and then fall again evenly.
Points that pull the edge in. The points are worked straight onto the outer squares, and if Row 1 is tight, it gathers the edge of the square and the side of the cover ripples. If the slip stitch decreases are pulled tight, the edges of the point become stiff and curl. Work Row 1 at a relaxed tension, the same as the squares, and keep the slip stitches loose. After the edge round, pin each point into a neat triangle with its tip pulled straight down, mist it with water and let it dry, so the points hang crisply.

You Might Also Like






Important Notes
Gauge matters because 63 squares have to fit together. With a 5 mm hook, the first four rounds should measure about 4.5 inches across, and the finished square about 10 inches with 37 stitches on each side. Measure your first three squares and then one in every ten. Because the squaring round uses tall stitches, small differences in tension show up there, so if your square is not square, check the heights of your tr and dtr first.
Block every square before joining. Pin it to 10 by 10 inches with sharp corners and straight sides, gently stretch the chain arches open with your fingertips, and spray it with water until damp. Let it dry completely. Blocking opens the corner windows, straightens the arms and makes every square the same size. Block the finished cover again after the edge round, especially the points, so they hang straight.
The yarn amounts in the materials list are estimates for the queen size, including the joining, the points and the edge. Buy all of the cream and all of the burgundy at once, from the same dye lots, and keep the labels. Deep burgundy can vary between lots, and a slightly different shade would show clearly in a long stripe. Buy one extra skein of each color for safety and for future repairs.
Wash the finished cover on a gentle cold cycle in a large mesh bag or a zipped duvet cover, with mild detergent. Burgundy and cream squares sit side by side along every stripe, so always add a color catcher, and for the first wash you can soak the cover in cold water with a splash of vinegar. Never wring or twist it. Press out the water, lay it flat, reshape the squares and points, and let it dry fully.
Thank you for making this cream and burgundy Maltese cross bed cover with me. I hope you enjoy watching the solid arms and lacy arches grow together, the clever squaring round that turns each one into a neat square, and the moment the stripes come together on your bed with their little lace points. It is a cover full of light and balance.
So find your cream and burgundy yarn, make your magic ring and start your first square today. Count your arms, open your arches and block it flat. Then make the next one, and before long you will have a timeless striped cover that brings warmth and elegance to your bedroom for many years.
Crochet Abbreviations
You Ask, We Answer
How big is the finished bed cover, and how many squares do I need?
Following the pattern exactly, each square measures about 10 inches with 37 stitches on each side. The queen size uses 63 squares in 7 columns of 9, 36 in cream and 27 in burgundy, which makes a panel of about 70 by 90 inches. The 25 lacy points add about 3.5 inches along both long sides and the foot, so the finished cover measures about 77 by 94 inches. On a standard queen mattress of 60 by 80 inches, that gives a good drop on both sides with the points hanging below. For other sizes, keep an odd number of columns so the same color sits on both outer edges, and count your points as the number of columns plus twice the number of rows. Measure your bed, add the drop you want and divide by 10 to plan your layout.
Can I use a different yarn, or make the squares in one color?
Yes to both. Worsted cotton shows the solid arms and open arches crisply, holds the squares flat and washes well. A cotton and acrylic blend gives a softer, lighter cover, and a smooth acrylic is fine for easy care. Avoid fuzzy yarns, which blur the arches. DK cotton with a 4 mm hook gives squares of about 8 inches, and bulky yarn with a 6.5 mm hook gives squares of about 13 inches, so plan your layout from your own square. A one-color cover, all cream or all ecru, looks beautiful and very vintage, with the crosses and arches showing through texture alone. In that case, work the seams and edge in the same color, and the cover will look like one large piece of lace. Always make and block one square before you buy all your yarn.
How do I care for and store the bed cover so it lasts?
Wash it only when it really needs it, on a gentle cold cycle in a large mesh bag or zipped duvet cover, with mild detergent, and always use a color catcher, because burgundy sits right next to cream along every seam. Dry it flat, reshaping the squares and pulling each point straight while it is damp. Avoid a hot dryer, which can shrink cotton and pull the arches out of shape. Between washes, shake the cover out and air it near an open window, away from strong direct sun, which can fade burgundy over time. To store it, fold it loosely along the seams, which make natural fold lines, with tissue paper between the layers, and keep it in a cotton bag rather than plastic. Refold it every few months, and check the seams and points once a year.
Success!
Thanks for subscribing — check your inbox for a welcome note.
Abbreviations
- ch — chain
- sl st — slip stitch
- sc — single crochet
- sc2tog — single crochet 2 together (here worked over 2 corner spaces at a seam)
- dc — double crochet
- tr — treble crochet
- dtr — double treble crochet
- picot — ch 3, sl st in 3rd ch from hook
- BLO — back loop only
- st(s) — stitch(es)
- sp(s) — space(s)
- rep — repeat
- Rnd — round
- RS — right side