
Amanda's Creative Corner Crochet · Kitchen
Free Crochet Patterns Handmade with Love

Cream and Taupe Diamond Granny Bed Cover Crochet Pattern
Jump to Pattern
Cream and Taupe Diamond Granny Bed Cover Crochet Pattern
180-220 Hours 3 made this
Intermediate Level

You need turned rows, double crochet clusters and simple seaming.

180 to 220 Hours

Every square is small and portable, so the cover grows in easy steps.

Diamond Checkerboard

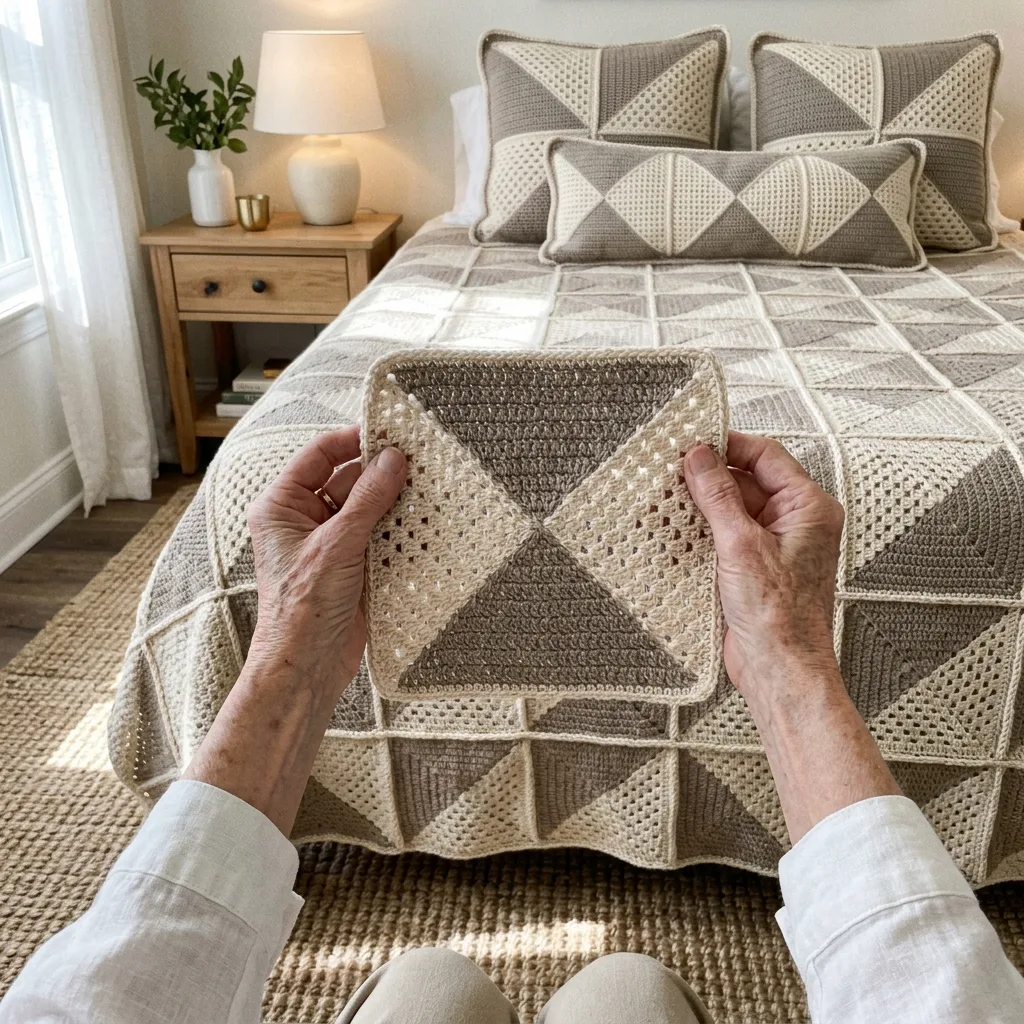
Cream and taupe triangles meet to make a bold diamond pattern across the bed.

About This Cream and Taupe Diamond Granny Bed Cover Crochet Pattern Pattern

This bed cover is a straight grid of 90 squares. Each square is split into four triangles: two soft cream granny cluster triangles with little square holes, and two warm taupe single crochet triangles with a dense, tweedy texture. When the squares are joined, the cream triangles meet to form cream diamonds and the taupe triangles meet to form taupe diamonds, so the whole bed looks like a checkerboard set on point.

It finishes at about 82 by 91 inches in worsted cotton yarn, with a thin cream rope edge around the cover. You will use single crochet, double crochet clusters and plain seaming. It suits a crocheter who is comfortable with turned rows and ready for a big, steady project.
Cream and Taupe Diamond Granny Bed Cover Crochet Pattern step detail

Why You'll Love This Cream and Taupe Diamond Granny Bed Cover Crochet Pattern Pattern

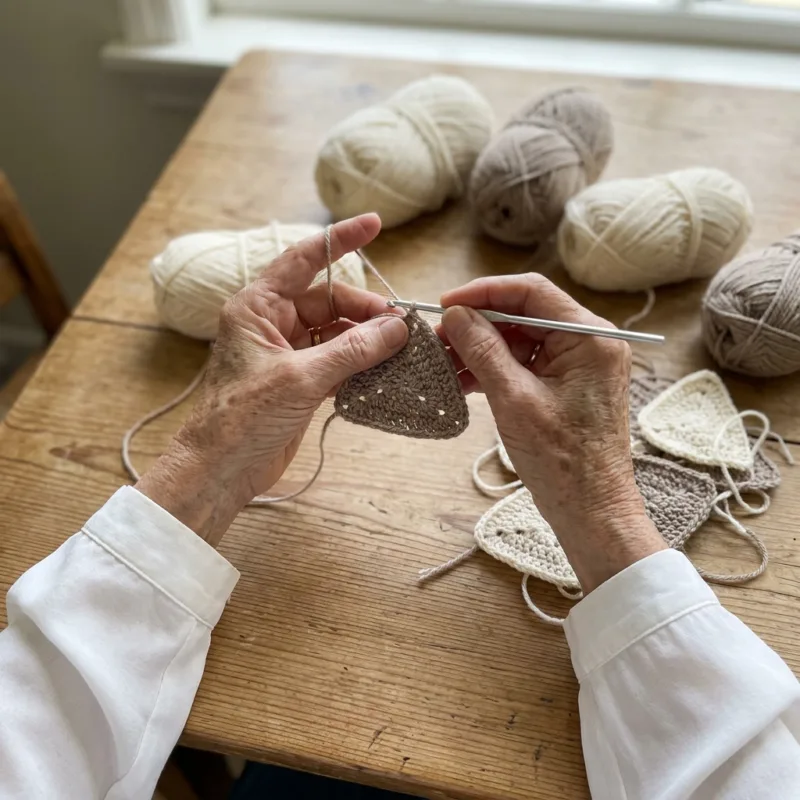
I love this project because it starts so small. One triangle takes less than an hour, so you can crochet it on the sofa, in the car or at a friend's kitchen table. Then one day you lay out the squares and the diamonds appear.

The two stitches feel so different in your hands. The taupe is firm and calm, and the cream is light and lacy. Together they make a cozy bedroom cover that looks far more complicated than it is.

Switch Things Up

Try charcoal and cream for a bolder look, or sage and ivory for a soft spring bedroom. Make 5 by 6 squares for a sofa throw of about 45 by 54 inches, or 4 by 4 squares for a baby blanket. Use the same two colors to crochet one square into a pillow cover that matches the bed. You can also finish the cover with a plain single crochet edge if you prefer to skip the reverse single crochet.


Materials Needed

— Main Fabric

01 Worsted weight (4) cotton yarn in warm taupe: about 2,000 g (3,300 yd / 3,000 m) for 180 triangles
02 Worsted weight (4) cotton yarn in soft cream: about 2,900 g (4,900 yd / 4,500 m) for 180 triangles, the square borders, seaming, joining and the cover edge
03 Buy about 10 percent extra of each color. Yardage is estimated and will vary with your tension

— Tools Required

04 4 mm (G-6) crochet hook, or the size that gives 16 sc and 18 rows in 4 in (10 cm)
05 Yarn needle
06 Stitch markers
07 Scissors
08 Blocking mats and rust-proof pins
09 Measuring tape

The Free Pattern

Intermediate 180-220 Hours

0% complete

— Taupe Triangle (Make 180, taupe) :

Worked in turned rows from the center point of the square outward. Row 18 becomes one outer side of the square. Turn at the end of every row.
Row 1: Ch 2, sc in 2nd ch from hook. Turn. (1 sc)
Row 2: Ch 1, 3 sc in the sc. Turn. (3 sc)
Rows 3 to 18: Ch 1, 2 sc in first st, sc in each st across to last st, 2 sc in last st. Turn. Each row grows by 2 sts. (Row 3: 5 sc, Row 4: 7 sc, Row 5: 9 sc, Row 6: 11 sc, Row 7: 13 sc, Row 8: 15 sc, Row 9: 17 sc, Row 10: 19 sc, Row 11: 21 sc, Row 12: 23 sc, Row 13: 25 sc, Row 14: 27 sc, Row 15: 29 sc, Row 16: 31 sc, Row 17: 33 sc, Row 18: 35 sc)
Fasten off and weave in the starting tail. Each triangle has 324 sc in total and a 35 st base.

— Cream Triangle (Make 180, cream) :

Worked in turned rows from the center point outward. A cluster is 3 dc worked in the same st or sp. Each row adds one cluster. Row 9 becomes one outer side of the square.
Row 1: Ch 3 (counts as first dc), 2 dc in 3rd ch from hook. Turn. (1 cluster, 3 dc)
Row 2: Ch 3 (counts as dc), 2 dc in first st, ch 1, 3 dc in top of turning ch. Turn. (2 clusters, 6 dc, 1 ch-1 sp)
Row 3: Ch 3 (counts as dc), 2 dc in first st, [ch 1, 3 dc in next ch-1 sp] 1 time, ch 1, 3 dc in top of turning ch. Turn. (3 clusters, 9 dc, 2 ch-1 sps)
Row 4: Ch 3 (counts as dc), 2 dc in first st, [ch 1, 3 dc in next ch-1 sp] 2 times, ch 1, 3 dc in top of turning ch. Turn. (4 clusters, 12 dc, 3 ch-1 sps)
Row 5: Ch 3 (counts as dc), 2 dc in first st, [ch 1, 3 dc in next ch-1 sp] 3 times, ch 1, 3 dc in top of turning ch. Turn. (5 clusters, 15 dc, 4 ch-1 sps)
Row 6: Ch 3 (counts as dc), 2 dc in first st, [ch 1, 3 dc in next ch-1 sp] 4 times, ch 1, 3 dc in top of turning ch. Turn. (6 clusters, 18 dc, 5 ch-1 sps)
Row 7: Ch 3 (counts as dc), 2 dc in first st, [ch 1, 3 dc in next ch-1 sp] 5 times, ch 1, 3 dc in top of turning ch. Turn. (7 clusters, 21 dc, 6 ch-1 sps)
Row 8: Ch 3 (counts as dc), 2 dc in first st, [ch 1, 3 dc in next ch-1 sp] 6 times, ch 1, 3 dc in top of turning ch. Turn. (8 clusters, 24 dc, 7 ch-1 sps)
Row 9: Ch 3 (counts as dc), 2 dc in first st, [ch 1, 3 dc in next ch-1 sp] 7 times, ch 1, 3 dc in top of turning ch. Do not turn. (9 clusters, 27 dc, 8 ch-1 sps = 35 sts across the base)
Fasten off and weave in the starting tail. Each triangle has 135 dc in total.

— Square Assembly (Make 90, 2 taupe and 2 cream triangles each) :

Step 1: Lay a taupe triangle at the top with its base row facing up, a cream triangle on the right with its base row facing right, a taupe triangle at the bottom with its base row facing down, and a cream triangle on the left with its base row facing left. All four center points touch in the middle. (4 triangles)
Step 2: With cream yarn and a yarn needle, whip stitch each taupe leg to the neighboring cream leg through the back loops, from the center point out to the corner. Match 2 taupe row ends to each cream row end and pin first. (4 seams, each 18 taupe row ends to 9 cream row ends)
Step 3: Weave in all ends. Each side of the square now has 35 sts: 35 sc on a taupe side, 27 dc and 8 ch-1 sps on a cream side. (4 sides, 35 sts each)

— Square Border (Make 90, cream) :

Round 1: With the right side facing, join cream with a sl st in the first st of any side. Ch 1, sc in the same st and in each of the next 34 sts (on a cream side work 1 sc in each dc and each ch-1 sp). Ch 2 for the corner. *Sc in each of the next 35 sts, ch 2.* Repeat from * to * 2 more times. Join with a sl st to the first sc. Fasten off and weave in ends. (140 sc, 4 ch-2 corner sps)
Block each square to about 9 in (23 cm) wide. Keep all 90 squares in the same direction: taupe at the top and bottom, cream at the left and right.

— Layout and Joining :

The cover is 9 squares wide and 10 squares long (90 squares). Every square faces the same way, so cream diamonds appear along the vertical seams and taupe diamonds appear along the horizontal seams.
Strips: Make 10 strips of 9 squares. Hold two squares with right sides together, matching the 35 sts of the sides that face each other. Working through the back loops of both squares, sl st across. Do not join the corner ch-2 sps. (8 seams per strip, 35 sl sts each, 280 sl sts per strip)
Joining strips: Join the 10 strips the same way, one long edge at a time. Along each seam, sl st the 35 sts of every square pair, and where four squares meet work 1 sl st through all four ch-2 sps. (9 seams, 315 sl sts plus 8 corner meeting points each, 72 meeting points in total)

— Cover Edge :

Round 1: With the right side facing, join cream with a sl st in any outer corner ch-2 sp. Ch 1, (sc, ch 2, sc) in the same sp. Sc in each st along the edge, working sc2tog over the two ch-2 sps where two squares meet. Work (sc, ch 2, sc) in each outer corner ch-2 sp. Join with a sl st to the first sc. (Top and bottom edges: 315 sc plus 8 sc2tog = 323 sts each. Side edges: 350 sc plus 9 sc2tog = 359 sts each. Corners: 8 sc. Total 1,372 sts and 4 ch-2 sps)
Round 2: Ch 1, do not turn. Working left to right, rev sc in each st around and 3 rev sc in each corner ch-2 sp. Join with a sl st to the first rev sc. Fasten off and weave in ends. (1,372 rev sc plus 12 corner rev sc = 1,384 rev sc)

Assembly Instructions

  1. Make 180 taupe triangles and 180 cream triangles, and weave in the starting tails before you seam.
  2. For each of the 90 squares, lay 2 taupe and 2 cream triangles with the center points together, taupe at the top and bottom and cream at the left and right.
  3. Seam the four legs with cream yarn, matching 2 taupe row ends to each cream row end.
  4. Work the cream Square Border around every square, then block each one to about 9 in (23 cm).
  5. Join 9 squares into a strip, and make 10 strips, always keeping the squares facing the same direction.
  6. Join the 10 strips with a back loop slip stitch seam, working one slip stitch through the four corner spaces wherever four squares meet.
  7. Work the Cover Edge, Round 1 in single crochet and Round 2 in reverse single crochet.
  8. Wet block the whole cover flat and let it dry fully before it goes on the bed.

Common Mistakes & How to Fix Them

Letting a taupe triangle grow too wide or too narrow. Every row must have 2 more sts than the row before, so count at rows 5, 10, 15 and 18.

Skipping the 2 dc in the first st of the cream rows. Without it the triangle leans to one side instead of growing evenly, so check that each row has one more cluster than the last.

Seaming the four triangles with different tension. Pin the legs first and ease the 2 taupe row ends onto each cream row end so the square stays flat.

Joining squares in different directions. Always keep taupe at the top and bottom and cream at the left and right, or the diamonds will not form.


Denise

I design cozy crochet patterns for the home, from small coasters to full bed covers, and I test every stitch count before I share it.


Important Notes

Gauge is 16 sc and 18 rows in 4 in (10 cm) with a 4 mm hook. Each square should measure about 9 in (23 cm) after blocking and the finished cover about 82 by 91 in.

Block the squares before joining, because blocked squares are easier to match along the 35 st sides.

Yarn amounts are estimates. Weigh your first square and multiply by 90 before you buy all of your yarn.

Wash on a gentle cycle in cool water with a color catcher, because the taupe and cream yarns are used side by side. Dry flat.


I hope you enjoy every square as much as I did. Take your time, line up your diamonds, and share a photo when your cover is on the bed.

Crochet Abbreviations

01 ch — chain
02 sl st — slip stitch
03 sc — single crochet
04 dc — double crochet
05 st — stitch
06 sts — stitches
07 sp — space
08 sps — spaces
09 sc2tog — single crochet 2 together (one sc worked over two spaces or stitches)
10 rev sc — reverse single crochet (single crochet worked from left to right)

You Ask, We Answer

What size is the finished bed cover?

About 82 by 91 inches, made from 9 by 10 squares of about 9 inches each. It covers a queen bed top. Add or remove a row or a column of squares to change the size by 9 inches.

Can I use a different yarn weight or make it smaller?

Yes. The stitch counts stay the same, but the square size changes with the yarn and hook, so swatch one square first. For a sofa throw, make 5 by 6 squares for about 45 by 54 inches.

How do I wash and care for it?

Machine wash on a gentle cycle in cool water with a color catcher, then dry flat or on low heat. Cotton yarn can stretch when wet, so lift it fully supported and do not hang it.





