
Emerald Green Pineapple Lace Bed Cover Crochet Pattern
You need basic stitches and a steady hand with chain loops, plus patience for counting each pineapple row.
Each square takes about two and a half hours, so three or four squares a week finishes the cover in about three months.
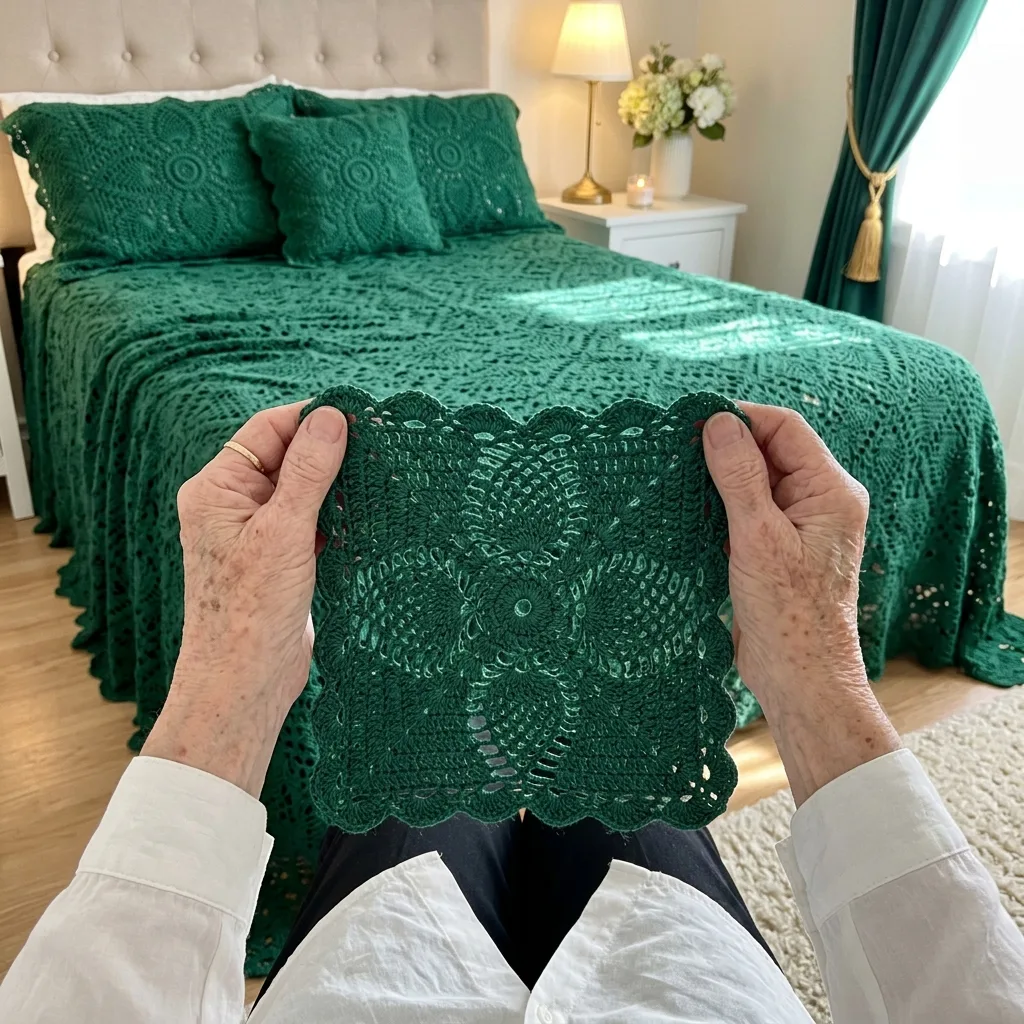
Every square holds four classic pineapples that fan out from the center, the most loved motif in vintage lace.
About This Emerald Green Pineapple Lace Bed Cover Crochet Pattern Pattern
This bed cover brings the classic pineapple lace of vintage bedspreads into a rich emerald green. It is made from forty two squares, and each one starts with a small raised ring at the center, followed by a ring of double crochet clusters. From there, four pineapples grow outward, one toward each side of the square, built from rows of chain loops that narrow to a point. Between the pineapples, solid double crochet wedges fill the corners, and a round of shells scallops the edge of every square. The squares are joined shell to shell, so the seams look lacy instead of heavy.
The finished size is about 74 by 86 inches including the scallops. Each square measures about 12 inches, and the layout is 6 squares across and 7 squares down. That covers the top of a full or queen bed and drapes down the sides, with the outer shells forming a soft scalloped edge along the bottom and sides. I worked mine in DK cotton, which gives clear, crisp lace and a cool, smooth feel. The open pineapples keep the cover light, and it looks lovely over a green or cream quilt for extra warmth in winter.
The pineapple is one of the most loved shapes in crochet lace, and it is easier than it looks. It starts as a fan of nine double crochets with chain spaces between them. On the next round, you work a single crochet into each chain space with chain 3 loops between, which gives eight stitches and seven loops. On every round after that, you work into the loops instead, and each round has one loop fewer than the last. Seven rounds later, the pineapple ends in a single point, and the long chains on either side of it turn into the frame of the square.
While the pineapples narrow, the corners grow. Each corner starts with a shell of three double crochets, a chain 3 and three more double crochets, and every round adds three stitches on each side of the corner. By the end, the corners are solid wedges of double crochet that give the square its structure and frame the lacy pineapples beautifully. A round of solid double crochet then squares everything up, and the last round turns the edge into fourteen shells per side with a big shell at every corner.
The squares are joined as you go on that last round. When you reach a side that touches a finished square, you slip stitch into the center of the matching shell instead of finishing the shell on its own. The result is a row of little points where the shells hold hands, with small lacy openings between them. The outer shells stay free, so the bed cover has a scalloped edge built right in, and one round of crab stitch along the outside gives those scallops a firm, rope like finish.
I rate this pattern Intermediate. The stitches are simple: chain, slip stitch, single crochet and double crochet. What makes it Intermediate is the counting, because the pineapple loses one loop each round while the corners gain stitches, and the side chains grow longer. I give every round with its stitch count, so if you count as you go you will never get lost. It suits a maker who has made a granny square or two, loves vintage lace, and wants a dramatic, elegant bed cover that looks like it came from a grandmother's linen chest.
Why You'll Love This Emerald Green Pineapple Lace Bed Cover Crochet Pattern Pattern
I love this bed cover because pineapple lace always reminds me of the bedspreads I saw in old farmhouses as a child, usually in white or ecru, folded carefully at the foot of a bed. Making it in a deep emerald green gives that old pattern new life. The green feels rich and calm, like a forest after rain, and it makes the lace look bold and modern while keeping all the charm of the classic design. It is the best of both worlds, old fashioned and fresh at the same time.
I also love watching each pineapple take shape. The first rounds feel like any other square, but then the fan opens, the chain loops start stacking, and round by round the pineapple narrows to its little point. Meanwhile the corners grow solid and strong. By the time I work the shells around the edge, the square looks like a piece of fine lace, and it is hard to believe it came from such simple stitches. That moment of surprise never gets old, even after forty squares.
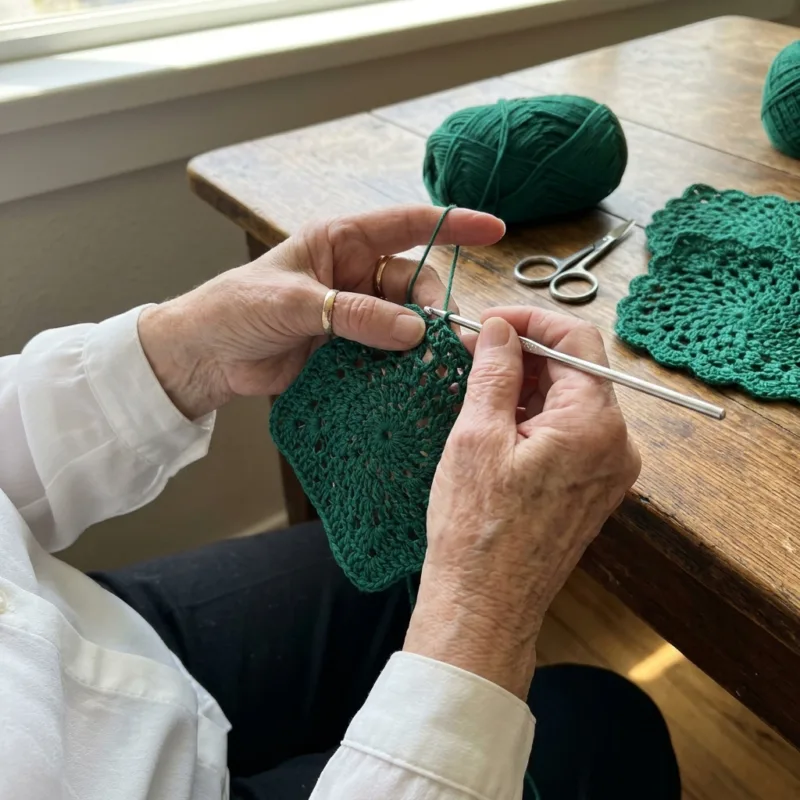
The squares are easy to carry. One square uses a single ball of yarn or less, so I keep a ball, my hook and a few stitch markers in a small bag and take it with me everywhere. I crocheted squares at my kitchen table with my morning coffee, in the garden in the afternoon and in my armchair in the evening. Because each square is finished on its own, I always feel like I accomplished something, and seeing the stack of green squares grow kept me happily going.
Here is what I learned while making it:
- A stitch marker in the first loop of each pineapple keeps the four pineapples even.
- Counting the corner stitches every round keeps the square perfectly square.
- Joining as you go saves hours compared to sewing squares together at the end.
- Cotton yarn makes the pineapples crisp, especially after blocking.
This bed cover also makes a beautiful heirloom gift. Pineapples have long been a symbol of welcome and hospitality, so a pineapple lace bed cover is a lovely gift for a new home, a guest room or a couple starting their life together. I like to tuck a little card into the folded cover explaining the meaning of the pineapple, with the yarn name and washing notes, so the new owner can care for it and someday pass it on.
Finally, I love what it does to a bedroom. Emerald green with a cream headboard, gold lamps and white furniture feels elegant and warm, like a room in a country house hotel. Add matching lace pillows, a vase of green hydrangeas and a candle, and the bed becomes the heart of the room. Every time the lamp is on in the evening and the light shines through the pineapples, I am reminded of all the peaceful hours that went into it.
Switch Things Up
Try a classic or a bold color. Pineapple lace looks wonderful in any solid color. Ivory or ecru gives you the traditional heirloom look of a grandmother's bedspread. Navy feels crisp and elegant, burgundy feels rich and warm, and dusty blue or blush pink feels soft and romantic. For a modern room, try charcoal gray. Avoid variegated yarn, because the color changes blur the pineapple loops. A single solid shade lets the lace do all the talking.
Make it in other bed sizes. Each square is about 12 inches, so planning a new size is easy. Measure the top of the mattress, add the drop you want on each side, and divide by 12. Because the squares join as you go and the edge is built into the shells, any grid works. Here are some grids to start from:
- Twin: 5 x 8 squares, 40 squares, about 62 x 98 inches.
- Full: 7 x 8 squares, 56 squares, about 86 x 98 inches.
- Queen: 8 x 9 squares, 72 squares, about 98 x 110 inches.
- King: 9 x 9 squares, 81 squares, about 110 x 110 inches.
Make a baby blanket. Six squares joined 2 across and 3 down make a baby blanket of about 25 by 37 inches. For a baby, use a soft cotton blend in pale mint, butter yellow or soft white, and go down half a hook size so the loops are a little smaller and tiny fingers cannot catch. Lay it over a solid blanket in the crib or use it as a christening shawl. It makes a beautiful keepsake that can later become a doll blanket or a table topper.
Make a throw or table topper. Twelve squares joined 3 across and 4 down make a throw of about 37 by 49 inches, perfect for draping over a sofa or the foot of a bed. Four squares joined 2 by 2 make a lovely square table topper of about 25 inches, and a single square makes a large doily for a nightstand or side table. A matching doily under the lamp on your nightstand ties the whole room together with very little effort.
Add matching pillow covers. My cushions are each made from one square for the front and one for the back, joined with single crochet on three sides around a 12 inch pillow form, then closed on the fourth side. For standard shams, join 2 squares side by side for the front and add a back panel in plain double crochet. Use a green fabric pillow underneath so the lace shows clearly and nothing white peeks through the pineapples.
Make a runner or curtain panel. Join squares in a single strip of 5 or 6 for a dining table runner about 12 by 62 to 74 inches. For a lace curtain, join squares in a panel the width of your window and as long as you need, and add a row of chain loops at the top for the rod. Light coming through pineapple lace throws beautiful patterns across the room in the afternoon, and green curtains with a matching bed cover look stunning.
Change the yarn weight. In size 10 crochet thread with a 1.75 mm hook, each square comes out about 6 inches, perfect for doilies, runners and fine heirloom pieces. In worsted cotton with a 5.0 mm hook, the squares grow to about 14 inches, making a bolder cover with fewer squares. Always make one test square, block it, measure it, and plan your grid and yarn from that real size.
Change the edge. If you want a lacier finish, skip the crab stitch and add a picot to the center of each outer shell instead: work 2 dc, ch 3, sl st in the top of the last dc, then the rest of the shell. For a heavier, more dramatic drape, add a green tassel to every corner shell along the bottom of the cover, so the tassels swing gently when the cover hangs over the side of the bed.
Materials Needed
— Main Fabric
— Tools Required
The Free Pattern
0% complete
— Pineapple Lace Square, Rnds 1 to 14 (Make 42, green A) :
— Layout :
— Rnd 15, Shell Edge and Join As You Go :
— Outer Edge :
Assembly Instructions
- Make 42 Pineapple Lace Squares through Rnd 14 and weave in the ends.
- Block each square to 12 x 12 inches, opening the pineapple loops with pins, and let them dry completely.
- Work Rnd 15 on the first square, then work Rnd 15 on every other square while joining it as you go, following the Layout grid of 6 across and 7 down.
- Work the crab stitch Outer Edge around all the outer shells of the cover.
- Weave in the last ends, then mist the finished cover and pin out the pineapples and scallops on a clean flat surface until dry.
Common Mistakes & How to Fix Them
Losing track of the pineapple loops. Each pineapple must lose exactly one loop per round, from 7 loops in Rnd 6 down to a single point in Rnd 13. If you accidentally work into the side chain as if it were a pineapple loop, the pineapple stays the same width and the square stops lying flat. This happens most often at the start of the pineapple, right after the side chain. Place a stitch marker in the first loop of each pineapple every round, and count the loops before you move on. The stitch count after each round tells you instantly if a loop went missing.
Working into the side chains. The side chains, which grow from ch 3 up to ch 10, are meant to arch over the chains of the round below, not to be worked into. If you put stitches into them, the corners pull in, the square cups, and the pineapples look squashed. Always work the side chain, then go straight to the first pineapple loop, skipping everything in between. When you reach Rnd 14, these long chains finally get filled with 9 dc each, and the square squares up beautifully. Trust the chains, even if they look loose at first.
Uneven corner wedges. The corners grow by 3 dc on each side every round, so a missed or extra stitch shows up quickly as one corner wedge being longer than another. The square then twists, and the shells in Rnd 15 will not line up for joining. After each round, count the dc on each side of every corner: Rnd 7 has 12 on each side, Rnd 10 has 21, and Rnd 13 has 30. If a count is off, fix it right away. A correct Rnd 14 must have exactly 85 dc per side, or the 14 shells will not fit.
Squares that block to different sizes. Lace stretches, so tension differences hide until you block. Over forty two squares, your tension will change with your mood, your tiredness and even the yarn ball. Measure each square after Rnd 14, then block every square to exactly 12 inches on the same mat before you join it. Set aside any square that cannot reach 12 inches without straining or that stretches past it easily, and remake it. Uneven squares make the shell joins pull and the scalloped edge wavy, and that is very hard to fix after joining.

You Might Also Like






Important Notes
Gauge matters with lace. Make one full square through Rnd 14, block it and measure it. It should be about 11.5 inches before the shell round and about 12 inches after it. If it is smaller, go up half a hook size, and if it is larger, go down half a size. Write your hook size on a tag in your bag and recheck every tenth square.
Blocking turns crumpled pineapples into crisp lace. Pin each square to its size, placing pins in the corners and gently opening every pineapple loop, then mist with water and let it dry fully. Block before joining, because joined squares are hard to pin evenly. After the outer edge is finished, mist the whole cover and pin out the scallops.
Buy all your yarn at once and check that every ball has the same dye lot number. Deep greens can shift toward blue or yellow from one lot to the next, and a slightly different square will stand out clearly in daylight. The amount in the materials list is a generous estimate for the 6 x 7 size, but buy one extra ball as insurance.
Hand wash the cover in cool water with a mild detergent, or machine wash it on a gentle cold cycle inside a large mesh laundry bag. Deep green can release dye in the first washes, so wash it alone and add a color catcher sheet. Never wring it. Roll it in big towels to press out water, then dry it flat and pat the pineapples and scallops back into shape.
Thank you for spending this time with me and my green pineapples. This bed cover is a long and lovely journey, and every square is a little piece of lace you can finish in an afternoon or an evening. You do not need to think about the whole bed today. All you need to begin is a magic ring, a ball of green cotton and a stitch marker to keep your pineapple loops in line.
Make one square this week. Watch the fan open, the pineapple narrow to its point and the shells scallop around the edge, and see how it makes you feel. I think you will want to make another right away. Before long you will have a stack of lace squares, and soon a bed dressed in welcoming green pineapples. Happy crocheting, my friends.
Crochet Abbreviations
You Ask, We Answer
How big is the finished bed cover?
The finished bed cover measures about 74 by 86 inches including the scalloped edge. Each blocked square is about 12 inches, joined 6 across and 7 down, which gives about 72 by 84 inches, and the outer shells with the crab stitch add about an inch on every side. On a full bed this covers the top and drapes down both sides with a pretty scalloped edge. On a queen it covers the top with a shorter side drop. If you want the cover to reach the floor on both sides, measure the mattress width plus twice the height from the mattress top to the floor, then divide by 12 to find how many squares you need across. Do the same for the length, adding one drop for the foot. Because the squares join as you go and the edge is built into the shells, you can change the grid to any size without recounting the border.
Can I use a different yarn weight or fiber?
Yes. DK cotton gives crisp lace and clear pineapples, which is why I chose it, but other yarns work well too. In size 10 crochet thread with a 1.75 mm hook, each square is about 6 inches, which is perfect for doilies, table toppers and fine heirloom bedspreads. In worsted cotton with a 5.0 mm hook, squares grow to about 14 inches, so you need fewer squares and finish faster. Acrylic is soft, light and easy to wash, but pineapple lace in acrylic does not block as crisply, so steam it gently instead of misting. Avoid fuzzy, textured or variegated yarns, because they hide the chain loops that make the pineapples so pretty. Whatever you choose, make one test square, block it and measure it, then plan your grid and buy your yarn from that real size.
How do I wash and care for the bed cover?
Treat it like the heirloom lace it is. The gentlest way is to hand wash it in a bathtub of cool water with a mild detergent, pressing the water through the lace without rubbing or twisting. If you prefer the machine, place the cover in a large mesh laundry bag and use a gentle cold cycle. Deep green can release dye during the first few washes, so wash it alone and add a color catcher sheet. Never wring it. Press out the water, roll it in big towels, and lay it flat on a clean sheet to dry, patting each pineapple and scallop back into shape as it dries. Avoid the dryer, because heat can shrink cotton and stretch the lace out of shape. Between washes, shake it out and air it near an open window. Store it folded loosely in a cotton bag, away from direct sun, so the green stays deep and rich.
Success!
Thanks for subscribing — check your inbox for a welcome note.
Abbreviations
- A — color A, deep emerald green
- MR — magic ring
- ch — chain
- sl st — slip stitch
- sc — single crochet
- dc — double crochet
- rev sc — reverse single crochet (crab stitch)
- st(s) — stitch(es)
- sp(s) — space(s)
- RS — right side
- WS — wrong side
- rep — repeat
- Rnd — round