
Red and Burgundy Granny Square Bed Cover Crochet Pattern
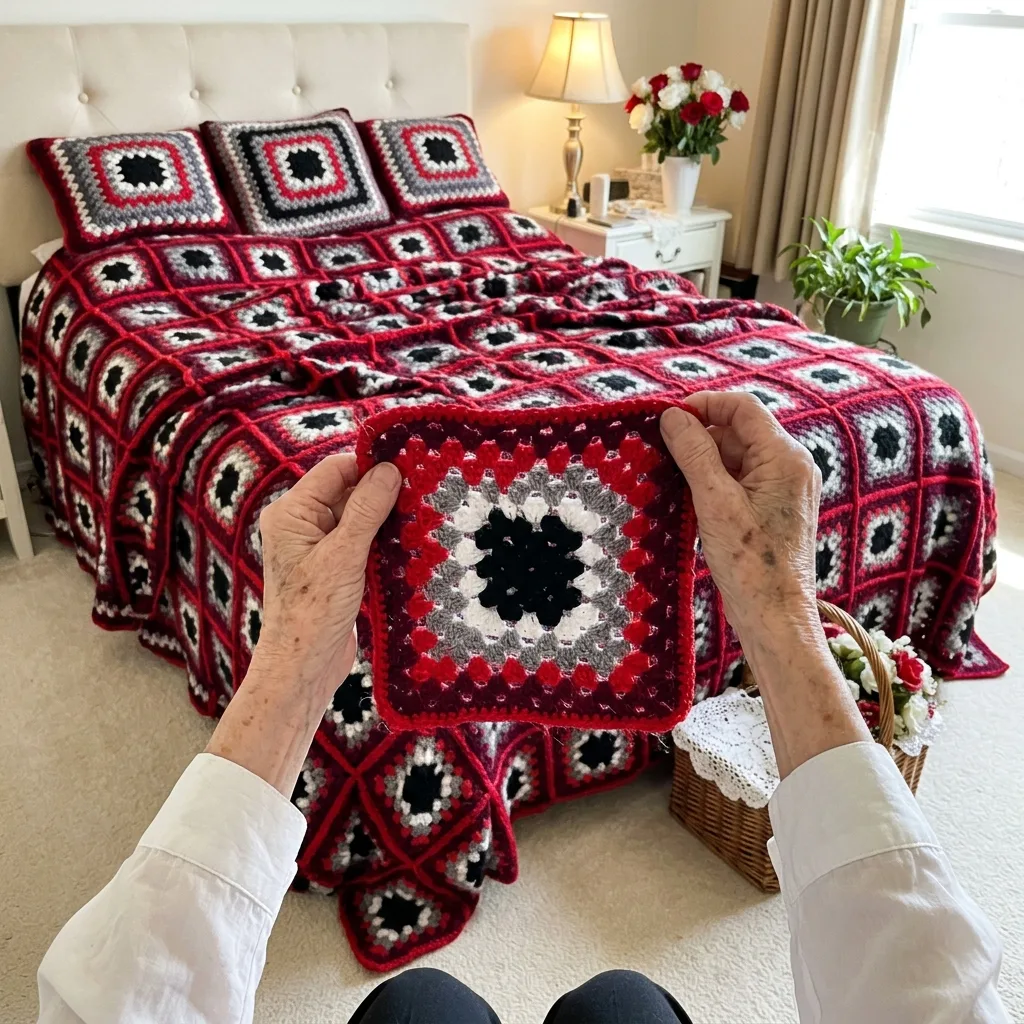
If you can chain and make a double crochet, you can make every square in this bed cover.
Each square takes about an hour and a half, so four squares a week finishes the cover in under three months.
Red, burgundy, white and gray rings around a black center make every square glow like a little target.
About This Red and Burgundy Granny Square Bed Cover Crochet Pattern Pattern
This bed cover is a bold, cheerful take on the classic granny square. It is made from forty two large squares, and every square starts with a small black center, then grows outward in rings of 3 double crochet clusters in white, gray, bright red and deep burgundy. The colors repeat in a steady rhythm, white and gray pairs separated by red and burgundy rings, so the eye moves from the center to the edge like ripples on water. A solid red frame closes each square, and when the squares are joined, the red frames become a strong grid that holds the whole design together.
The finished size is about 75 by 87 inches with the border. Each square measures about 12 inches, and the layout is 6 squares across and 7 squares down. That covers the top of a full or queen bed and drapes down the sides with a good drop at the foot. Worked in worsted weight yarn, the cover is warm and substantial, perfect for cold winter nights and lovely during the holidays, when the red and white feel festive and cozy. It also has the comforting weight that makes you want to curl up under it with a cup of tea.
The technique is the traditional granny square, one of the first things many of us ever learn in crochet. Each round is made of groups of three double crochet stitches, called clusters, with a chain 1 space between them along the sides and a chain 2 space at each corner. Every round adds one cluster to each side, which keeps the square perfectly flat. You change color at the end of each round, so the stripes come from the color order, not from any special stitch. It is simple, relaxing and very satisfying.
After eleven rounds of clusters, a round of solid double crochet in red fills every space and turns the lacy granny into a firm, smooth frame. A final round of single crochet gives each square a neat edge for joining. I join the squares with red single crochet worked on the right side, which leaves a raised red ridge between every square, like the leading in a stained glass window. That ridge is a big part of why this cover looks so crisp and graphic from across the room.
The border is three simple rounds in red: a round of double crochet, a round of half double crochet, and a round of reverse single crochet, also called crab stitch. The crab stitch makes a twisted, rope like edge that is strong, lies flat and wears beautifully over time. It frames the bold squares without competing with them, and it gives the whole bed cover a finished, professional look that will hold up to years of washing and use.
I rate this pattern Beginner. You only need chain, slip stitch, single crochet, half double crochet and double crochet, plus the crab stitch at the very end, which I explain right in the pattern. The most important skills are counting your clusters, changing colors neatly and weaving in ends. It suits a new crocheter who wants a real, finished bed cover as a first big project, and it also suits an experienced maker who wants a relaxing, rhythmic project to work on while watching a movie or chatting with family.

Why You'll Love This Red and Burgundy Granny Square Bed Cover Crochet Pattern Pattern
I love this bed cover because it takes the humble granny square and makes it bold. Most of us picture granny squares in soft pastels or scrappy rainbows, but red, burgundy, black, white and gray make it feel modern and strong. When I look at the bed from the door, the black centers look like little eyes in the middle of each square, and the red rings almost seem to pulse. It is a cover with real personality, and it makes a quiet bedroom feel warm and full of life.
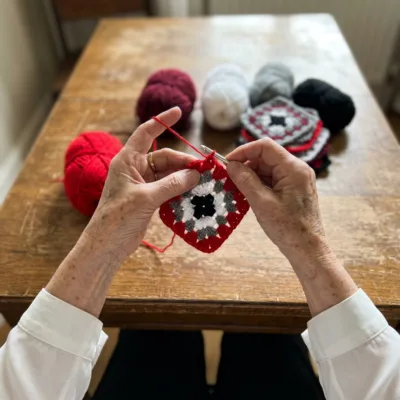
I also love how relaxing it is to make. The granny square is so familiar that my hands know it by heart. Three double crochet, chain one, three double crochet, chain one, round and round. After the first square, I barely look at my work, and I can crochet while I talk on the phone or watch my favorite show. The color changes keep it interesting, because every round brings a new shade, and I never got bored, even on the fortieth square.
The squares are wonderful to take along. One square needs only small amounts of each color, so I wind little balls and keep them in a bag with my hook and scissors. I made squares on the train, in the car while waiting, and at my kitchen table early in the morning. Because each square is a finished piece, I always feel like I am making progress, and the stack grows faster than I expect. Seeing the pile of red frames grow week by week kept me motivated all the way to the end.
Here is what I learned while making it:
- Weaving in ends after every few squares, not at the very end, saves a lot of tears.
- Joining each new color in a different corner hides the seams in the stripes.
- Making all the centers first, then all the next rounds, speeds things up.
- Laying the squares out on the floor before joining helps you spot any mix ups.
This bed cover makes a heartwarming gift. A granny square blanket carries a feeling of home and family, and the red and white colors feel especially lovely for a Christmas gift, a Valentine's present or a housewarming. I can picture it on a cabin bed, in a farmhouse guest room or in a college dorm, bringing comfort far from home. I always add a little tag with the yarn names and washing notes so it can be loved for many years.
Finally, I love how it changes a room. Against a cream headboard and white furniture, the red cover becomes the heart of the bedroom. Add the matching pillow shams, a vase of red and white roses, and the room feels warm and welcoming. On a snowy evening with the lamp glowing, it is the coziest spot in the house. Every time I see it, I think of all the quiet hours I spent making it, and that makes it even more special to me.
Switch Things Up
Try a new color story. The color order works with any five shades, as long as you have one dark center, two light neutrals and two strong colors. Navy, royal blue, white, gray and black feel crisp and nautical. Forest green, sage, cream, taupe and black feel calm and earthy. Mustard, burnt orange, cream, tan and brown feel warm and retro. Keep the frame and the border in your strongest color so the grid stays bold, just like the red does here.
Make it in other bed sizes. Each square is about 12 inches, so planning a new size is easy. Measure the top of the mattress, add the drop you want on each side, and divide by 12. The border has no repeat to match, so it fits any grid. Here are some grids I like:
- Twin: 5 x 8 squares, 40 squares, about 63 x 99 inches.
- Full: 7 x 8 squares, 56 squares, about 87 x 99 inches.
- Queen: 8 x 9 squares, 72 squares, about 99 x 111 inches.
- King: 9 x 9 squares, 81 squares, about 111 x 111 inches.
Make a baby blanket. Six squares laid 2 across and 3 down make a baby blanket of about 27 by 39 inches. For a nursery, you might soften the colors to pale pink, rose, white, light gray and charcoal, or mint, sage, white, gray and navy. Use a soft acrylic or cotton blend made for babies, and weave every end in very securely so nothing comes loose. It is a quick gift that still feels special.
Make a sofa throw. Twelve squares laid 3 across and 4 down give you a throw of about 39 by 51 inches. Twenty squares laid 4 across and 5 down make a larger throw of about 51 by 63 inches. A throw is a great way to try the pattern before a bed cover, and it looks wonderful folded over the arm of a couch. The red and white version is especially cheerful for the winter holidays.
Add matching pillow shams. The shams in my bedroom are each made from one square front and back. For a standard sham, join 2 squares side by side for the front and 2 more for the back, then join front and back with red single crochet on three sides and close the last side with buttons or a slip stitch seam. For an accent pillow, use 1 square for the front and 1 for the back around a 12 inch pillow form.
Change the edge. If you want a softer edge, replace the crab stitch with a round of small shells: skip 1 st, 5 dc in next, skip 1, sc in next. For a farmhouse look, add red tassels at the four corners. You can also work the first border round in burgundy and the rest in red for a deeper frame, or add a round of white between them for a crisp stripe that echoes the white rings in the squares.
Change the yarn weight. In DK yarn with a 4.0 mm hook, each square comes out about 9 to 10 inches, so you will need more squares for the same bed. In bulky yarn with a 6.5 mm hook, squares grow to about 15 inches, and you can finish a whole bed cover with only about 30 squares. Always make one test square in your yarn, measure it, and plan your grid from that real size.
Use up your stash. The granny square loves leftovers. Keep the black center, the red frame and the red border the same in every square, and use any leftover shades for the cluster rings in between. The strong red grid holds everything together, so a scrappy version still looks planned. It is the perfect way to turn a basket of half balls into something your family will use every day.
Materials Needed
— Main Fabric
— Tools Required
The Free Pattern
0% complete
— Granny Square (Make 42, black A, white B, gray C, red D, burgundy E) :
— Layout :
— Joining (red D) :
— Border (red D) :
Assembly Instructions
- Make 42 Granny Squares, weaving in all ends as you go.
- Lightly block each square to 12 x 12 inches and let them dry.
- Lay out the squares in 7 rows of 6 following the Layout section.
- Join the horizontal seams with D, sc on the RS, 51 sc per square edge.
- Join the vertical seams the same way, working 1 sc over each crossing seam.
- Work the three Border rounds in D, finishing with crab stitch.
- Weave in the last ends and give the finished cover a light steam or mist to relax the seams and border.
Common Mistakes & How to Fix Them
Losing a ch-1 space or a cluster along a side. This is the most common granny square slip, and it usually happens near the corners, where it is easy to skip the ch-1 between the corner cluster and the first side cluster. One missing cluster makes that side shorter, and the square slowly turns into a lopsided shape. After every round, count the clusters on each side: Rnd 5 should have 5 per side, Rnd 8 should have 8 per side, and so on. Counting takes seconds and saves you from ripping back several rounds later.
Joining every new color in the same corner. If you always start in the same corner, the slip stitch joins and the color change bumps stack up in one spot, and that corner looks thick and messy. It can even make the square pull slightly out of shape. Join each new color in a different corner, moving one corner to the right every round. The joins then spread out evenly around the square and disappear into the stripes. Your squares will look tidier and lie flatter, and the bed cover will look more professional.
Leaving all the ends for the very end. Each square has about 24 ends, so a finished cover has around a thousand. If you save them all, weaving them in becomes a long, discouraging job, and some ends may never get woven in well. Weave in ends after every square or two, or crochet over them as you work the next round by laying the tails along the top of the previous round. Weave each end through at least 2 inches of the same color, then back the other way, so nothing pokes out after washing.
Squares that end up different sizes. Over forty two squares, tension changes. You may crochet tighter when you are tired, or looser when you relax with a show. Red and burgundy rounds also tend to tighten when you concentrate on the color changes. Measure every square before joining and set aside any that are more than half an inch off. Block them all to 12 inches on the same mat. If a square is far off, remake it, because one odd square will make the red seams wavy and pull the grid out of line.

You Might Also Like






Important Notes
Gauge matters on a bed cover. Make one full square first and measure it. It should be about 12 x 12 inches. If it is smaller, go up half a hook size, and if it is larger, go down half a size. Write your hook size on a tag in your project bag so you always use the same one. Measure every tenth square to catch any drift early.
Blocking gives granny squares sharp corners and straight sides. Pin each square to 12 x 12 inches on a blocking mat, then mist it with water or hover a steam iron above it without touching the yarn. Acrylic responds well to gentle steam, but too much heat can flatten it, so keep the iron moving. Let the squares dry fully before joining.
Buy all your yarn at once and check that every ball of each color has the same dye lot number. Reds and burgundies especially can shift from one lot to the next, and a slightly different red will stand out in the frames and border. The amounts in the materials list are generous estimates for the 6 x 7 size, but buy one extra ball of each color as insurance.
Machine wash the cover on a gentle cool cycle with a mild detergent. Because bright red and burgundy sit right next to white, always add a color catcher sheet to the wash, especially the first few times, so any loose dye is caught before it tints the white rings pink. Dry flat or tumble dry on low if your yarn label allows it, and take it out while still slightly damp.
Thank you for spending this time with me and my red granny squares. This bed cover is proof that the simplest stitches can make something truly striking. Every square is a little ring of color you can finish in one evening, and every square brings you closer to a cozy, bold bed cover your family will love for years. You do not need to think about the whole bed today.
Start with one black center this week. Add the white, the gray, the red and the burgundy, and watch the rings grow. I think you will want to make another square right away, and then another. Before long you will have a stack of red frames waiting to be joined, and a bedroom full of warmth. Happy crocheting, my friends.
Crochet Abbreviations
You Ask, We Answer
How big is the finished bed cover?
The finished bed cover measures about 75 by 87 inches including the border. Each square is about 12 inches, laid 6 across and 7 down, which gives 72 by 84 inches before the edge, and the three border rounds add about 1.5 inches on every side. On a full bed this covers the top and drapes generously down both sides with a nice drop at the foot. On a queen it covers the top with a shorter side drop. If you want the cover to reach the floor on both sides, measure the mattress width plus twice the height from the mattress top to the floor, then divide by 12 to find how many squares you need across. Do the same for the length, adding one drop for the foot. The border has no stitch repeat to match, so you can add or remove rows and columns of squares without recounting anything in the edge rounds.
Can I use a different yarn weight or fiber?
Yes. Granny squares work in almost any yarn. In DK yarn with a 4.0 mm hook, each square comes out about 9 to 10 inches, so you will need more squares for the same bed. In bulky yarn with a 6.5 mm hook, squares grow to about 15 inches, and you can finish a bed cover with far fewer squares. Acrylic is soft, easy to wash and budget friendly, which makes it a great choice for a large bed cover. Cotton gives crisp stitches and stays cool in summer, but it is heavier and can stretch over time. Wool blends are the warmest and block beautifully, but check that they are machine washable. Whatever you choose, make one full test square, measure it, and plan your grid and buy your yarn from that real size.
How do I wash and care for the bed cover?
An acrylic granny square cover is very easy to care for. Machine wash it on a gentle, cool cycle with a mild detergent, and always add a color catcher sheet, because the bright red and deep burgundy can release a little dye into the white rings, especially in the first few washes. Use a large machine so the cover can move freely. Tumble dry on low if your yarn label allows it, and take it out while still slightly damp, then lay it flat to finish drying so it keeps its shape. Avoid high heat, which can flatten acrylic and make it lose its softness. If you used cotton or wool, dry it flat instead. Between washes, shake it out and air it near a window. Store it folded in a breathable cotton bag, away from direct sun, so the reds stay bright for many years.
Success!
Thanks for subscribing — check your inbox for a welcome note.
Abbreviations
- A — color A, black
- B — color B, white
- C — color C, gray
- D — color D, bright red
- E — color E, deep burgundy
- MR — magic ring
- ch — chain
- sl st — slip stitch
- sc — single crochet
- hdc — half double crochet
- dc — double crochet
- rev sc — reverse single crochet (crab stitch)
- st(s) — stitch(es)
- sp(s) — space(s)
- RS — right side
- WS — wrong side
- rep — repeat
- Rnd — round