
Amanda's Creative Corner Crochet · Kitchen
Free Crochet Patterns Handmade with Love

White Floral Medallion Bed Cover Crochet Pattern
Jump to Pattern
White Floral Medallion Bed Cover Crochet Pattern
180-220 Hours 0 made this
Intermediate Skill

You should be comfortable working in the round, making square corners and counting stitches.

180 to 220 Hours

Each block takes about an hour, so this is a long and cozy project.

Portable Blocks

Every square is small, so you can crochet it anywhere and join it later.

About This White Floral Medallion Bed Cover Crochet Pattern Pattern

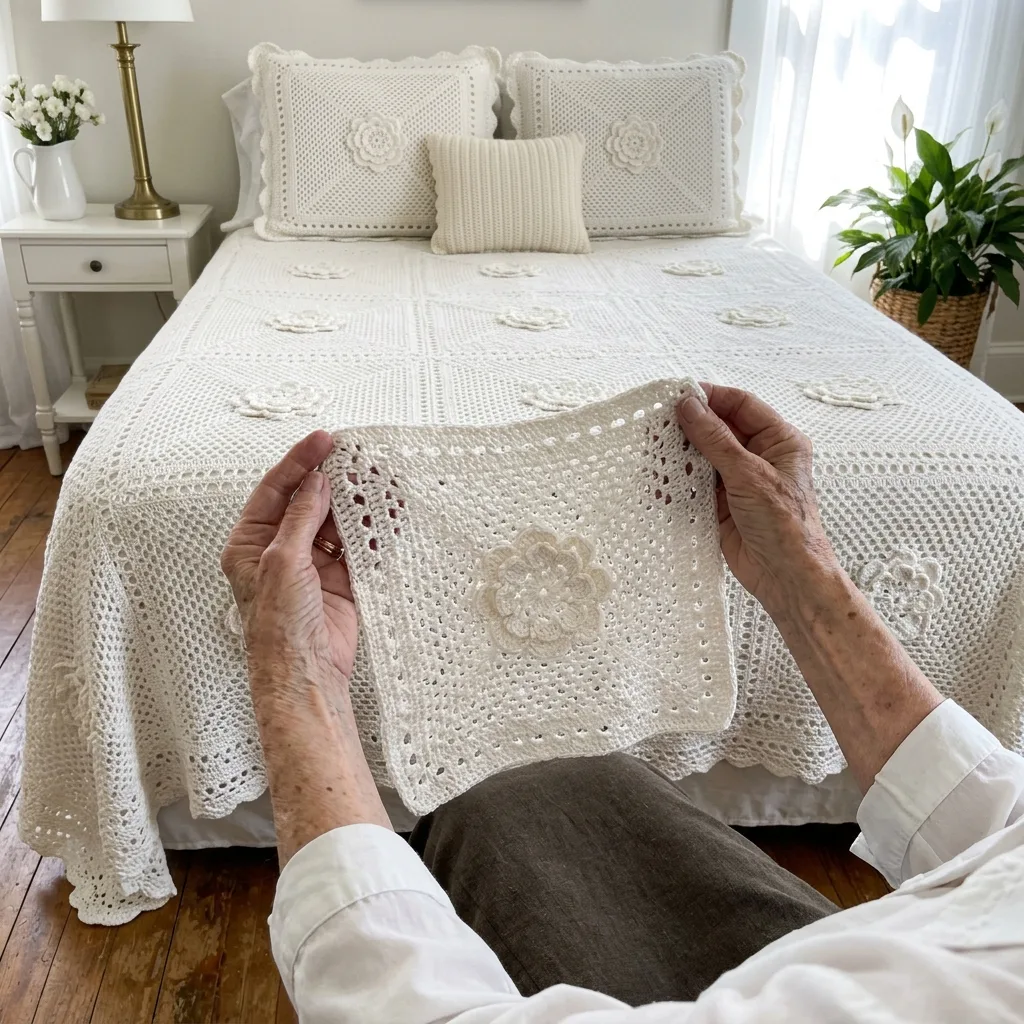
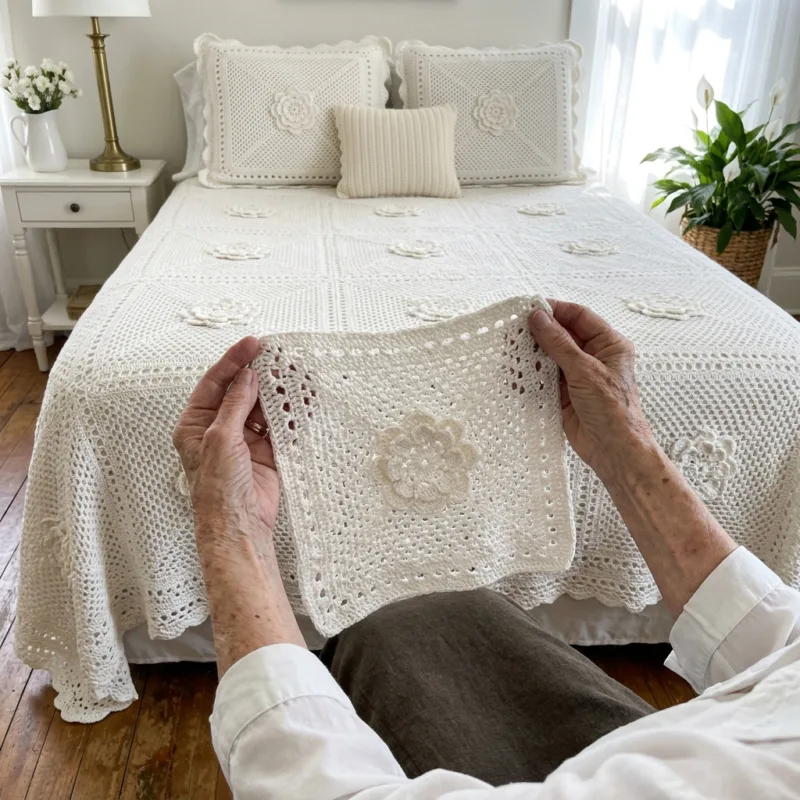
This white floral bed cover is made from 120 lacy square blocks. Each block has a layered flower in the center, soft filet mesh around it and a frame of solid double crochet with one round of small eyelet holes. The blocks are joined with slip stitches and finished with a scalloped shell edge.

The finished size is about 83 by 99 inches, a generous queen size with a drop on both sides. It suits crocheters who like a long, calm project they can pick up a few rounds at a time.
White Floral Medallion Bed Cover Crochet Pattern step 1 - construction progress

Why You'll Love This White Floral Medallion Bed Cover Crochet Pattern Pattern

I love projects made from small pieces. A block fits in a bag, so I can crochet one at the doctor's office, in the garden or by the window. When one block is done, I get to start the next flower.

White cotton makes a bedroom feel bright and calm. This bed cover also makes a lovely gift for a wedding or an anniversary, because every block carries a little bit of you.

Switch Things Up

Make 5 by 6 blocks for a 40 by 48 inch throw, or 3 by 4 blocks for a baby blanket. Try soft grey, sage green or dusty rose cotton for a colored version. Stop after Round 7 and you have a flower motif that works as a coaster or a pillow center. For a simpler finish, swap the shell edge for two rounds of single crochet.


Materials Needed

— Main Fabric

01 DK / light worsted (size 3) mercerized cotton yarn in white, about 5,600 yards (5,120 m) in total, roughly 26 balls of 100 g (220 yards each)
02 About 40 yards per block for 120 blocks (4,800 yards), about 500 yards for joining and about 300 yards for the edge

— Tools Required

03 3.5 mm (size E-4) crochet hook, or the size that gives you an 8 inch block
04 Yarn needle
05 At least 4 stitch markers
06 Scissors
07 Blocking mats and rustproof pins
08 Measuring tape

The Free Pattern

Intermediate 180-220 Hours

0% complete

— Medallion Block (Make 120, white) :

Work every round with the right side facing you. Do not turn at the end of a round. Each block is worked from the center out.
Rnd 1: Make a magic ring. Ch 3 (counts as dc), work 15 dc in the ring, pull the ring tight, sl st to top of beginning ch-3. (16 dc)
Rnd 2: Ch 1, sc in same st, *ch 3, skip 1 dc, sc in next dc; repeat from * 6 more times, ch 3, skip last dc, sl st to first sc. (8 sc, 8 ch-3 sps)
Rnd 3: Sl st into first ch-3 sp. In each ch-3 sp work (sc, hdc, 3 dc, hdc, sc) to make a petal. Sl st to first sc. (8 petals, 56 sts)
Rnd 4: Ch 1. Working behind the petals, sc around the post of the first Rnd 2 sc, *ch 5, sc around the post of the next Rnd 2 sc; repeat from * 6 more times, ch 5, sl st to first sc. (8 sc, 8 ch-5 sps)
Rnd 5: Sl st into first ch-5 sp. In each ch-5 sp work (sc, hdc, 5 dc, hdc, sc) to make a large petal. Sl st to first sc. (8 large petals, 72 sts)
The large petals sit behind the small ones, which gives the flower its layered look. Gently push the small petals forward as you work.
Rnd 6: Sl st across to the center dc (3rd dc) of any large petal. Ch 1, sc in the same dc, *ch 6, sc in the center dc of the next large petal; repeat from * 6 more times, ch 6, sl st to first sc. (8 sc, 8 ch-6 sps)
Place a marker in ch-6 sps 1, 3, 5 and 7. These four spaces are the corners of your square.
Rnd 7: Sl st into the first marked ch-6 sp. Ch 3 (counts as dc), 2 dc, ch 2, 3 dc in the same sp (corner made). *6 dc in next ch-6 sp, (3 dc, ch 2, 3 dc) in next marked ch-6 sp; repeat from * 2 more times, 6 dc in the last ch-6 sp, sl st to top of beginning ch-3. Skip all the sc of Rnd 6. (48 dc, 4 ch-2 corner sps, 12 dc on each side between corners)
Rnd 8: Sl st across the next 2 dc and into the corner ch-2 sp. Ch 3 (counts as dc), ch 3, dc in the same sp (corner made). *[Ch 1, skip 1 dc, dc in next dc] 6 times, (dc, ch 3, dc) in next corner ch-2 sp; repeat from * 2 more times, [ch 1, skip 1 dc, dc in next dc] 6 times, sl st to top of beginning ch-3. (32 dc, 24 ch-1 sps, 4 ch-3 corner sps)
Rnd 9: Sl st into the next ch-3 corner sp. Ch 3 (counts as dc), dc, ch 2, 2 dc in the same sp. *Dc in each dc and in each ch-1 sp across the side (14 dc), (2 dc, ch 2, 2 dc) in next corner ch-3 sp; repeat from * 2 more times, dc in each dc and ch-1 sp across the last side (14 dc), sl st to top of beginning ch-3. (72 dc, 4 ch-2 corner sps, 18 dc on each side between corners)
Rnd 10: Sl st in the next dc and into the corner ch-2 sp. Ch 3 (counts as dc), ch 3, dc in the same sp. *[Ch 1, skip 1 dc, dc in next dc] 9 times, (dc, ch 3, dc) in next corner ch-2 sp; repeat from * 2 more times, [ch 1, skip 1 dc, dc in next dc] 9 times, sl st to top of beginning ch-3. (44 dc, 36 ch-1 sps, 4 ch-3 corner sps)
Rnd 11: Sl st into the next ch-3 corner sp. Ch 3 (counts as dc), dc, ch 2, 2 dc in the same sp. *Dc in each dc and in each ch-1 sp across the side (20 dc), (2 dc, ch 2, 2 dc) in next corner ch-3 sp; repeat from * 2 more times, dc in each dc and ch-1 sp across the last side (20 dc), sl st to top of beginning ch-3. (96 dc, 4 ch-2 corner sps, 24 dc on each side between corners)
Rnd 12: Sl st in the next dc and into the corner ch-2 sp. Ch 3 (counts as dc), ch 3, dc in the same sp. *[Ch 1, skip 1 dc, dc in next dc] 12 times, (dc, ch 3, dc) in next corner ch-2 sp; repeat from * 2 more times, [ch 1, skip 1 dc, dc in next dc] 12 times, sl st to top of beginning ch-3. (56 dc, 48 ch-1 sps, 4 ch-3 corner sps)
Rnd 13: Sl st into the next ch-3 corner sp. Ch 3 (counts as dc), dc, ch 2, 2 dc in the same sp. *Dc in each dc and in each ch-1 sp across the side (26 dc), (2 dc, ch 2, 2 dc) in next corner ch-3 sp; repeat from * 2 more times, dc in each dc and ch-1 sp across the last side (26 dc), sl st to top of beginning ch-3. (120 dc, 4 ch-2 corner sps, 30 dc on each side between corners)
Rnd 14: Sl st in the next dc and into the corner ch-2 sp. Ch 3 (counts as dc), ch 3, dc in the same sp. *[Ch 1, skip 1 dc, dc in next dc] 15 times, (dc, ch 3, dc) in next corner ch-2 sp; repeat from * 2 more times, [ch 1, skip 1 dc, dc in next dc] 15 times, sl st to top of beginning ch-3. (68 dc, 60 ch-1 sps, 4 ch-3 corner sps)
Rnd 15: Sl st into the next ch-3 corner sp. Ch 3 (counts as dc), dc, ch 2, 2 dc in the same sp. *Dc in each dc and in each ch-1 sp across the side (32 dc), (2 dc, ch 2, 2 dc) in next corner ch-3 sp; repeat from * 2 more times, dc in each dc and ch-1 sp across the last side (32 dc), sl st to top of beginning ch-3. (144 dc, 4 ch-2 corner sps, 36 dc on each side between corners)
Rnd 16 (eyelet round): Sl st in the next dc and into the corner ch-2 sp. Ch 3 (counts as dc), ch 3, dc in the same sp. *[Ch 1, skip 1 dc, dc in next dc] 18 times, (dc, ch 3, dc) in next corner ch-2 sp; repeat from * 2 more times, [ch 1, skip 1 dc, dc in next dc] 18 times, sl st to top of beginning ch-3. (80 dc, 72 ch-1 sps, 4 ch-3 corner sps)
Rnd 17: Sl st into the next ch-3 corner sp. Ch 3 (counts as dc), dc, ch 2, 2 dc in the same sp. *Dc in each dc and in each ch-1 sp across the side (38 dc), (2 dc, ch 2, 2 dc) in next corner ch-3 sp; repeat from * 2 more times, dc in each dc and ch-1 sp across the last side (38 dc), sl st to top of beginning ch-3. Fasten off. (168 dc, 4 ch-2 corner sps, 42 dc on each side between corners)
Weave in the ends and block each block to 8 inches (20 cm) square, pinning the corners square and the eyelet round open.

— Layout and Joining :

Lay out 12 rows of 10 white blocks, all facing the same direction. This gives about 80 by 96 inches before the edge.
To join two blocks, hold them wrong sides together. Working through the back loops only of both blocks, sl st in the corner ch-2 sp, in each of the 42 dc, and in the corner ch-2 sp at the other end (44 sl sts per seam).
Join the blocks of each row into a strip of 10. Then join the 12 strips together the same way. Where four blocks meet, sl st once through all four corner ch-2 sps.

— Scalloped Edge :

Rnd 1: Join yarn with a sl st in any outer corner ch-2 sp. Ch 1, 3 sc in the same sp. Sc in each of the 42 dc of every block along the side, and at each seam sc once through both ch-2 sps. Work 3 sc in each outer corner ch-2 sp. Continue around, sl st to first sc. (1900 sc: 429 on each short side, 515 on each long side, plus 3 sc in each of the 4 corners)
Rnd 2: Join yarn in any sc. Ch 3 (counts as dc), 4 dc in the same sc. *Skip 4 sc, 5 dc in next sc; repeat from * around until 4 sc remain. Skip the last 4 sc, sl st to top of beginning ch-3. Fasten off. (380 shells of 5 dc, 1900 dc)
Both rounds go around the whole cover, including the headboard end. 1900 divides evenly by 5, so the shells fall into place without any adjusting.

Assembly Instructions

  1. Make 120 white medallion blocks and block each one to 8 inches square. Let them dry completely.
  2. Lay out the blocks in 12 rows of 10, all facing the same direction.
  3. Join the blocks of each row into 12 strips of 10, using sl sts through the back loops only (44 sl sts per seam).
  4. Join the 12 strips to each other the same way, working one sl st through all four corner ch-2 sps where four blocks meet.
  5. Work Edge Rnd 1 (1900 sc) around the whole cover, with 3 sc in each outer corner.
  6. Work Edge Rnd 2 to make the 380 scalloped shells, then weave in all ends.
  7. Wash gently and block the finished cover flat so the lace opens and the scallops lie smooth.

Common Mistakes & How to Fix Them

Placing the corners on the wrong spaces in Rnd 7. Mark the four corner ch-6 sps before you start, or the block will turn out lopsided.

Forgetting to skip the Rnd 6 sc stitches in Rnd 7. Work the dc into the ch-6 sps only, or the side counts will be off.

Pulling the ch-1 mesh rounds too tight. Keep the chains loose so the block stays flat and reaches 8 inches.

Joining blocks through the front loops. Use the back loops only so the seam makes a neat ridge and does not show on the lace.


Denise

Denise designs cozy lace and home decor crochet patterns with clear stitch counts and friendly instructions.


Important Notes

Gauge: Rnds 1 to 9 should measure about 5 inches across, and the finished block about 8 inches square after blocking. Make one test block first, and go up or down a hook size if needed.

Yarn amounts, finished size and stitch counts are estimated, so check your first block and keep a few extra balls from the same dye lot.

Blocking is important for lace. Pin each block square, spray it with water and let it dry completely before joining.

Wash on a gentle cycle or by hand in cold water and dry flat. A cover this size is heavy when wet, so support it when you lift it.


Thank you for crocheting along with me. I hope this white bed cover makes your bedroom feel soft and bright. Happy crocheting, Denise.

Crochet Abbreviations

01 ch — chain
02 sl st — slip stitch
03 sc — single crochet
04 hdc — half double crochet
05 dc — double crochet
06 sp — space (sps means spaces)
07 st — stitch (sts means stitches)
08 Rnd — round

You Ask, We Answer

What is the finished size of this bed cover?

It is about 83 by 99 inches including the edge, made from 120 blocks in 12 rows of 10. That fits a queen bed with a drop on both sides.

Can I use a different yarn weight or make a smaller size?

Yes. Thicker yarn with a larger hook makes bigger blocks, so you need fewer of them. For a throw, make 5 by 6 blocks. The edge counts then change, so recalculate: 42 sc per block edge plus 1 sc per seam plus 3 sc per corner, and the total must divide by 5.

How do I wash and care for it?

Wash it gently by hand or on a delicate cycle in cold water and dry it flat. Because the cover is all white cotton, you do not need a color catcher.





