Amanda's Creative Corner Crochet · Kitchen
Free Crochet Patterns Handmade with Love

Red Flower Puff Square Bedspread Crochet Pattern
Jump to Pattern
Red Flower Puff Square Bedspread Crochet Pattern
180-220 Hours 2 made this
Intermediate Level

You need to be comfortable with puff stitches, color changes and sewing squares together.

180 to 220 Hours

Each square takes about two hours, so this is a long and cozy project for the colder months.

Red Puff Flowers

Plump red petals, cream puffs and olive leaves make every square look like a little garden.

About This Red Flower Puff Square Bedspread Crochet Pattern Pattern

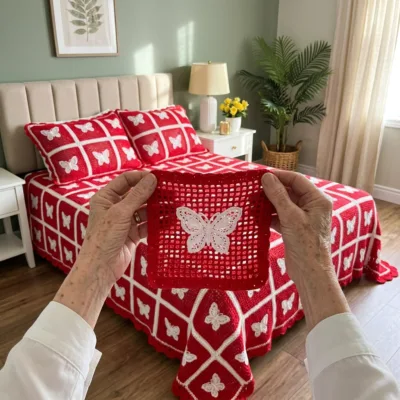
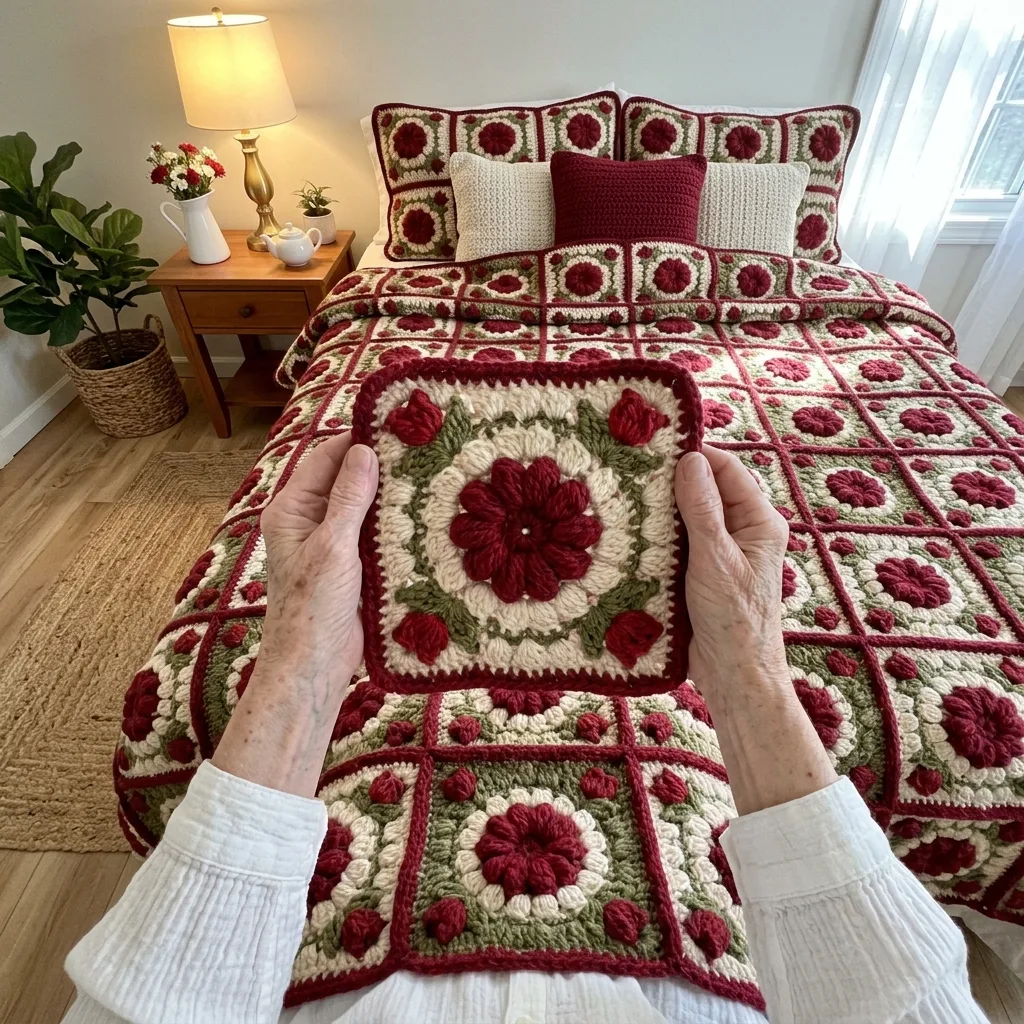
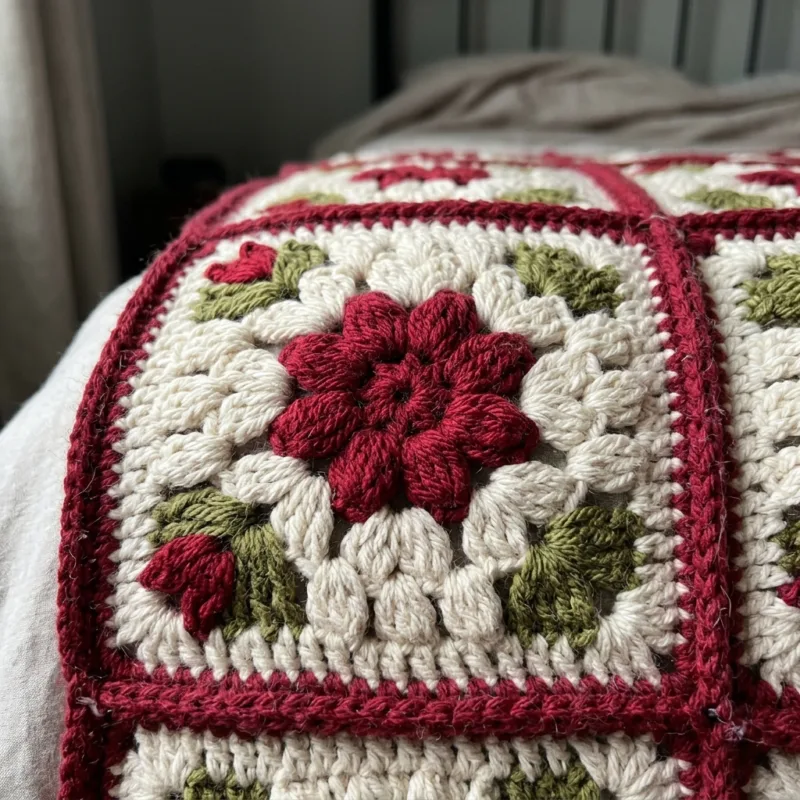
This bedspread is made from 72 puff stitch flower squares. Each one has a deep red eight petal flower in the middle, a ring of cream puffs, olive green leaves with red tulip buds in the corners, and a deep red border.

The squares are joined with red seams in a grid of 8 across and 9 down, and a plain red border goes around the whole cover. The finished size is about 73 by 82 inches. You need ch, sl st, sc, hdc and a puff stitch, plus a little sewing to join the squares.
Red Flower Puff Square Bedspread Crochet Pattern step detail

Why You'll Love This Red Flower Puff Square Bedspread Crochet Pattern Pattern

I love how a flower grows from a magic ring. The red petals puff up, the cream puffs frame them, and the little leaves and buds in the corners make the square feel finished. One square fits in a small bag, so I made mine on the sofa and in the car.

Red, cream and green are cozy colors for any season, and this bedspread makes a gift that someone will keep for many years.

Switch Things Up

Try dusty pink petals with sage leaves and a gray border, or navy petals with cream and soft yellow. Make 4 by 5 squares for a sofa throw, or 3 by 4 squares for a baby blanket. A single square also makes a pretty cushion front.


Materials Needed

— Main Fabric

01 Bulky weight (5) 100% cotton yarn in deep red (A), about 3,350 yards (3,060 m) in total, roughly 3,700 g, including the joining and the border
02 Bulky weight (5) 100% cotton yarn in cream (B), about 1,225 yards (1,120 m), roughly 1,350 g
03 Bulky weight (5) 100% cotton yarn in olive green (C), about 800 yards (730 m), roughly 900 g
04 Each square uses about 42 yards (38 m) of A, 17 yards (16 m) of B and 11 yards (10 m) of C

— Tools Required

05 6 mm (US J-10) crochet hook, or the size that gives you the gauge
06 Yarn needle for weaving in ends and seaming
07 Stitch markers
08 Scissors
09 Blocking mats and rustproof pins
10 Measuring tape

The Free Pattern

Intermediate 180-220 Hours

0% complete

— Flower Puff Square (Make 72, red A, cream B and olive C) :

Puff st = (yo, insert hook in the st, yo, pull up a long loop) 4 times in the same st, yo and pull through all 9 loops on the hook, ch 1 to close. The closing ch 1 does not count as a stitch.
Every round is joined with a sl st to the first st of the round. At the start of a round, ch 1 or ch 2 does not count as a stitch. Corners are worked in the ch sp. Count every round, because the corners and the side counts depend on them.
Round 1: With B, make a magic ring. Ch 1, work 8 sc in the ring. Join. Fasten off B (8 sc).
Round 2: Join A in any sc. Ch 1, 2 sc in each st around. Join (16 sc).
Round 3 (flower): Ch 1, *puff st in next st, sc in next st; rep from * 7 more times. Join. Fasten off A (16 sts: 8 puffs and 8 sc).
Round 4 (cream puffs): Join B in any sc of Round 3. Ch 1, (puff st, ch 2, puff st) in the same st (first corner). *Puff st in each of next 3 sts, (puff st, ch 2, puff st) in next st; rep from * 2 more times. Puff st in each of the last 3 sts. Join with a sl st to the first puff (20 puffs and 4 ch-2 corner sps; 3 puffs between corner pairs).
Round 5: Sl st in the next ch-2 sp. Ch 2, (hdc, ch 2, hdc) in the same sp. *Hdc in each of next 5 puffs, (hdc, ch 2, hdc) in next corner sp; rep from * 2 more times. Hdc in each of the last 5 puffs. Join with a sl st to the first hdc (28 hdc and 4 ch-2 sps; 5 hdc on each side between the corners).
Round 6: Sl st in the next ch-2 sp. Ch 2, (hdc, ch 2, hdc) in the same sp. *Hdc in each of next 7 hdc, (hdc, ch 2, hdc) in next corner sp; rep from * 2 more times. Hdc in each of the last 7 hdc. Join. Fasten off B (36 hdc and 4 ch-2 sps; 7 hdc on each side between the corners).
Round 7 (leaves): Join C in any corner ch-2 sp. Ch 1, (puff st, ch 3, puff st) in the same sp (leaves made). *Sc in each of next 9 hdc, (puff st, ch 3, puff st) in next corner sp; rep from * 2 more times. Sc in each of the last 9 hdc. Join with a sl st to the first puff (36 sc, 8 puffs and 4 ch-3 sps; 9 sc on each side between the leaf pairs).
Round 8: Sl st in the next ch-3 sp. Ch 1, (sc, ch 2, sc) in the same sp. *Sc in each of next 11 sts (the second leaf, 9 sc and the first leaf of the next pair), (sc, ch 2, sc) in next corner sp; rep from * 2 more times. Sc in each of the last 11 sts. Join. Fasten off C (52 sc and 4 ch-2 sps; 11 sc on each side between the corners).
Round 9 (tulip buds): Join A in any corner ch-2 sp. Ch 1, (puff st, ch 3, puff st) in the same sp (bud made). *Sc in each of next 13 sc, (puff st, ch 3, puff st) in next corner sp; rep from * 2 more times. Sc in each of the last 13 sc. Join with a sl st to the first puff (52 sc, 8 puffs and 4 ch-3 sps; 13 sc on each side between the buds).
Round 10: Sl st in the next ch-3 sp. Ch 2, (hdc, ch 2, hdc) in the same sp. *Hdc in each of next 15 sts (the second bud puff, 13 sc and the first bud puff of the next pair), (hdc, ch 2, hdc) in next corner sp; rep from * 2 more times. Hdc in each of the last 15 sts. Join (68 hdc and 4 ch-2 sps; 15 hdc on each side between the corners).
Round 11: Sl st in the next ch-2 sp. Ch 2, (hdc, ch 2, hdc) in the same sp. *Hdc in each of next 17 hdc, (hdc, ch 2, hdc) in next corner sp; rep from * 2 more times. Hdc in each of the last 17 hdc. Join (76 hdc and 4 ch-2 sps; 17 hdc on each side between the corners).
Round 12: Sl st in the next ch-2 sp. Ch 2, (hdc, ch 2, hdc) in the same sp. *Hdc in each of next 19 hdc, (hdc, ch 2, hdc) in next corner sp; rep from * 2 more times. Hdc in each of the last 19 hdc. Join. Fasten off and weave in the ends (84 hdc and 4 ch-2 sps; 19 hdc between the corners, 21 hdc on each side counting the corner hdc).
Block each square to about 9 by 9 inches. Each side has 21 hdc and a ch-2 corner sp at each end, and these counts are used for the joining and the border.

— Layout and Joining :

Lay out 8 squares across and 9 squares down, 72 squares in total. All squares face the same way, with the same corner at the top.
Seams: 9 rows x 7 seams inside the rows = 63 seams. Between the rows there are 8 columns x 8 seams = 64 seams. Total: 127 seams.
Join with A and a whip stitch through the back loops of both squares: 21 hdc pairs plus 1 stitch through the corner sps at each end, 23 stitches per seam. The joined grid measures about 72 by 81 inches before the border.

— Red Border :

Counts: each top and bottom edge has 8 squares x 21 hdc = 168 hdc and 7 x 2 = 14 corner sps at the joins, so 182 sc. Each side edge has 9 squares x 21 hdc = 189 hdc and 8 x 2 = 16 corner sps, so 205 sc.
Round 1 (RS): Join A in any outer corner sp. Ch 1, 3 sc in the same sp. Along each edge, work 1 sc in each hdc and 1 sc in each ch-2 corner sp at the joins. Work 3 sc in each of the other outer corner sps. Join with a sl st to the first sc (786 sc: 182 on the top, 205 on the right side, 182 on the bottom, 205 on the left side and 12 sc at the 4 outer corners).
Round 2 (RS): Ch 1, sc in each sc around, working 3 sc in the middle sc of each corner. Join with a sl st to the first sc. Fasten off and weave in the ends (794 sc).

Assembly Instructions

  1. Weave in all ends on the 72 squares, then wet block each one to about 9 by 9 inches and let it dry flat.
  2. Lay the squares out in 9 rows of 8, with every square facing the same way.
  3. Join the squares into 9 strips of 8 squares each, using red yarn and a whip stitch through the back loops only.
  4. Join the 9 strips together with the same whip stitch, matching the corner sps at every crossing.
  5. Block the whole cover flat with pins so that the seams lie evenly.
  6. Work Round 1 of the red border around the whole cover, following the stitch counts for each edge.
  7. Work Round 2 of the border, then fasten off and weave in the last ends.

Common Mistakes & How to Fix Them

Making puffs that are too loose or too tight. Pull each loop up to the same height so the petals are plump and even, and close each puff with a firm ch 1.

Missing the corner counts. Every round from Round 4 on has 4 corners, so mark the first corner with a stitch marker and check the side counts at the end of each round.

Seaming too tightly. Sew loosely so the cover keeps its drape, and block the whole cover after joining.

Mixing up the red and cream yarns while seaming. Use red for every seam so the grid stays crisp.


Denise

Denise designs cozy home decor crochet patterns with clear written rounds and easy to follow stitch counts.


Important Notes

Gauge: the flower after Round 3 should measure about 2.5 inches across, and a finished square about 9 inches. Make one square first and change the hook size if needed. The sizes and yarn amounts in this pattern are estimated, so check them with your swatch.

Yarn amounts depend on how tightly you crochet and on how big your puffs are. Buy a little extra of the same dye lot of each color.

Cotton stretches when wet, so block the squares gently and let them dry flat.

Wash on a gentle cycle in cold water with a color catcher, because the deep red yarn can bleed onto the cream. Dry flat.


I hope this cozy bedspread brings warmth to your home. Take your time, one square at a time, and send me a photo when yours is on the bed.

Crochet Abbreviations

01 ch — chain
02 sl st — slip stitch
03 sc — single crochet
04 hdc — half double crochet
05 yo — yarn over
06 puff st — puff stitch, worked as described at the start of the pattern
07 st(s) — stitch(es)
08 sp — space
09 rep — repeat
10 RS — right side
11 A — deep red yarn
12 B — cream yarn
13 C — olive green yarn

You Ask, We Answer

What size is the finished bedspread?

It measures about 73 by 82 inches with the red border, which covers the top of a full bed. Add more squares for a bigger bed and count the border again.

Can I use a different yarn weight or make a different size?

Yes. A lighter yarn makes smaller squares, so make more of them. For a throw, crochet fewer squares, for example 4 across and 5 down, and keep the same joining method. Work out the border counts again for your new layout.

How do I wash and care for it?

Machine wash on a gentle cycle in cold water with a color catcher, reshape while damp and dry flat. Avoid hanging it wet, because cotton is heavy and can stretch.